索引扫描路径之1:Index Unique Scan

index_unique_scan

近期在读一本名为《Expert Indexing in Oracle Database 11g》的书,个人觉得写的很不错,收获颇多。在这里就把一些关于CBO 通过INDEX 扫描数据的相关知识稍作整理,算是读书笔记。

其中,在读到第7章,Tuning Index Usage时,提到常见的通过索引访问数据的方式有下述几种:

Index Unique Scan;

Index Range Scan;

Index Skip Scan;

Index Full Scan;

Index Fast Full Scan;

        这里,首先说Index Unique Scan。

CBO【Cost Based Optimizer】通常在什么场景下会选择通过Index Unique Scan的方式来访问数据呢?

1 必须是通过唯一索引【UNIQUE】来访问数据;

2 通过唯一索引来访问数据时,每次返回的记录数必须是1条;

3 WHERE从句中必须要用等值【=】条件来过滤数据;

        我个人目前的理解是,必须同时满足上述3个条件,CBO才会选择通过Index Unique Scan的路径来访问数据。

下面给出验证:

1 操作系统版本和数据库版本:
操作系统:

[oracle@oracle11g ~]$ uname -rm
2.6.18-194.el5 x86_64
[oracle@oracle11g ~]$

数据库:

SQL> select * from v$version;

BANNER
--------------------------------------------------------------------------------
Oracle Database 11g Enterprise Edition Release 11.2.0.1.0 - 64bit Production
PL/SQL Release 11.2.0.1.0 - Production
CORE    11.2.0.1.0      Production
TNS for Linux: Version 11.2.0.1.0 - Production
NLSRTL Version 11.2.0.1.0 - Production

SQL>

2 测试表、表结构、表数据如下:

SQL> conn hr/hr
Connected.
SQL> desc departments;
 Name                                      Null?    Type
 ----------------------------------------- -------- ----------------------------
 DEPARTMENT_ID                             NOT NULL NUMBER(4)
 DEPARTMENT_NAME                           NOT NULL VARCHAR2(30)
 MANAGER_ID                                         NUMBER(6)
 LOCATION_ID                                        NUMBER(4)

SQL> select * from departments;

DEPARTMENT_ID DEPARTMENT_NAME                MANAGER_ID LOCATION_ID
------------- ------------------------------ ---------- -----------
           10 Administration                        200        1700
           20 Marketing                             201        1800
           30 Purchasing                            114        1700
           40 Human Resources                       203        2400
           50 Shipping                              121        1500
           60 IT                                    103        1400
           70 Public Relations                      204        2700
           80 Sales                                 145        2500
           90 Executive                             100        1700
          100 Finance                               108        1700
          110 Accounting                            205        1700

DEPARTMENT_ID DEPARTMENT_NAME                MANAGER_ID LOCATION_ID
------------- ------------------------------ ---------- -----------
          120 Treasury                                         1700
          130 Corporate Tax                                    1700
          140 Control And Credit                               1700
          150 Shareholder Services                             1700
          160 Benefits                                         1700
          170 Manufacturing                                    1700
          180 Construction                                     1700
          190 Contracting                                      1700
          200 Operations                                       1700
          210 IT Support                                       1700
          220 NOC                                              1700

DEPARTMENT_ID DEPARTMENT_NAME                MANAGER_ID LOCATION_ID
------------- ------------------------------ ---------- -----------
          230 IT Helpdesk                                      1700
          240 Government Sales                                 1700
          250 Retail Sales                                     1700
          260 Recruiting                                       1700
          270 Payroll                                          1700

27 rows selected.

SQL>

3 该表上的索引信息如下:

SQL> select index_name,index_type,table_name,uniqueness from user_indexes where table_name='DEPARTMENTS';

INDEX_NAME                     INDEX_TYPE                  TABLE_NAME                     UNIQUENES
------------------------------ --------------------------- ------------------------------ ---------
DEPT_ID_PK                     NORMAL                      DEPARTMENTS                    UNIQUE
DEPT_LOCATION_IX               NORMAL                      DEPARTMENTS                    NONUNIQUE

SQL> select * from user_ind_columns where table_name='DEPARTMENTS';

INDEX_NAME                     TABLE_NAME                     COLUMN_NAME     COLUMN_POSITION COLUMN_LENGTH CHAR_LENGTH DESC
------------------------------ ------------------------------ --------------- --------------- ------------- ----------- ----
DEPT_ID_PK                     DEPARTMENTS                    DEPARTMENT_ID                 1            22           0 ASC
DEPT_LOCATION_IX               DEPARTMENTS                    LOCATION_ID                   1            22           0 ASC

SQL>

从上看到departments表有2个索引,其中在DEPARTMENT_ID字段上的索引DEPT_ID_PK 为主键索引,是个UNIQUE类型的索引。而LOCATION_ID 字段上的DEPT_LOCATION_IX则为非唯一【NONUNIQUE】索引。

4 通过该表上的主键字段department_id来定位数据:

SQL> set autotrace trace
SQL> select department_id from departments where department_id=270;

Execution Plan
----------------------------------------------------------
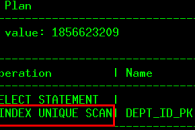
Plan hash value: 1856623209

--------------------------------------------------------------------------------
| Id  | Operation         | Name       | Rows  | Bytes | Cost (%CPU)| Time     |
--------------------------------------------------------------------------------
|   0 | SELECT STATEMENT  |            |     1 |     4 |     0   (0)| 00:00:01 |
|*  1 |  INDEX UNIQUE SCAN| DEPT_ID_PK |     1 |     4 |     0   (0)| 00:00:01 |
--------------------------------------------------------------------------------

Predicate Information (identified by operation id):
---------------------------------------------------

   1 - access("DEPARTMENT_ID"=270)

Statistics
----------------------------------------------------------
          1  recursive calls
          0  db block gets
          1  consistent gets
          0  physical reads
          0  redo size
        532  bytes sent via SQL*Net to client
        524  bytes received via SQL*Net from client
          2  SQL*Net roundtrips to/from client
          0  sorts (memory)
          0  sorts (disk)
          1  rows processed

SQL>

从上述执行计划里看到,CBO选择了Index Unique Scan,因为department_id字段上有一个DEPT_ID_PK 的UNIQUE类型的索引,且上述SQL满足Index Unique Scan的条件。

而如果WHERE条件换成department_id>=270时,则CBO选择了Index Range Scan的访问路径,因为该WHERE条件是>=而非等值匹配。CBO认为返回的记录数可能不止1条,即使实际情况下满足条件的记录数确实是1条,所以选择了Index Range Scan。

SQL> select department_id from departments where department_id>=270;

Execution Plan
----------------------------------------------------------
Plan hash value: 4271874676

-------------------------------------------------------------------------------
| Id  | Operation        | Name       | Rows  | Bytes | Cost (%CPU)| Time     |
-------------------------------------------------------------------------------
|   0 | SELECT STATEMENT |            |     1 |     4 |     1   (0)| 00:00:01 |
|*  1 |  INDEX RANGE SCAN| DEPT_ID_PK |     1 |     4 |     1   (0)| 00:00:01 |
-------------------------------------------------------------------------------

Predicate Information (identified by operation id):
---------------------------------------------------

   1 - access("DEPARTMENT_ID">=270)

Statistics
----------------------------------------------------------
          0  recursive calls
          0  db block gets
          1  consistent gets
          0  physical reads
          0  redo size
        532  bytes sent via SQL*Net to client
        524  bytes received via SQL*Net from client
          2  SQL*Net roundtrips to/from client
          0  sorts (memory)
          0  sorts (disk)
          1  rows processed

SQL>

5 通过该表上的location_id字段来定位数据的场景:

SQL> select location_id from departments where location_id=2700;

Execution Plan
----------------------------------------------------------
Plan hash value: 2790119751

-------------------------------------------------------------------------------------
| Id  | Operation        | Name             | Rows  | Bytes | Cost (%CPU)| Time     |
-------------------------------------------------------------------------------------
|   0 | SELECT STATEMENT |                  |     1 |     3 |     1   (0)| 00:00:01 |
|*  1 |  INDEX RANGE SCAN| DEPT_LOCATION_IX |     1 |     3 |     1   (0)| 00:00:01 |
-------------------------------------------------------------------------------------

Predicate Information (identified by operation id):
---------------------------------------------------

   1 - access("LOCATION_ID"=2700)

Statistics
----------------------------------------------------------
          0  recursive calls
          0  db block gets
          1  consistent gets
          0  physical reads
          0  redo size
        529  bytes sent via SQL*Net to client
        524  bytes received via SQL*Net from client
          2  SQL*Net roundtrips to/from client
          0  sorts (memory)
          0  sorts (disk)
          1  rows processed

SQL> select location_id from departments where location_id=1700;

21 rows selected.

Execution Plan
----------------------------------------------------------
Plan hash value: 2790119751

-------------------------------------------------------------------------------------
| Id  | Operation        | Name             | Rows  | Bytes | Cost (%CPU)| Time     |
-------------------------------------------------------------------------------------
|   0 | SELECT STATEMENT |                  |    21 |    63 |     1   (0)| 00:00:01 |
|*  1 |  INDEX RANGE SCAN| DEPT_LOCATION_IX |    21 |    63 |     1   (0)| 00:00:01 |
-------------------------------------------------------------------------------------

Predicate Information (identified by operation id):
---------------------------------------------------

   1 - access("LOCATION_ID"=1700)

Statistics
----------------------------------------------------------
          1  recursive calls
          0  db block gets
          3  consistent gets
          0  physical reads
          0  redo size
        901  bytes sent via SQL*Net to client
        535  bytes received via SQL*Net from client
          3  SQL*Net roundtrips to/from client
          0  sorts (memory)
          0  sorts (disk)
         21  rows processed

SQL>

从上述执行计划看到,通过LOCATION_ID 字段上的DEPT_LOCATION_IX来定位数据时,不管是通过location_id=2700还是location_id=1400或者location_id=1700,结果都是走INDEX RANGE SCAN。因为DEPT_LOCATION_IX不是唯一索引,即使location_id=2700或者location_id=1400条件能确保返回的记录数只有1条,CBO也不会选择Index Unique Scan。

6  通过唯一索引、非唯一索引来定位数据的场景:

非唯一索引的情况:

SQL> create table all_t as select object_id,object_name from all_objects;

Table created.

SQL> desc all_t;
 Name                                      Null?    Type
 ----------------------------------------- -------- ----------------------------
 OBJECT_ID                                 NOT NULL NUMBER
 OBJECT_NAME                               NOT NULL VARCHAR2(30)

SQL> select table_name,index_name,index_type,uniqueness from user_indexes where table_name='ALL_T';

no rows selected

SQL> create index idx_all_t on all_t(object_id);

Index created.

SQL> select table_name,index_name,index_type,uniqueness from user_indexes where table_name='ALL_T';

TABLE_NAME                     INDEX_NAME                     INDEX_TYPE                  UNIQUENES
------------------------------ ------------------------------ --------------------------- ---------
ALL_T                          IDX_ALL_T                      NORMAL                      NONUNIQUE

SQL> exec dbms_stats.gather_table_stats(user,'all_t',cascade=>true);

PL/SQL procedure successfully completed.

SQL> set autotrace trace
SQL> select * from all_t where object_id=30000;

Execution Plan
----------------------------------------------------------
Plan hash value: 2459308467

-----------------------------------------------------------------------------------------
| Id  | Operation                   | Name      | Rows  | Bytes | Cost (%CPU)| Time     |
-----------------------------------------------------------------------------------------
|   0 | SELECT STATEMENT            |           |     1 |    31 |     2   (0)| 00:00:01 |
|   1 |  TABLE ACCESS BY INDEX ROWID| ALL_T     |     1 |    31 |     2   (0)| 00:00:01 |
|*  2 |   INDEX RANGE SCAN          | IDX_ALL_T |     1 |       |     1   (0)| 00:00:01 |
-----------------------------------------------------------------------------------------

Predicate Information (identified by operation id):
---------------------------------------------------

   2 - access("OBJECT_ID"=30000)

Statistics
----------------------------------------------------------
          0  recursive calls
          0  db block gets
          4  consistent gets
          0  physical reads
          0  redo size
        627  bytes sent via SQL*Net to client
        523  bytes received via SQL*Net from client
          2  SQL*Net roundtrips to/from client
          0  sorts (memory)
          0  sorts (disk)
          1  rows processed

SQL>

唯一索引的情况:

SQL> drop index idx_all_t ;

Index dropped.

SQL> create unique index idx_all_t on all_t(object_id);

Index created.

SQL> select table_name,index_name,index_type,uniqueness from user_indexes where table_name='ALL_T';

TABLE_NAME                     INDEX_NAME                     INDEX_TYPE                  UNIQUENES
------------------------------ ------------------------------ --------------------------- ---------
ALL_T                          IDX_ALL_T                      NORMAL                      UNIQUE

SQL> set autotrace trace
SQL> exec dbms_stats.gather_table_stats(user,'all_t',cascade=>true);

PL/SQL procedure successfully completed.

SQL> select * from all_t where object_id=30000;

Execution Plan
----------------------------------------------------------
Plan hash value: 3932529197

-----------------------------------------------------------------------------------------
| Id  | Operation                   | Name      | Rows  | Bytes | Cost (%CPU)| Time     |
-----------------------------------------------------------------------------------------
|   0 | SELECT STATEMENT            |           |     1 |    31 |     2   (0)| 00:00:01 |
|   1 |  TABLE ACCESS BY INDEX ROWID| ALL_T     |     1 |    31 |     2   (0)| 00:00:01 |
|*  2 |   INDEX UNIQUE SCAN         | IDX_ALL_T |     1 |       |     1   (0)| 00:00:01 |
-----------------------------------------------------------------------------------------

Predicate Information (identified by operation id):
---------------------------------------------------

   2 - access("OBJECT_ID"=30000)

Statistics
----------------------------------------------------------
          0  recursive calls
          0  db block gets
          3  consistent gets
          0  physical reads
          0  redo size
        491  bytes sent via SQL*Net to client
        512  bytes received via SQL*Net from client
          1  SQL*Net roundtrips to/from client
          0  sorts (memory)
          0  sorts (disk)
          1  rows processed

SQL>

从上可以看到,虽然测试表all_t上的字段object_id字段虽然的确可以确保唯一,但是在第一种情况下,索引IDX_ALL_T为非唯一索引的时候,CBO毅然选择了INDEX RANGE SCAN,而第二种情况下,却是Index Unique Scan。

也就是说,即使可以确保表中某个字段是唯一的,如果该字段上的索引不是唯一的,那么CBO选择的将是通过INDEX RANGE SCAN的路径来访问数据。想要表达的是,真实场景下这种情况的确会存在,因为有些系统是通过应用程序来保证表中的字段唯一,而并没有在表上对应的字段上通过创建唯一约束或者是唯一索引来保证数据的唯一性。那么,这样的话,将会导致CBO在选择执行计划的情况下,有可能会出现偏差。所以,对于这种情况下,即使应用程序可以保证数据的唯一性,最好还是在表上创建一个唯一索引比较稳妥。

最后,留一个小疑问给所有的看到这篇文章的朋友,对于第6种情况,是不是第二种场景下的Index Unique Scan的效率要高于第一种场景下的INDEX RANGE SCAN?因为,从执行计划来看的话,一致性读的次数分别为3和4。

声讨淘宝上及其他各类非法销售本人Oracle视频作品的卖家和网站

被侵权了,被盗版了,虽然这已经不是一天两天的事儿了,并且还在继续…

同时,深知这是一个相当不重视知识产权,不够尊重个人劳动价值的国度,反正就是各种不靠谱,不多说。

并且,也明白,码出的这些文字几乎是瞬间就能被淹没在网络中,消失的无声无息。但,还是忍不住声讨那些在淘宝上在未经本人任何许可的情况下销售本人的Oracle数据库教学视频的卖家。在此,我很无奈的被问候你们家的某些人!

声明:

1 截止目前我所有的oracle视频均为原创,未经本人许可,不得以任何形式在互联网上兜售、获得商业利益的行为;

2 截止目前我所有的oracle视频唯一指定的销售平台只有播布客;

3 其他一切渠道,包括淘宝、美和在线等等等各类三教九流之辈均为盗版。是的,你们侵权了,侵了我的知识产权。

附:给出部分非法淘宝的黑心卖家列表及其他非法销售本人Oracle视频的卖家链接地址,这篇文章我会不定期的更新。你们这帮混蛋行为的链接地址在这里呢:

坏蛋 01:http://item.taobao.com/item.htm?spm=a230r.1.14.1.iaFvu9&id=19972027533&_u=v1fov9jd9105

坏蛋 02:http://item.taobao.com/item.htm?spm=a230r.1.14.10.iaFvu9&id=19225714645&_u=v1fov9jd3d58

坏蛋 03:http://item.taobao.com/item.htm?spm=a230r.1.14.18.iaFvu9&id=17768833172&_u=v1fov9jdb5fa

坏蛋 04:http://item.taobao.com/item.htm?spm=a230r.1.14.28.PQJZdM&id=25385320741&_u=11fov9jd0cf7

坏蛋 05:http://item.taobao.com/item.htm?spm=a230r.1.14.18.PQJZdM&id=17768833172&_u=11fov9jd2efd

坏蛋 太多了,点击这里可以戳出一坨一坨的坏蛋,这也有一坨坏蛋呢!

你们这帮混蛋,下面给出你们的不要脸的脸面贴图:

淘宝坏蛋1淘宝坏蛋2

这篇短文字写于2013年7月31日23点43分,于给上海一客户恢复数据的空当时间内。

最后,大家看到这篇文字的时候,如果有更好的办法可以制止这帮坏蛋的行为或者建议,请回复这篇文章,多谢!当然,如果你们当中有需要这些Oracle视频资料的话,更是可以直接联系我。你们的支持,是我前进的动力。

Oracle索引组织表学习系列三(完)

5 索引组织表(IOT Index-Organized Table)的键压缩

      在创建IOT表时,有一个存储选项NOCOMPRESS,这个选项的意思是不压缩,即对IOT表的索引条目不压缩。该选项不单对IOT表有效,同样对B-Tree索引也适用。

      与NOCOMPRESS选项对应的就是COMPRESS N,这个N只能取值整数,表示要压缩的列数,在数据块儿级别提取"公因子",用以避免存储重复值。如IOT表的主键是(col1,col2,col3)的联合主键的话,那么COMPRESS 2就可以表示,如果在表中重复出现多个col1,col2的重复值的话,那么Oracle就只存储col1,col2 1次,对于重复的记录不再存储。所以,达到压缩的目的。

      接下来,看一个示例:

      1 创建一个NOCOMPRESS的IOT表:

[oracle@oracle11g ~]$ sqlplus 

SQL*Plus: Release 11.2.0.1.0 Production on Fri Nov 23 14:21:43 2012

Copyright (c) 1982, 2009, Oracle.  All rights reserved.


Connected to:
Oracle Database 11g Enterprise Edition Release 11.2.0.1.0 - 64bit Production
With the Partitioning and Automatic Storage Management options

SQL> conn hr/hr
Connected.
SQL> create table iot
  2  ( owner, object_type, object_name,
  3  constraint iot_pk primary key(owner,object_type,object_name)
  4  )
  5  organization index
  6  NOCOMPRESS
  7  as
  8  select distinct owner, object_type, object_name
  9  from all_objects;

Table created.

SQL> select count(*) from iot;

  COUNT(*)
----------
     55646

SQL> select lf_blks, br_blks, used_space, opt_cmpr_count, opt_cmpr_pctsave from index_stats;

no rows selected

SQL> 


      看到表里有55646条记录。

      2 用ANALYZE INDEX VALID STRUCTURE来分析这个IOT表的主键:

SQL> analyze index iot_pk validate structure;

Index analyzed.

SQL> select lf_blks, br_blks, used_space, opt_cmpr_count, opt_cmpr_pctsave from index_stats;

   LF_BLKS    BR_BLKS USED_SPACE OPT_CMPR_COUNT OPT_CMPR_PCTSAVE
---------- ---------- ---------- -------------- ----------------
       347          3    2493786              2               33

SQL> 


      看到这个IOT表的索引使用了347个叶子块,3个分枝块,占用空间大小是2493786字节,约2.4M。

      3 使用COMPRESS 1选项来重建IOT表:

SQL> alter table iot move compress 1;

Table altered.

SQL> select lf_blks, br_blks, used_space, opt_cmpr_count, opt_cmpr_pctsave from index_stats;

no rows selected

SQL> analyze index iot_pk validate structure;

Index analyzed.

SQL> select lf_blks, br_blks, used_space, opt_cmpr_count, opt_cmpr_pctsave from index_stats;

   LF_BLKS    BR_BLKS USED_SPACE OPT_CMPR_COUNT OPT_CMPR_PCTSAVE
---------- ---------- ---------- -------------- ----------------
       304          3    2178229              2               23

SQL> 


         然后,看到这个IOT表的索引现在使用了304个叶子块,3个分枝块,占用空间大小是2178229字节,约2.1M。

      4 使用COMPRESS 2继续压缩这个IOT表:

SQL> alter table iot move compress 2;

Table altered.

SQL> select lf_blks, br_blks, used_space, opt_cmpr_count, opt_cmpr_pctsave from index_stats;

no rows selected

SQL> analyze index iot_pk validate structure;

Index analyzed.

SQL> select lf_blks, br_blks, used_space, opt_cmpr_count, opt_cmpr_pctsave from index_stats;

   LF_BLKS    BR_BLKS USED_SPACE OPT_CMPR_COUNT OPT_CMPR_PCTSAVE
---------- ---------- ---------- -------------- ----------------
       233          1    1670153              2                0

SQL> 


      最终,看到这个IOT表的索引现在使用了233个叶子块,1个分枝块,占用空间大小是1670153字节,约1.6M。

      说明:

      从上可以看出,使用不同的压缩级别,索引的占用的空间大小逐渐变小,从最初的2.4M变成1.6M。叶子块从最初的347变成233个,分枝块最终只有1个。

      对于上述分析索引之后的OPT_CMPR_COUNT字段表示最优压缩数,即对于该索引而言如果使用COMPRESS 2来压缩的话,可以得到最优的压缩效果。

       同时OPT_CMPR_PCTSAVE字段值则表示最优压缩节省的空间百分比,针对第一次分析之后的结果,可以看到OPT_CMPR_PCTSAVE为33,即可以节省大约33%的空间。如下,压缩后1670153大约是压缩前2493786的2/3,即节约了1/3的空间:

SQL> select 1670153/2493786 from dual;

1670153/2493786
---------------
     .669725871

SQL>


6 索引组织表(IOT Index-Organized Table)的INCLUDING和PCTTHRESHOLD参数选择

     对于IOT表而言,如果在建表的语句中同时使用了INCLUDING和PCTTHRESHOLD参数的话,那么PCTTHRESHOLD参数的级别较高。

       PCTTHRESHOLD:行中的数据量超过数据块的这个百分比时,行中其它的列则存放到OVERFLOW段中;

       INCLUDING:行中从第一列直到INCLUDING子句中指定的列(包括该列)都存放在索引块中,其它的列存放到OVERFLOW段中。

       即,对于大小为8K的数据块而言,有下面的IOT表:

SQL> create table iot1
  2  (id number,
  3  name char(2000),
  4  addr char(2000),
  5  salary number,
  6  constraint iot1_pk primary key(id,name)
  7  )
  8  organization index
  9  pctthreshold 50
 10  overflow
 11  including addr;

Table created.

SQL> 


       那么,如果PCTTHRESHOLD参数指定为50的话,那么索引块中至多会使用4K的空间来存放主键字段和非主键字段,其它字段则存放到OVERFLOW段中,而会忽略此时的INCLUDING选项,并非将addr字段随主键字段一起存放,而是将其存放到溢出段中。

       关于IOT表的学习,先到这个地方,以后有新的关于IOT表的知识,再补充在这里!

解决一则ORA-00600[kcratr_nab_less_than_odr]的故障

       临近中午,收到某客户生产库的故障请求:数据库出现了ORA-00600的错误!现在数据库启不来,影响业务的运行。

       故障场景描述:这是我之前服务过的一家客户,是一套跑在Linux机器上的11gR2单实例数据库,由于服务器异常断电导致的故障!印象较为深刻的是就在2011年2月14日情人节那天,这个库也曾出现过另外一则ORA-00600的错误。较为不幸的是,就在今天又遭遇到这个ORA-600的错误!

        下面记录一下这次故障的处理过程:

        1 启库时遭遇ORA-600的错误

[oracle@os5 ~]$ uname -rm
2.6.18-128.el5PAE i686
[oracle@os5 ~]$ ps -ef|grep asm_
oracle    9099  9068  0 10:54 pts/8    00:00:00 grep asm_
[oracle@os5 ~]$ ps -ef|grep ora_
oracle    4797     1  0 10:52 ?        00:00:00 ora_pmon_database
oracle    4799     1  0 10:52 ?        00:00:00 ora_vktm_database
oracle    4803     1  0 10:52 ?        00:00:00 ora_gen0_database
oracle    4805     1  0 10:52 ?        00:00:00 ora_diag_database
oracle    4807     1  0 10:52 ?        00:00:00 ora_dbrm_database
oracle    4809     1  0 10:52 ?        00:00:00 ora_psp0_database
oracle    4811     1  0 10:52 ?        00:00:01 ora_dia0_database
oracle    4813     1  0 10:52 ?        00:00:00 ora_mman_database
oracle    4815     1  0 10:52 ?        00:00:00 ora_dbw0_database
oracle    4817     1  0 10:52 ?        00:00:00 ora_lgwr_database
oracle    4819     1  0 10:52 ?        00:00:00 ora_ckpt_database
oracle    4821     1  0 10:52 ?        00:00:00 ora_smon_database
oracle    4823     1  0 10:52 ?        00:00:00 ora_reco_database
oracle    4825     1  0 10:52 ?        00:00:00 ora_mmon_database
oracle    4827     1  0 10:52 ?        00:00:00 ora_mmnl_database
oracle    4829     1  0 10:52 ?        00:00:00 ora_d000_database
oracle    4831     1  0 10:52 ?        00:00:00 ora_s000_database
oracle    9105  9068  0 11:55 pts/8    00:00:00 grep ora_ 
[oracle@os5 ~]$ sqlplus / as sysdba

SQL*Plus: Release 11.2.0.1.0 Production on Wed Nov 21 10:54:16 2012

Copyright (c) 1982, 2009, Oracle.  All rights reserved.


Connected to:
Oracle Database 11g Enterprise Edition Release 11.2.0.1.0 - Production
With the Partitioning, OLAP, Data Mining and Real Application Testing options


SQL> alter database open;
alter database open
*
ERROR at line 1:
ORA-00600: internal error code, arguments: [kcratr_nab_less_than_odr], [1],
[3464], [12432], [12534], [], [], [], [], [], [], []


SQL> select open_mode from v$database;

OPEN_MODE
--------------------
MOUNTED

SQL>

          从上可以看到,当前数据库停留在MOUNT状态,没法OPEN,然后,就用RMAN重新做了个全备,并手工拷贝了联机日志文件,保留现场!

         2 接下来,重新尝试以RESETLOGS方式也打不开,尝试RECOVER依然报错

SQL> alter database open resetlogs;
alter database open resetlogs
*
ERROR at line 1:
ORA-01139: RESETLOGS option only valid after an incomplete database recovery


SQL> recover database;
ORA-00283: recovery session canceled due to errors
ORA-00264: no recovery required


SQL> alter database open;
alter database open
*
ERROR at line 1:
ORA-00600: internal error code, arguments: [kcratr_nab_less_than_odr], [1], [3464], [12432], [12534], [], [], [], [], [], [], []


SQL>

        3  那么接下来,看看ALERT日志都记录哪些有用的信息:

Wed Nov 21 10:59:16 2012
alter database open
Beginning crash recovery of 1 threads
 parallel recovery started with 2 processes
Started redo scan
Completed redo scan
 read 1642 KB redo, 0 data blocks need recovery
Errors in file /oracle/ora11gR2/diag/rdbms/database/database/trace/database_ora_4848.trc  (incident=129790):
ORA-00600: internal error code, arguments: [kcratr_nab_less_than_odr], [1], [3464], [12432], [12534], [], [], [], [], [], [], []
Incident details in: /oracle/ora11gR2/diag/rdbms/database/database/incident/incdir_129790/database_ora_4848_i129790.trc
Aborting crash recovery due to error 600
Errors in file /oracle/ora11gR2/diag/rdbms/database/database/trace/database_ora_4848.trc:
ORA-00600: internal error code, arguments: [kcratr_nab_less_than_odr], [1], [3464], [12432], [12534], [], [], [], [], [], [], []
Errors in file /oracle/ora11gR2/diag/rdbms/database/database/trace/database_ora_4848.trc:
ORA-00600: internal error code, arguments: [kcratr_nab_less_than_odr], [1], [3464], [12432], [12534], [], [], [], [], [], [], []
ORA-600 signalled during: alter database open...
Wed Nov 21 10:59:17 2012
Sweep [inc][129790]: completed
Sweep [inc2][129790]: completed
Wed Nov 21 10:59:17 2012
Trace dumping is performing id=[cdmp_20121121105917]
Wed Nov 21 11:07:50 2012
db_recovery_file_dest_size of 3852 MB is 0.00% used. This is a
user-specified limit on the amount of space that will be used by this
database for recovery-related files, and does not reflect the amount of
space available in the underlying filesystem or ASM diskgroup.

        从alert里,一直看到ORA-00600: internal error code, arguments: [kcratr_nab_less_than_odr], [1], [3464], [12432], [12534], [], [], [], [], [], [], []的错误,还有一些提示就是Errors in file /oracle/ora11gR2/diag/rdbms/database/database/trace/database_ora_4848.trc。

        4 就去看看上述的TRACE文件:

*** 2012-11-21 10:59:16.123
Successfully allocated 2 recovery slaves
Using 66 overflow buffers per recovery slave
Thread 1 checkpoint: logseq 3464, block 4945, scn 203336710
  cache-low rba: logseq 3464, block 9148
    on-disk rba: logseq 3464, block 12534, scn 203340512
  start recovery at logseq 3464, block 9148, scn 0

*** 2012-11-21 10:59:16.144
Started writing zeroblks thread 1 seq 3464 blocks 12432-12439

*** 2012-11-21 10:59:16.144
Completed writing zeroblks thread 1 seq 3464
==== Redo read statistics for thread 1 ====
Total physical reads (from disk and memory): 4096Kb
-- Redo read_disk statistics --
Read rate (ASYNC): 1642Kb in 0.02s => 80.18 Mb/sec
Longest record: 14Kb, moves: 0/1953 (0%)
Change moves: 22/192 (11%), moved: 0Mb
Longest LWN: 445Kb, moves: 0/733 (0%), moved: 0Mb
Last redo scn: 0x0000.0c1eba6c (203340396)
----------------------------------------------
----- Recovery Hash Table Statistics ---------
Hash table buckets = 32768
Longest hash chain = 0
Average hash chain = 0/0 = 0.0
Max compares per lookup = 0
Avg compares per lookup = 0/0 = 0.0
----------------------------------------------
WARNING! Crash recovery of thread 1 seq 3464 is
ending at redo block 12432 but should not have ended before
redo block 12534
Incident 129790 created, dump file: /oracle/ora11gR2/diag/rdbms/database/database/incident/incdir_129790/database_ora_4848_i129790.trc
ORA-00600: internal error code, arguments: [kcratr_nab_less_than_odr], [1], [3464], [12432], [12534], [], [], [], [], [], [], []

ORA-00600: internal error code, arguments: [kcratr_nab_less_than_odr], [1], [3464], [12432], [12534], [], [], [], [], [], [], []

        5 结合ALERT里的错误ORA-00600: internal error code, arguments: [kcratr_nab_less_than_odr], [1], [3464], [12432], [12534], 和TRACE里的错误提示WARNING! Crash recovery of thread 1 seq 3464 is ending at redo block 12432 but should not have ended before redo block 12534 以及查询MetaLink文档ID 1299564.1获取的指导性信息,应该是由于服务器异常断电,导致LGWR写联机日志文件时失败,下次重新启动数据库时,需要做实例级恢复,而又无法从联机日志文件里获取到这些redo信息,因为上次断电时,写日志失败了。

          那么ORA-00600的错误里,那几个参数 [1], [3464], [12432], [12534]又表示什么呢? 从EYGLE的网站上查询到类似的案例信息,结合本故障场景分析,原来是实例需要恢复日志序列号为3464的联机日志文件,需要恢复到编号为12534的日志块,而实际上只能恢复到第12432个日志块儿,所以库就启不来了。不过,从当前日志文件信息,可以看到,当前日志组的确是3464:

SQL> alter session set nls_date_format='yyyy/mm/dd hh24:mi:ss';

Session altered.

SQL> select * from v$log;

    GROUP#    THREAD#  SEQUENCE#      BYTES  BLOCKSIZE    MEMBERS ARC STATUS           FIRST_CHANGE# FIRST_TIME          NEXT_CHANGE# NEXT_TIME
---------- ---------- ---------- ---------- ---------- ---------- --- ---------------- ------------- ------------------- ------------ -------------------
         1          1       3463   52428800        512          1 YES INACTIVE             203285629 2012/11/21 03:00:32    203335249 2012/11/21 08:59:46
         3          1       3462   52428800        512          1 YES INACTIVE             203238520 2012/11/20 21:00:52    203285629 2012/11/21 03:00:32
         2          1       3464   52428800        512          1 NO  CURRENT              203335249 2012/11/21 08:59:46   2.8147E+14

SQL> 

        6 参照MetaLink文档ID 1299564.1的方案来恢复数据库:


SQL> recover database until cancel using backup controlfile;
ORA-00279: change 203360397 generated at 11/21/2012 09:21:51 needed for thread 1
ORA-00289: suggestion : /home/oracle/archive_no_delete/ARC_743097220_0000003464_1.arc
ORA-00280: change 203360397 for thread 1 is in sequence #3464


Specify log: {=suggested | filename | AUTO | CANCEL}
/oracle/ora11gR2/oradata/database/redo02.log
Log applied.
Media recovery complete.
SQL> alter database open ;
alter database open
*
ERROR at line 1:
ORA-01589: must use RESETLOGS or NORESETLOGS option for database open


SQL>  alter database open resetlogs;

Database altered.

SQL> 

          至此,这个库是成功恢复,并且启动了。恢复之后,再次对数据库做了备份。看到Alert日志信息

Wed Nov 21 12:43:44 2012
ALTER DATABASE RECOVER    LOGFILE '/oracle/ora11gR2/oradata/database/redo02.log'  
Media Recovery Log /oracle/ora11gR2/oradata/database/redo02.log
Wed Nov 21 12:43:44 2012
Incomplete recovery applied all redo ever generated.
Recovery completed through change 203360398 time 11/21/2012 09:21:51
Media Recovery Complete (database)
Completed: ALTER DATABASE RECOVER    LOGFILE '/oracle/ora11gR2/oradata/database/redo02.log'  
Wed Nov 21 12:43:55 2012
alter database open 
Errors in file /oracle/ora11gR2/diag/rdbms/database/database/trace/database_ora_10698.trc:
ORA-01589: must use RESETLOGS or NORESETLOGS option for database open
ORA-1589 signalled during: alter database open ...
Wed Nov 21 12:44:37 2012
 alter database open resetlogs
Archived Log entry 3382 added for thread 1 sequence 3463 ID 0xd9842c95 dest 1:
Archived Log entry 3383 added for thread 1 sequence 3464 ID 0xd9842c95 dest 1:
Archived Log entry 3384 added for thread 1 sequence 3462 ID 0xd9842c95 dest 1:
RESETLOGS after complete recovery through change 203360398
Resetting resetlogs activation ID 3649318037 (0xd9842c95)
Wed Nov 21 12:44:43 2012
Setting recovery target incarnation to 4
Wed Nov 21 12:44:43 2012
Assigning activation ID 3706166088 (0xdce79b48)
LGWR: STARTING ARCH PROCESSES
Wed Nov 21 12:44:43 2012
ARC0 started with pid=24, OS id=11236 
ARC0: Archival started
LGWR: STARTING ARCH PROCESSES COMPLETE
ARC0: STARTING ARCH PROCESSES
Wed Nov 21 12:44:44 2012
ARC1 started with pid=25, OS id=11238 
Wed Nov 21 12:44:44 2012
ARC2 started with pid=26, OS id=11240 
Thread 1 opened at log sequence 1
  Current log# 1 seq# 1 mem# 0: /oracle/ora11gR2/oradata/database/redo01.log
Successful open of redo thread 1
MTTR advisory is disabled because FAST_START_MTTR_TARGET is not set
Wed Nov 21 12:44:44 2012
SMON: enabling cache recovery
ARC1: Archival started
ARC2: Archival started
Wed Nov 21 12:44:44 2012
ARC3 started with pid=29, OS id=11242 
ARC1: Becoming the 'no FAL' ARCH
ARC1: Becoming the 'no SRL' ARCH
ARC2: Becoming the heartbeat ARCH
Successfully onlined Undo Tablespace 2.
Dictionary check beginning
Dictionary check complete
Verifying file header compatibility for 11g tablespace encryption..
Verifying 11g file header compatibility for tablespace encryption completed


        从Metalink上看到,目前这个ORA-600的错误应该只有在Oracle 11g上才有的。    

Oracle索引组织表学习系列二

4 索引组织表(IOT Index-Organized Table)适用什么场景

       在上一篇文章里,提到了IOT表的基本概念和创建的一些注意事项,接下来讨论一下关于IOT表和Heap使用的一个测试对比,用以说明IOT表适用于什么场景。

1 构建一个主表emp表:

[oracle@oracle11g arch_new]$ sqlplus 

SQL*Plus: Release 11.2.0.1.0 Production on Thu Nov 15 10:15:19 2012

Copyright (c) 1982, 2009, Oracle.  All rights reserved.


Connected to:
Oracle Database 11g Enterprise Edition Release 11.2.0.1.0 - 64bit Production
With the Partitioning and Automatic Storage Management options

SQL> conn hr/hr
Connected.
SQL> create table emp
  2  as
  3  select object_id empno,
  4  object_name ename,
  5  created hiredate,
  6  owner job
  7  from all_objects
  8  ;

Table created.

SQL> select count(*) from emp;

  COUNT(*)
----------
     55636

SQL> alter table emp add constraint emp_pk primary key(empno);

Table altered.

SQL> exec dbms_stats.gather_table_stats(user,'EMP',cascade=>true);

PL/SQL procedure successfully completed.

SQL> 


2  构建一张子表,子表分别通过Heap和IOT两种方式来实现:

构建Heap类型子表

SQL> create table heap_addresses
  2  ( empno references emp(empno) on delete cascade,
  3  addr_type varchar2(10),
  4  street varchar2(20),
  5  city varchar2(20),
  6  state varchar2(2),
  7  zip number,
  8  primary key (empno,addr_type)
  9  );

Table created.

SQL> 

构建IOT类型子表

SQL> create table iot_addresses
  2  ( empno references emp(empno) on delete cascade,
  3  addr_type varchar2(10),
  4  street varchar2(20),
  5  city varchar2(20),
  6  state varchar2(2),
  7  zip number,
  8  primary key (empno,addr_type)
  9  )
 10  ORGANIZATION INDEX
 11  ;

Table created.

SQL> 

3  分别向两种子表里构造数据,插入WORK,HOME,ORIGINAL,SCHOOL地址:

Heap类型子表插入

SQL> insert into heap_addresses
  2  select empno, 'WORK', '123 main street', 'Washington', 'DC', 20123
  3  from emp;

55636 rows created.

SQL> insert into heap_addresses
  2  select empno, 'HOME', '123 main street', 'Washington', 'DC', 20123
  3  from emp;

55636 rows created.

SQL> insert into heap_addresses
  2  select empno, 'ORIGINAL', '123 main street', 'Washington', 'DC', 20123
  3  from emp;

55636 rows created.

SQL> insert into heap_addresses
  2  select empno, 'SCHOOL', '123 main street', 'Washington', 'DC', 20123
  3  from emp;

55636 rows created.

SQL> select count(*) from heap_addresses;

  COUNT(*)
----------
    222544

SQL> 

IOT类型子表插入

SQL> insert into iot_addresses
  2  select empno, 'WORK', '123 main street', 'Washington', 'DC', 20123
  3  from emp;

55636 rows created.

SQL> insert into iot_addresses
  2  select empno, 'HOME', '123 main street', 'Washington', 'DC', 20123
  3  from emp;

55636 rows created.

SQL> insert into iot_addresses
  2  select empno, 'ORIGINAL', '123 main street', 'Washington', 'DC', 20123
  3  from emp;

55636 rows created.

SQL> insert into iot_addresses
  2  select empno, 'SCHOOL', '123 main street', 'Washington', 'DC', 20123
  3  from emp;

55636 rows created.

SQL> select count(*) from iot_addresses;

  COUNT(*)
----------
    222544

SQL> 

4 分别收集两种子表的统计信息

SQL> exec dbms_stats.gather_table_stats(user,'HEAP_ADDRESSES');

PL/SQL procedure successfully completed.

SQL> exec dbms_stats.gather_table_stats(user,'IOT_ADDRESSES');

PL/SQL procedure successfully completed.

SQL> 

5 对比使用不同类型的子表,SQL的执行计划

SQL> set line 200
SQL> set autot trace
SQL> select *
  2  from emp, heap_addresses
  3  where emp.empno = heap_addresses.empno
  4  and emp.empno = 100;


Execution Plan
----------------------------------------------------------
Plan hash value: 541875893

-----------------------------------------------------------------------------------------------
| Id  | Operation                    | Name           | Rows  | Bytes | Cost (%CPU)| Time     |
-----------------------------------------------------------------------------------------------
|   0 | SELECT STATEMENT             |                |     4 |   368 |     8   (0)| 00:00:01 |
|   1 |  NESTED LOOPS                |                |     4 |   368 |     8   (0)| 00:00:01 |
|   2 |   TABLE ACCESS BY INDEX ROWID| EMP            |     1 |    45 |     2   (0)| 00:00:01 |
|*  3 |    INDEX UNIQUE SCAN         | EMP_PK         |     1 |       |     1   (0)| 00:00:01 |
|   4 |   TABLE ACCESS BY INDEX ROWID| HEAP_ADDRESSES |     4 |   188 |     6   (0)| 00:00:01 |
|*  5 |    INDEX RANGE SCAN          | SYS_C00138141  |     4 |       |     2   (0)| 00:00:01 |
-----------------------------------------------------------------------------------------------

Predicate Information (identified by operation id):
---------------------------------------------------

   3 - access("EMP"."EMPNO"=100)
   5 - access("HEAP_ADDRESSES"."EMPNO"=100)


Statistics
----------------------------------------------------------
          0  recursive calls
          0  db block gets
         11  consistent gets
          0  physical reads
          0  redo size
       1351  bytes sent via SQL*Net to client
        523  bytes received via SQL*Net from client
          2  SQL*Net roundtrips to/from client
          0  sorts (memory)
          0  sorts (disk)
          4  rows processed

SQL> 
SQL> select *
  2  from emp, iot_addresses
  3  WHERE emp.empno = iot_addresses.empno
  4  and emp.empno = 100;


Execution Plan
----------------------------------------------------------
Plan hash value: 1475200359

---------------------------------------------------------------------------------------------------
| Id  | Operation                    | Name               | Rows  | Bytes | Cost (%CPU)| Time     |
---------------------------------------------------------------------------------------------------
|   0 | SELECT STATEMENT             |                    |     4 |   368 |     4   (0)| 00:00:01 |
|   1 |  NESTED LOOPS                |                    |     4 |   368 |     4   (0)| 00:00:01 |
|   2 |   TABLE ACCESS BY INDEX ROWID| EMP                |     1 |    45 |     2   (0)| 00:00:01 |
|*  3 |    INDEX UNIQUE SCAN         | EMP_PK             |     1 |       |     1   (0)| 00:00:01 |
|*  4 |   INDEX RANGE SCAN           | SYS_IOT_TOP_184800 |     4 |   188 |     2   (0)| 00:00:01 |
---------------------------------------------------------------------------------------------------

Predicate Information (identified by operation id):
---------------------------------------------------

   3 - access("EMP"."EMPNO"=100)
   4 - access("IOT_ADDRESSES"."EMPNO"=100)


Statistics
----------------------------------------------------------
          1  recursive calls
          0  db block gets
          8  consistent gets
          0  physical reads
          0  redo size
       1351  bytes sent via SQL*Net to client
        523  bytes received via SQL*Net from client
          2  SQL*Net roundtrips to/from client
          0  sorts (memory)
          0  sorts (disk)
          4  rows processed

SQL> 

6 小结:通过分析上述2条“几乎”完全相同的SQL语句的执行计划,我们可以看到:

        对于第1个SQL(子表通过Heap来实现),首先通过EMP_PK这个主键来访问主表EMP,得到主表的行记录,然后通过得到的主键EMPNO字段来访问子表HEAP_ADDRESS,通过子表HEAP_ADDRESS的索引SYS_C00138141来获取子表记录。整个SQL耗费了11次内存读,COST为8。

        而对于第2个SQL(子表通过IOT来实现),首先通过EMP_PK这个主键来访问主表EMP,得到主表的行记录,然后直接通过EMPNO字段来访问子表IOT_ADDRESS,而EMPNO字段同时也是子表IOT_ADDRESS的主键字段,这样通过IOT表的主键字段来访问数据就非常快了。整个SQL耗费8次内存读,COST为4,是第1条SQL的1/2。

IOT表适用的场景:

① 应用中有完全由主键字段构成的表;

②  应用中有只会通过主键来访问数据的表;

③  希望数据以某种特定顺序存储的表;

IOT表不适用于使用非主键字段来查询数据。

使用Log Miner恢复数据的案例一则

        上周五(9月21日上午11点左右),收到项目组的一封紧急邮件:

生产数据库中,FIN_CASH_MOVEMENTFIN_CASH_DETAIL这两张表的数据91号到919号的数据都被删除了。

烦请提供下技术支持,恢复这两张表的数据。待回复。谢谢!

经过沟通,初步了解到系统的信息是:这是一套运行在IBM P750的小机上的64位的11gR2的单实例数据库。其实,这套环境也是之前的一篇文章里[记录一次在IBM P750小机上给Oracle动态扩展存储]提到的系统。

进一步了解,确认数据库中FIN_CASH_MOVEMENTFIN_CASH_DETAIL这两张表的数据在9月20号下午3点左右被误删除了,且这两张表是主子表的关系。

我首先想到的方法是,尝试使用事务的闪回查询,看看能否找回数据?结果很不幸,由于是生产数据库,事务繁忙,且误操作离当前时间较长(差不错相差20个小时),UNDO表空间中的回滚数据被覆盖了,遇到了ORA-01555回滚过旧的错误。显然,这条路是走不通了。

接下来,看看系统中是否有之前的有效的逻辑备份?如果有的话,可以用逻辑恢复的方式来尝试找回数据,再次不幸,该系统中采用的RMAN备份,并无逻辑备份。显然,该方法同样不凑效。

那么,我能想到的方法就是对全库做基于时间点的不完全恢复或者使用Oracle 自带的Log Miner工具来挖掘数据了。而该生产库的数据量很大,如果使用基于时间的不完全恢复的话,又有种种弊端和风险。比如,肯定得在一套独立的测试库上执行基于时间的不完全恢复,还有就是rman备份文件很大,这个显然是下下策了。

最后,选择Log Miner工具来尝试找回数据了。下面,记录一下这次的主要过程:

1  首先,找出系统中涵盖误操作时间段的归档日志,这里找出9月20日15点到17点之间的归档:

select name,FIRST_TIME from v$archived_log where first_time between to_date('2012/09/20 14:50:00','yyyy/mm/dd hh24:mi:ss') and to_date('2012/09/20 17:00:00','yyyy/mm/dd hh24:mi:ss');
NAME                                                                   FIRST_TIME
---------------------------------------------------------------------- -------------------
/oraflash/SITCDB/archivelog/2012_09_20/o1_mf_1_123956_85ohgybj_.arc    2012/09/20 14:52:41
/oraflash/SITCDB/archivelog/2012_09_20/o1_mf_1_123957_85ohn6qh_.arc    2012/09/20 14:55:26
...
...
/oraflash/SITCDB/archivelog/2012_09_20/o1_mf_1_123984_85olkh0t_.arc    2012/09/20 15:45:49
/oraflash/SITCDB/archivelog/2012_09_20/o1_mf_1_123985_85olo3vb_.arc    2012/09/20 15:47:59
/oraflash/SITCDB/archivelog/2012_09_20/o1_mf_1_123986_85olqg4r_.arc    2012/09/20 15:49:55
...
/oraflash/SITCDB/archivelog/2012_09_20/o1_mf_1_123992_85om9wo7_.arc    2012/09/20 15:59:07

2  调用dbms_logmnr系统包,添加归档日志:

SQL>exec dbms_logmnr.add_logfile(logfilename=>'/oraflash/SITCDB/archivelog/2012_09_20/o1_mf_1_123956_85ohgybj_.arc',options=>dbms_logmnr.new);

3  调用dbms_logmnr系统包,启动Log Miner开始挖掘日志:

SQL>exec dbms_logmnr.start_logmnr(options=>dbms_logmnr.dict_from_online_catalog);

4  从v$logmnr_contents系统表中,查看是否包含FIN_CASH_DETAIL表的SQL语句:

SQL>select timestamp,table_name,sql_redo,sql_undo,operation from v$logmnr_contents where table_name='FIN_CASH_DETAIL';

5  调用dbms_logmnr系统包,停止Log Miner:

exec dbms_logmnr.end_logmnr;

6  重复上述2~5步骤的动作,只是每次需要添加的归档日志不同而已。终于,在/oraflash/SITCDB/archivelog/2012_09_20/o1_mf_1_123985_85olo3vb_.arc这份归档日志中,均找到有FIN_CASH_MOVEMENT和FIN_CASH_DETAIL这两张表的操作。也就是误操作的时间应该是在2012/09/20 15:47:59到2012/09/20 15:49:55之间。

select sql_redo from v$logmnr_contents where table_name='FIN_CASH_MOVEMENT' and operation='DELETE';
SQL_REDO
---------------------------------------------------------------------------------------------------
delete from "SITCLINE"."FIN_CASH_MOVEMENT" where "CASH_MOVEMENT_ID" = '2c2881d63987424d01398b77fa2f6345' and "RP_ID" = 'R' and "OFFICE_ID" = 'SITTP' and "STATE_IND" = '0' 
and "MOVEMENT_TYPE" = 'CHECK' and "MOVEMENT_NO" = 'CR201209030138' and "BANK_MOVEMENT_NO" = '010060936' and "MOVEMENT_DATE" 
= TO_DATE('03-9月 -12', 'DD-MON-RR') and "LEDGER_PARTNER_CODE" = '80273312' and "LEDGER_PARTNER_NAME" IS NULL 
and "EXTERNAL_BANK_NAME" IS NULL and "EXTERNAL_BANK_ACCOUNT" = '056637' and "EXTERAL_BANK_ACCOUN
T_NAME" IS NULL and "INTERNAL_BANK_ID" = '2c2881d63978294201397a864fe30c1e' and "INTERNAL_BANK_NAME" = '花旗台灣' and "INTERNAL_BACNT_ID" = '2c2881d63978294201397a8c72be0c6c' and "INTERNAL_BANK_ACCOUNT_CODE" = '5049328003' 
and "INTERNAL_BANK_ACCOUNT_NAME" = 'SITC STEAMSHIPS CO LTD TAIWAN BRANCH' and "PRIME_CURRENCY_CODE" = 'NTD' and "PRIME_CURRENCY_VALUE" = '10799' and "BASE_CURRENCY_CODE" IS NULL and "BASE_CURRENCY_VALUE" IS NULL and "REMARK" IS NULL and "REALRP" = '1' and "REALRP_DATE" 
IS NULL and
 "REALRP_PERSON" IS NULL and "REALRP_PERSON_NAME" IS NULL and "DISCOUNT_VALUE" IS NULL and "DISCOUNT_REMARK" 
IS NULL and "RATE_BASE" IS NULL and "ALLOCATION_EVENT_ID" IS NULL and "DEPOSIT_DATE" = TO_DATE('03-9月 -12', 'DD-MON-RR') and "INVOICE_INFO" IS NULL and "CREATED_BY_USER" = 'FIN_TWPEI05' and "CREATED_OFFICE" = 'TP_FIN_DP' and "CREATED_DTM_LOC" = TO_DATE('03-9月 -12', 'DD-MON-RR') and "CREATED_TIME_ZONE" 
IS NULL and "UPDATED_BY_USER" = 'FIN_TWPEI05' and "UPDATED_OFFICE" = 'TP_FIN_DP' and "UP
DATED_DTM_LOC" = TO_DATE('03-9月 -12', 'DD-MON-RR') and "UPDATED_TIME_ZONE" IS NULL and "RECORD_VERSION" = '0' and "PRINCIPAL_GROUP_CODE" = 'SIT' 
and "CHECK_NO" = '6822983' and "PRINTED_PERSON" IS NULL and "IS_PRINTED" = '0' and "PRINTED_PERSON_NAME" IS NULL and "PRINTED_DATE" IS NULL and "BANK_EXCHANGE_NO" 
IS NULL and "INVOICE_AMOUNT" IS NULL and "SHORT_OVER_AMOUNT" = '0' and "SAP_STATUS" = '0' and "ARP_ID" IS NULL and ROWID = 'AAATyIAAUAAAMQ7AAH';

...

7  发现对于主、子表FIN_CASH_MOVEMENT、FIN_CASH_DETAIL的误操作分别删除了1390和1911条数据。生成下述的反向SQL,并把SQL脚本交给项目组确认,数据是否正确?

select sql_undo from v$logmnr_contents where table_name='FIN_CASH_MOVEMENT' and operation='DELETE';
SQL_UNDO
---------------------------------------------------------------------------------------------------
insert into "SITCLINE"."FIN_CASH_MOVEMENT"("CASH_MOVEMENT_ID","RP_ID","OFFICE_ID","
STATE_IND","MOVEMENT_TYPE","MOVEMENT_NO","
BANK_MOVEMENT_NO","MOVEMENT_DATE","LEDGER_PARTNER_CODE","
LEDGER_PARTNER_NAME","EXTERNAL_BANK_NAME","
EXTERNAL_BANK_ACCOUNT","EXTERAL_BANK_ACCOUNT_NAME","
INTERNAL_BANK_ID","INTERNAL_BANK_NAME","INTERNAL_BACNT_ID","
INTERNAL_BANK_ACCOUNT_CODE","INTERNAL_BANK_ACCOUNT_NAME","
PRIME_CURRENCY_CODE","PRIME_CURRENCY_VALUE","BASE_CURRENCY_CODE","
BASE_CURRENCY_VALUE","REMARK","REALRP","REALRP_DATE","
REALRP_PERSON","REALRP_PERSON_NAME","DISCOUNT_VALUE","
DISCOUNT_REMARK","RATE_BASE","A
LLOCATION_EVENT_ID","DEPOSIT_DATE","INVOICE_INFO","
CREATED_BY_USER","CREATED_OFFICE","CREATED_DTM_LOC","
CREATED_TIME_ZONE","UPDATED_BY_USER","UPDATED_OFFICE","
UPDATED_DTM_LOC","UPDATED_TIME_ZONE","RECORD_VERSION","
PRINCIPAL_GROUP_CODE","CHECK_NO","PRINTED_PERSON","
IS_PRINTED","PRINTED_PERSON_NAME","PRINTED_DATE","
BANK_EXCHANGE_NO","INVOICE_AMOUNT","SHORT_OVER_AMOUNT","
SAP_STATUS","ARP_ID") values ('2c2881d63987424d01398b77fa2f6345','R','SITTP','0','CHECK','CR201209030138','010060936',TO_DATE('03-9月 -12', 'DD-MON-RR'),'80273312',NULL,NULL,'056637',NULL,'2c2881d63978294201397a864fe30c1e','花旗台灣',
'2c2881d63978294201397a8c72be0c6c','5049328003','SITC STEAMSHIPS CO LTD TAIWAN BRANCH','NTD','10799',NULL,NULL,NULL,'1',
NULL,NULL,NULL,NULL,NULL,NULL,NULL,TO_DATE('03-9月 -12', 'DD-MON-RR'),NULL,'FIN_TWPEI05','TP_FIN_DP',TO_DATE('03-9月 -12', 'DD-MON-RR'),NULL,'FIN_TWPEI05','TP_FIN_DP',TO_DATE('03-9月 -12', 'DD-MON-RR'),NULL,'0','SIT','6822983',
NULL,'0',NULL,NULL,NULL,NULL,'0','0',NULL);

...
select sql_undo from v$logmnr_contents where table_name='FIN_CASH_DETAIL' and operation='DELETE';
SQL_UNDO
---------------------------------------------------------------------------------------------------
insert into "SITCLINE"."FIN_CASH_DETAIL"("CASH_DETAIL_ID","CASH_MOVEMENT_ID","INVOICE_NO","
VESSEL_CODE","VOYAGE_NO","VOYAGE_LEG","BL_NO","
AMOUNT","CURRENCY","RATE","INVOICE_DOC_ID","
FREIGHT_ITEM_ID","CREATED_BY_USER","CREATED_OFFICE","
CREATED_DTM_LOC","CREATED_TIME_ZONE","UPDATED_BY_USER","
UPDATED_OFFICE","UPDATED_DTM_LOC","UPDATED_TIME_ZONE","
RECORD_VERSION","PRINCIPAL_GROUP_CODE") values ('2c2881d63987424d01398b77fa2f6346','2c2881d63987424d01398b77fa2f6345',
'EZ03404580','STKE','1236','N','SITGKESH002049','
10799',NULL,NULL,'2c2881d63987424d01398a8999e22caa',NULL,'FIN_TWPEI05','
TP_FIN_DP',TO_D
ATE('03-9月 -12', 'DD-MON-RR'),NULL,'FIN_TWPEI05','TP_FIN_DP',TO_DATE('03-9月 -12', 'DD-MON-RR'),NULL,'0','SIT');
...

8  最后,项目组确认之后,重新执行反向的SQL脚本,并发邮件过来,确认数据全部找回

后记:项目组发布出来,确认引起该错误的原因是程序bug,已经修复。从这次的恢复数据过程中,我们说在生产系统上的程序也好,人为操作数据库也好,一定要谨慎。同样,数据库的备份也不容忽视!


一步一步在Linux上安装Oracle 11gR2 RAC (8–完结)

脚本附录

7.1 preusers.sh脚本


#!/bin/bash
#Purpose:Create 6 groups named 'oinstall','dba','asmadmin','asmdba','asmoper','oper', plus 2 users named 'oracle','grid'.
#Also setting the Environment
#variable for oracle user.
#variable for grid user.
#Usage:Log on as the superuser('root'),and then execute the command:#./1preusers.sh
#Author:Asher Huang

echo "Now create 6 groups named 'oinstall','dba','asmadmin','asmdba','asmoper','oper'"
echo "Plus 2 users named 'oracle','grid',Also setting the Environment"


groupadd -g 1000 oinstall 
groupadd -g 1200 asmadmin 
groupadd -g 1201 asmdba 
groupadd -g 1202 asmoper 
useradd -u 1100 -g oinstall -G asmadmin,asmdba,asmoper -d /home/grid -s /bin/bash -c "grid Infrastructure Owner" grid 
echo "grid" | passwd --stdin grid

echo 'export PS1="`/bin/hostname -s`-> "'>> /home/grid/.bash_profile 
echo "export TMP=/tmp">> /home/grid/.bash_profile  
echo 'export TMPDIR=$TMP'>>/home/grid/.bash_profile 
echo "export ORACLE_SID=+ASM1">> /home/grid/.bash_profile 
echo "export ORACLE_BASE=/u01/app/grid">> /home/grid/.bash_profile
echo "export ORACLE_HOME=/u01/app/11.2.0/grid">> /home/grid/.bash_profile
echo "export ORACLE_TERM=xterm">> /home/grid/.bash_profile
echo "export NLS_DATE_FORMAT='yyyy/mm/dd hh24:mi:ss'" >> /home/grid/.bash_profile
echo 'export TNS_ADMIN=$ORACLE_HOME/network/admin'  >> /home/grid/.bash_profile
echo 'export PATH=/usr/sbin:$PATH'>> /home/grid/.bash_profile
echo 'export PATH=$ORACLE_HOME/bin:$PATH'>> /home/grid/.bash_profile
echo 'export LD_LIBRARY_PATH=$ORACLE_HOME/lib:/lib:/usr/lib'>> /home/grid/.bash_profile
echo 'export CLASSPATH=$ORACLE_HOME/JRE:$ORACLE_HOME/jlib:$ORACLE_HOME/rdbms/jlib'>> /home/grid/.bash_profile
echo "export EDITOR=vi" >> /home/grid/.bash_profile
echo "export LANG=en_US" >> /home/grid/.bash_profile
echo "export NLS_LANG=american_america.AL32UTF8" >> /home/grid/.bash_profile
echo "umask 022">> /home/grid/.bash_profile

groupadd -g 1300 dba 
groupadd -g 1301 oper 
useradd -u 1101 -g oinstall -G dba,oper,asmdba -d /home/oracle -s /bin/bash -c "Oracle Software Owner" oracle 
echo "oracle" | passwd --stdin oracle

echo 'export PS1="`/bin/hostname -s`-> "'>> /home/oracle/.bash_profile 
echo "export TMP=/tmp">> /home/oracle/.bash_profile  
echo 'export TMPDIR=$TMP'>>/home/oracle/.bash_profile 
echo "export ORACLE_HOSTNAME=node1.localdomain">> /home/oracle/.bash_profile 
echo "export ORACLE_SID=devdb1">> /home/oracle/.bash_profile 
echo "export ORACLE_BASE=/u01/app/oracle">> /home/oracle/.bash_profile
echo 'export ORACLE_HOME=$ORACLE_BASE/product/11.2.0/db_1'>> /home/oracle/.bash_profile
echo "export ORACLE_UNQNAME=devdb">> /home/oracle/.bash_profile
echo 'export TNS_ADMIN=$ORACLE_HOME/network/admin'  >> /home/oracle/.bash_profile
echo "export ORACLE_TERM=xterm">> /home/oracle/.bash_profile
echo 'export PATH=/usr/sbin:$PATH'>> /home/oracle/.bash_profile
echo 'export PATH=$ORACLE_HOME/bin:$PATH'>> /home/oracle/.bash_profile
echo 'export LD_LIBRARY_PATH=$ORACLE_HOME/lib:/lib:/usr/lib'>> /home/oracle/.bash_profile
echo 'export CLASSPATH=$ORACLE_HOME/JRE:$ORACLE_HOME/jlib:$ORACLE_HOME/rdbms/jlib'>> /home/oracle/.bash_profile
echo "export EDITOR=vi" >> /home/oracle/.bash_profile
echo "export LANG=en_US" >> /home/oracle/.bash_profile
echo "export NLS_LANG=american_america.AL32UTF8" >> /home/oracle/.bash_profile
echo "export NLS_DATE_FORMAT='yyyy/mm/dd hh24:mi:ss'" >> /home/oracle/.bash_profile
echo "umask 022">> /home/oracle/.bash_profile

echo "The Groups and users has been created"
echo "The Environment for grid,oracle also has been set successfully"


7.2 predir.sh脚本


#!/bin/bash
#Purpose:Create the necessary directory for oracle,grid users and change the authention to oracle,grid users.
#Usage:Log on as the superuser('root'),and then execute the command:#./2predir.sh
#Author:Asher Huang

echo "Now create the necessary directory for oracle,grid users and change the authention to oracle,grid users..."
mkdir -p /u01/app/grid 
mkdir -p /u01/app/11.2.0/grid 
mkdir -p /u01/app/oracle 
chown -R oracle:oinstall /u01
chown -R grid:oinstall /u01/app/grid 
chown -R grid:oinstall /u01/app/11.2.0
chmod -R 775 /u01
echo "The necessary directory for oracle,grid users and change the authention to oracle,grid users has been finished"


7.3 prelimits.sh脚本

#!/bin/bash
#Purpose:Change the /etc/security/limits.conf.
#Usage:Log on as the superuser('root'),and then execute the command:#./3prelimits.sh
#Author:Asher Huang

echo "Now modify the /etc/security/limits.conf,but backup it named /etc/security/limits.conf.bak before"
cp /etc/security/limits.conf /etc/security/limits.conf.bak
echo "oracle soft nproc 2047" >>/etc/security/limits.conf
echo "oracle hard nproc 16384" >>/etc/security/limits.conf
echo "oracle soft nofile 1024" >>/etc/security/limits.conf
echo "oracle hard nofile 65536" >>/etc/security/limits.conf
echo "grid soft nproc 2047" >>/etc/security/limits.conf
echo "grid hard nproc 16384" >>/etc/security/limits.conf
echo "grid soft nofile 1024" >>/etc/security/limits.conf
echo "grid hard nofile 65536" >>/etc/security/limits.conf
echo "Modifing the /etc/security/limits.conf has been succeed."

7.4 prelogin.sh脚本

#!/bin/bash
#Purpose:Modify the /etc/pam.d/login.
#Usage:Log on as the superuser('root'),and then execute the command:#./4prelimits.sh
#Author:Asher Huang

echo "Now modify the /etc/pam.d/login,but with a backup named /etc/pam.d/login.bak"
cp /etc/pam.d/login /etc/pam.d/login.bak

echo "session required /lib/security/pam_limits.so" >>/etc/pam.d/login
echo "session required pam_limits.so" >>/etc/pam.d/login

echo "Modifing the /etc/pam.d/login has been succeed."

7.5 preprofile.sh脚本

#!/bin/bash
#Purpose:Modify the /etc/profile.
#Usage:Log on as the superuser('root'),and then execute the command:#./5preprofile.sh
#Author:Asher Huang

echo "Now modify the  /etc/profile,but with a backup named  /etc/profile.bak"
cp /etc/profile /etc/profile.bak
echo 'if [ $USER = "oracle" ]||[ $USER = "grid" ]; then' >>  /etc/profile
echo 'if [ $SHELL = "/bin/ksh" ]; then' >> /etc/profile
echo 'ulimit -p 16384' >> /etc/profile
echo 'ulimit -n 65536' >> /etc/profile
echo 'else' >> /etc/profile
echo 'ulimit -u 16384 -n 65536' >> /etc/profile
echo 'fi' >> /etc/profile
echo "Modifing the /etc/profile has been succeed."

7.6 presysctl.sh脚本

#!/bin/bash
#Purpose:Modify the /etc/sysctl.conf.
#Usage:Log on as the superuser('root'),and then execute the command:#./6presysctl.sh
#Author:Asher Huang

echo "Now modify the /etc/sysctl.conf,but with a backup named /etc/sysctl.bak"
cp /etc/sysctl.conf /etc/sysctl.conf.bak

echo "fs.aio-max-nr = 1048576" >> /etc/sysctl.conf
echo "fs.file-max = 6815744" >> /etc/sysctl.conf
echo "kernel.shmall = 2097152" >> /etc/sysctl.conf
echo "kernel.shmmax = 1054472192" >> /etc/sysctl.conf
echo "kernel.shmmni = 4096" >> /etc/sysctl.conf
echo "kernel.sem = 250 32000 100 128" >> /etc/sysctl.conf
echo "net.ipv4.ip_local_port_range = 9000 65500" >> /etc/sysctl.conf
echo "net.core.rmem_default = 262144" >> /etc/sysctl.conf
echo "net.core.rmem_max = 4194304" >> /etc/sysctl.conf
echo "net.core.wmem_default = 262144" >> /etc/sysctl.conf
echo "net.core.wmem_max = 1048586" >> /etc/sysctl.conf
echo "net.ipv4.tcp_wmem = 262144 262144 262144" >> /etc/sysctl.conf
echo "net.ipv4.tcp_rmem = 4194304 4194304 4194304" >> /etc/sysctl.conf

echo "Modifing the /etc/sysctl.conf has been succeed."
echo "Now make the changes take effect....."
sysctl -p

一步一步在Linux上安装Oracle 11gR2 RAC (7)

创建ASM磁盘组

   以grid用户创建ASM磁盘组,创建的ASM磁盘组为下一步创建数据库提供存储。


① grid用户登录图形界面,执行asmca命令来创建磁盘组:


② 进入ASMCA配置界面后,单击Create,创建新的磁盘组:

③ 输入磁盘组名 DATA,冗余策略选择External,磁盘选择ORCL:VOL3,单击OK

④ DATA磁盘组创建完成,单击OK

⑤ 继续创建磁盘组,磁盘组名FLASH,冗余策略选择External,磁盘选择ORCL:VOL4

⑥ 最后,完成DATAFLASH磁盘组的创建,Exit推出ASMCA图形配置界面:

至此,利用ASMCA创建好DATAFLASH磁盘组。且,可以看到连同之前创建的GRIDDG 3个磁盘组均已经被RAC双节点MOUNT

创建RAC数据库

接下来,使用DBCA来创建RAC数据库。

① 以oracle用户登录图形界面,执行dbca,进入DBCA的图形界面,选择第1项,创建RAC数据库:


② 选择创建数据库选项,Next

③ 选择创建通用数据库,Next

④ 配置类型选择Admin-Managed,输入数据库名devdb,选择双节点,Next

⑤ 选择默认,配置OEM、启用数据库自动维护任务,Next

⑥ 选择数据库用户使用同一口令,Next

 数据库存储选择ASM,使用OMF,数据区选择之前创建的DATA磁盘组,Next

⑧ 指定数据库闪回区,选择之前创建好的FLASH磁盘组,Next

⑨ 选择创建数据库自带Sample SchemaNext

 选择数据库字符集,AL32UTF8Next

 选择默认数据库存储信息,直接Next

⑫ 单击,Finish,开始创建数据库,Next

创建数据库可能持续时间稍长:

 完成创建数据库。

    至此,我们完成创建RAC数据库!!!

一步一步在Linux上安装Oracle 11gR2 RAC (6)

4安装Oracle 软件

   从此步骤开始,我们正式安装oracle软件:

① 以oracle用户登录图形界面,执行/home/oracle/database/runInstaller,进入OUI的图形安装界面:


② 进入OUI安装界面后,选择第3项,跳过软件更新,Next

③ 选择第2项,只安装oracle软件,Next

④ 选择第2项,安装oracle RAC,选择所有节点,Next

⑤ 语言选择默认,EnglishNext

⑥ 选择第1项,安装企业版软件,Next

 选择oracle软件的安装路径其中ORACLE_BASE,ORACLE_HOME均选择之前已经配置好的,可参照2.5节中的配置信息。Next


⑧ 选择oracle用户组,Next

⑨ 执行安装前的预检查,Next

 安装概要信息,Install

 根据提示以root用户分别在两个节点上执行脚本Next

   执行/u01/app/oracle/product/11.2.0/db_1/root.sh 脚本:

node1

[root@node1 ~]# /u01/app/oracle/product/11.2.0/db_1/root.sh 

Performing root user operation for Oracle 11g 


The following environment variables are set as:

    ORACLE_OWNER= oracle

    ORACLE_HOME=  /u01/app/oracle/product/11.2.0/db_1


Enter the full pathname of the local bin directory: [/usr/local/bin]: 

The contents of "dbhome" have not changed. No need to overwrite.

The contents of "oraenv" have not changed. No need to overwrite.

The contents of "coraenv" have not changed. No need to overwrite.


Entries will be added to the /etc/oratab file as needed by

Database Configuration Assistant when a database is created

Finished running generic part of root script.

Now product-specific root actions will be performed.

Finished product-specific root actions.

[root@node1 ~]# 

node2

[root@node2 ~]# /u01/app/oracle/product/11.2.0/db_1/root.sh 

Performing root user operation for Oracle 11g 


The following environment variables are set as:

    ORACLE_OWNER= oracle

    ORACLE_HOME=  /u01/app/oracle/product/11.2.0/db_1


Enter the full pathname of the local bin directory: [/usr/local/bin]: 

The contents of "dbhome" have not changed. No need to overwrite.

The contents of "oraenv" have not changed. No need to overwrite.

The contents of "coraenv" have not changed. No need to overwrite.


Entries will be added to the /etc/oratab file as needed by

Database Configuration Assistant when a database is created

Finished running generic part of root script.

Now product-specific root actions will be performed.

Finished product-specific root actions.

[root@node2 ~]# 

 最后,单击close,完成oracle软件在双节点上的安装。


至此,我们在RAC双节点上完成oracle软件的安装!!!  

一步一步在Linux上安装Oracle 11gR2 RAC (5)

安装Grid Infrastructure

从此步骤开始,我们正式安装Grid软件:

① 以grid用户登录图形界面,执行/home/grid/grid/runInstaller,进入OUI的图形安装界面:


② 进入OUI安装界面后,选择第3项,跳过软件更新,Next

③ 选择集群的Grid InfrastructureNext

④ 选择 advanced InstallationNext

⑤ 语言选择默认,EnglishNext

⑥ 去掉Configure GNS选项,按照之前2.1节中的表格输入Cluster Name:scan-cluster,SCAN Namescan-cluster.localdomainNext

 单击Add,添加第2个节点,Next

⑧ 确认网络接口,Next

⑨ 选择ASM,作为存储,Next


 输入ASM磁盘组名,这里命名为GRIDDG,冗余策略选择External外部,AU大小选择默认1MASM磁盘选择VOL1VOL2Next

 选择给ASMSYSASMSNMP用户配置为相同的口令,并输入口令,Next

 选择不使用IPMINext

 给ASM指定不同的组,Next


 选择GRID软件的安装路径,其中ORACLE_BASE,ORACLE_HOME均选择之前已经配置好的,可参照2.5节中的配置信息。这里需要注意GRID软件的ORACLE_HOME不能是ORACLE_BASE的子目录。

 选择默认的InventoryNext

⑯ 检查出现告警,提示在所有节点上缺失cvuqdisk-1.0.9-1软件包。

可以选择忽略,直接进入下一步安装。也可以从grid安装文件的rpm目录下获取该RPM包,然后进行安装。

node1


[root@node1 rpm]# pwd

/home/grid/grid/rpm

[root@node1 rpm]# ll

total 12

-rwxr-xr-x 1 root root 8551 Sep 22  2011 cvuqdisk-1.0.9-1.rpm

[root@node1 rpm]# rpm -ivh cvuqdisk-1.0.9-1.rpm 

Preparing…                ########################################### [100%]

Using default group oinstall to install package

   1:cvuqdisk               ########################################### [100%]

[root@node1 rpm]# 

node2


[root@node2 ~]# ll

total 96

-rw——- 1 root root  1371 Apr 20 14:48 anaconda-ks.cfg

drwxr-xr-x 2 root root  4096 Apr 26 11:20 asm_rpm

-rwxr-xr-x 1 root root  8551 Apr 27 09:27 cvuqdisk-1.0.9-1.rpm

-rw-r–r– 1 root root 51256 Apr 20 14:48 install.log

-rw-r–r– 1 root root  4077 Apr 20 14:48 install.log.syslog

drwxr-xr-x 2 root root  4096 Apr 24 10:45 shell

[root@node2 ~]# export CVUQDISK_GRP=oinstall

[root@node2 ~]# rpm -ivh cvuqdisk-1.0.9-1.rpm 

Preparing…                ########################################### [100%]

   1:cvuqdisk               ########################################### [100%]

[root@node2 ~]# 

在所有节点上安装完cvuqdisk-1.0.9-1软件后,重新执行预检查,不再有警告信息。

⑰ 进入安装GRID安装之前的概要信息,Install进行安装:

⑱ 根据提示以root用户分别在两个节点上执行脚本:

执行/u01/app/oraInventory/orainstRoot.sh脚本:

node1:

[root@node1 ~]# /u01/app/oraInventory/orainstRoot.sh 

Changing permissions of /u01/app/oraInventory.

Adding read,write permissions for group.

Removing read,write,execute permissions for world.


Changing groupname of /u01/app/oraInventory to oinstall.

The execution of the script is complete.

[root@node1 ~]#

node2

[root@node2 ~]# /u01/app/oraInventory/orainstRoot.sh 

Changing permissions of /u01/app/oraInventory.

Adding read,write permissions for group.

Removing read,write,execute permissions for world.


Changing groupname of /u01/app/oraInventory to oinstall.

The execution of the script is complete.

[root@node2 ~]# 

执行/u01/app/11.2.0/grid/root.sh脚本:

node1

[root@node1 ~]# /u01/app/11.2.0/grid/root

root.sh         rootupgrade.sh  

[root@node1 ~]# /u01/app/11.2.0/grid/root.sh 

Performing root user operation for Oracle 11g 


The following environment variables are set as:

    ORACLE_OWNER= grid

    ORACLE_HOME=  /u01/app/11.2.0/grid


Enter the full pathname of the local bin directory: [/usr/local/bin]: 

   Copying dbhome to /usr/local/bin …

   Copying oraenv to /usr/local/bin …

   Copying coraenv to /usr/local/bin …


Creating /etc/oratab file…

Entries will be added to the /etc/oratab file as needed by

Database Configuration Assistant when a database is created

Finished running generic part of root script.

Now product-specific root actions will be performed.

Using configuration parameter file: /u01/app/11.2.0/grid/crs/install/crsconfig_params

Creating trace directory

OLR initialization – successful

  root wallet

  root wallet cert

  root cert export

  peer wallet

  profile reader wallet

  pa wallet

  peer wallet keys

  pa wallet keys

  peer cert request

  pa cert request

  peer cert

  pa cert

  peer root cert TP

  profile reader root cert TP

  pa root cert TP

  peer pa cert TP

  pa peer cert TP

  profile reader pa cert TP

  profile reader peer cert TP

  peer user cert

  pa user cert

Adding Clusterware entries to inittab

CRS-2672: Attempting to start 'ora.mdnsd' on 'node1'

CRS-2676: Start of 'ora.mdnsd' on 'node1' succeeded

CRS-2672: Attempting to start 'ora.gpnpd' on 'node1'

CRS-2676: Start of 'ora.gpnpd' on 'node1' succeeded

CRS-2672: Attempting to start 'ora.cssdmonitor' on 'node1'

CRS-2672: Attempting to start 'ora.gipcd' on 'node1'

CRS-2676: Start of 'ora.gipcd' on 'node1' succeeded

CRS-2676: Start of 'ora.cssdmonitor' on 'node1' succeeded

CRS-2672: Attempting to start 'ora.cssd' on 'node1'

CRS-2672: Attempting to start 'ora.diskmon' on 'node1'

CRS-2676: Start of 'ora.diskmon' on 'node1' succeeded

CRS-2676: Start of 'ora.cssd' on 'node1' succeeded


ASM created and started successfully.


Disk Group GRIDDG created successfully.


clscfg: -install mode specified

Successfully accumulated necessary OCR keys.

Creating OCR keys for user 'root', privgrp 'root'..

Operation successful.

CRS-4256: Updating the profile

Successful addition of voting disk 9516d145c0254f9ebf50064a6a916182.

Successfully replaced voting disk group with +GRIDDG.

CRS-4256: Updating the profile

CRS-4266: Voting file(s) successfully replaced

##  STATE    File Universal Id                File Name Disk group

—  —–    —————–                ——— ———

 1. ONLINE   9516d145c0254f9ebf50064a6a916182 (ORCL:VOL1) [GRIDDG]

Located 1 voting disk(s).

CRS-2672: Attempting to start 'ora.asm' on 'node1'

CRS-2676: Start of 'ora.asm' on 'node1' succeeded

CRS-2672: Attempting to start 'ora.GRIDDG.dg' on 'node1'

CRS-2676: Start of 'ora.GRIDDG.dg' on 'node1' succeeded

CRS-2672: Attempting to start 'ora.registry.acfs' on 'node1'

CRS-2676: Start of 'ora.registry.acfs' on 'node1' succeeded

Configure Oracle Grid Infrastructure for a Cluster … succeeded

[root@node1 ~]# 

node2

[root@node2 ~]# /u01/app/11.2.0/grid/root.sh 

Performing root user operation for Oracle 11g 


The following environment variables are set as:

    ORACLE_OWNER= grid

    ORACLE_HOME=  /u01/app/11.2.0/grid


Enter the full pathname of the local bin directory: [/usr/local/bin]: 

   Copying dbhome to /usr/local/bin …

   Copying oraenv to /usr/local/bin …

   Copying coraenv to /usr/local/bin …


Creating /etc/oratab file…

Entries will be added to the /etc/oratab file as needed by

Database Configuration Assistant when a database is created

Finished running generic part of root script.

Now product-specific root actions will be performed.

Using configuration parameter file: /u01/app/11.2.0/grid/crs/install/crsconfig_params

Creating trace directory

OLR initialization – successful

Adding Clusterware entries to inittab

CRS-4402: The CSS daemon was started in exclusive mode but found an active CSS daemon on node node1, 

number 1, and is terminating

An active cluster was found during exclusive startup, restarting to join the cluster

Configure Oracle Grid Infrastructure for a Cluster … succeeded

[root@node2 ~]# 

此时,集群件相关的服务已经启动。当然,ASM实例也将在两个节点上启动。

[root@node1 ~]# su – grid

node1-> crs_stat -t

Name           Type           Target    State     Host        

————————————————————

ora.GRIDDG.dg  ora….up.type ONLINE    ONLINE    node1       

ora….N1.lsnr ora….er.type ONLINE    ONLINE    node1       

ora.asm        ora.asm.type   ONLINE    ONLINE    node1       

ora.cvu        ora.cvu.type   ONLINE    ONLINE    node1       

ora.gsd        ora.gsd.type   OFFLINE   OFFLINE               

ora….network ora….rk.type ONLINE    ONLINE    node1       

ora….SM1.asm application    ONLINE    ONLINE    node1       

ora.node1.gsd  application    OFFLINE   OFFLINE               

ora.node1.ons  application    ONLINE    ONLINE    node1       

ora.node1.vip  ora….t1.type ONLINE    ONLINE    node1       

ora….SM2.asm application    ONLINE    ONLINE    node2       

ora.node2.gsd  application    OFFLINE   OFFLINE               

ora.node2.ons  application    ONLINE    ONLINE    node2       

ora.node2.vip  ora….t1.type ONLINE    ONLINE    node2       

ora.oc4j       ora.oc4j.type  ONLINE    ONLINE    node1       

ora.ons        ora.ons.type   ONLINE    ONLINE    node1       

ora….ry.acfs ora….fs.type ONLINE    ONLINE    node1       

ora.scan1.vip  ora….ip.type ONLINE    ONLINE    node1       

node1-> 

⑲ 执行完上述脚本之后,单击OKNext,进入下一步。

 最后,单击close,完成GRID软件在双节点上的安装。


至此,GRID集群件安装成功!!!