概述:
继本人上一个系列的Oracle 11gR2 RAC+DG项目实战教程发布已一年有余,在此期间,那个系列的教程得到众多网友的喜爱与好评,更是在互联网上畅销不衰。为此,众多网友也一直希望本人推出Oracle 10gR2 RAC的系列教程,恰逢前不久,深圳某客户需要将一套Oracle 10gR2双节点RAC生产数据库升级至Oracle 11gR2 RAC,所以便有了本系列实战的视频教程。
为更贴切还原生产过程中的实际操作,本系列教程一个分两大部分:
第一部分,从零开始一步一步搭建一套在OEL 5.5 X86_64位环境下的双节点10gR2 RAC数据库,并将数据库升级至10.2.0.5.0版本。
第二部分,一步一步将10gR2 RAC升级至Oracle 11gR2 RAC,数据库版本选择11g最新的11.2.0.4.0版本。
本文是第二部分:
主要步骤:
一、配置SCAN IP、DNS、停止ntpd服务
二、将oracle用户添加至oper用户组
三、创建grid软件的base、home相关目录
四、创建11gR2 oracle软件的home目录
五、创建11gR2 grid Infrastructure的asm磁盘
六、停止10gR2 RAC软件
七、备份10gR2 RAC软件
八、安装grid软件
九、迁移10g RAC 磁盘组至11gR2 grid
十、安装11gR2 oracle软件
十一、升级10gR2 RAC数据库至11gR2 RAC数据库
1 配置SCAN IP、DNS、停止ntpd服务
DNS服务器配置在此不再赘述,具体可以:
1 查看本人之前的系列视频之《黄伟老师Oracle RAC+DG系列视频+售后安心技术支持服务》第2讲:RAC第一个节点准备工作之:配置网络、DNS服务器。
2 或查看本人系列文章之一步一步在Linux上安装Oracle 11gR2 RAC (2)第2.3节配置DNS服务器,确认SCAN IP可以被解析。
因为我们的双节点服务器指定了oracleonlinux.cn域名,所以具体需要做特别修改的地方,:
A /var/named/chroot/etc/named.rfc1912.zones添加下述内容:
zone “oracleonlinux.cn” IN {
type master;
file “oracleonlinux.cn.zone”;
allow-update { none; };
};
B 添加正向解析配置文件:
[root@rdd named]# pwd
/var/named/chroot/var/named
[root@rdd named]# cat oracleonlinux.cn.zone
$TTL 86400
@ IN SOA oracleonlinux.cn root.oracleonlinux.cn (
42 ; serial (d. adams)
3H ; refresh
15M ; retry
1W ; expiry
1D ) ; minimum
IN NS oracleonlinux.cn
localhost IN A 127.0.0.1
scan-cluster IN A 172.16.0.223
[root@rdd named]#
C 修改反向解析配置文件:
[root@rdd named]# pwd
/var/named/chroot/var/named
[root@rdd named]# ll
total 44
-rw-r—– 1 root named 491 Dec 19 11:39 0.16.172.in-addr.arpa
drwxrwx— 2 named named 4096 Dec 19 10:45 data
-rw-r—– 1 root named 244 Nov 23 14:19 localdomain.zone
-rw-r—– 1 root named 195 Jan 21 2010 localhost.zone
-rw-r—– 1 root named 427 Jan 21 2010 named.broadcast
-rw-r—– 1 root named 1892 Jan 21 2010 named.ca
-rw-r—– 1 root named 424 Jan 21 2010 named.ip6.local
-rw-r—– 1 root named 426 Jan 21 2010 named.local
-rw-r—– 1 root named 427 Jan 21 2010 named.zero
-rw-r—– 1 root named 275 Dec 19 11:39 oracleonlinux.cn.zone
drwxrwx— 2 named named 4096 Jul 27 2004 slaves
[root@rdd named]# cat 0.16.172.in-addr.arpa
$TTL 86400
@ IN SOA oracleonlinux.cn. root.oracleonlinux.cn. (
1997022700 ; Serial
28800 ; Refresh
14400 ; Retry
3600000 ; Expire
86400 ) ; Minimum
IN NS localhost.
1 IN PTR localhost.
223 IN PTR scan-cluster.oracleonlinux.cn.
[root@rdd named]#
D 双节点验证SCAN IP可以解析:
Node1:

Node2:

双节点停止NTP服务:
Node1:
[root@node1 ~]# ll /etc/ntp.conf
-rw-r–r– 1 root root 1833 Dec 9 2009 /etc/ntp.conf
[root@node1 ~]# mv /etc/ntp.conf /etc/ntp.conf.bak
[root@node1 ~]# service ntpd stop
Shutting down ntpd: [FAILED]
[root@node1 ~]# service ntpd status
ntpd is stopped
[root@node1 ~]#
Node2:
[root@node2 ~]# ll /etc/ntp.conf
-rw-r–r– 1 root root 1833 Dec 9 2009 /etc/ntp.conf
[root@node2 ~]# mv /etc/ntp.conf /etc/ntp.conf.bak
[root@node2 ~]# service ntpd status
ntpd is stopped
[root@node2 ~]# service ntpd stop
Shutting down ntpd: [FAILED]
[root@node2 ~]#
2 将oracle用户添加至oper用户组
双节点上创建oper用户组、并将oracle用户添加至oper组。
Node1:
[root@node1 ~]# id oracle
uid=500(oracle) gid=500(oinstall) groups=500(oinstall),501(dba)
[root@node1 ~]# groupadd oper
[root@node1 ~]# usermod -a -G oper oracle
[root@node1 ~]# id oracle
uid=500(oracle) gid=500(oinstall) groups=500(oinstall),501(dba),502(oper)
[root@node1 ~]#
Node2:
[root@node2 ~]# id oracle
[root@node2 ~]# id oracle
uid=500(oracle) gid=500(oinstall) groups=500(oinstall),501(dba)
[root@node2 ~]# groupadd oper
[root@node2 ~]# usermod -a -G oper oracle
[root@node2 ~]# id oracle
uid=500(oracle) gid=500(oinstall) groups=500(oinstall),501(dba),502(oper)
[root@node2 ~]#
3 创建grid软件的base、home相关目录
Note:
这里设置grid软件的oracle_base=/u01/app/grid,grid 软件的oracle_home=/u01/app/11.2.0/grid
需要注意的是,这两个目录是并行的目录,不能像传统的那样将oracle_home设置为oracle_base的子目录!
节点1:
[root@node1 ~]# hostname
node1.oracleonlinux.cn
[root@node1 ~]# mkdir -p /u01/app/grid
[root@node1 ~]# mkdir -p /u01/app/11.2.0/grid
[root@node1 ~]# chown -R oracle:oinstall /u01
[root@node1 ~]# ll /u01/app/
total 12
drwxrwxr-x 3 oracle oinstall 4096 Dec 25 20:19 11.2.0
drwxr-xr-x 2 oracle oinstall 4096 Dec 25 20:18 grid
drwxrwxr-x 5 oracle oinstall 4096 Dec 25 17:25 oracle
[root@node1 ~]#
节点2:
[root@node2 ~]# hostname
node2.oracleonlinux.cn
[root@node2 ~]# mkdir -p /u01/app/grid
[root@node2 ~]# mkdir -p /u01/app/11.2.0/grid
[root@node2 ~]# chown -R oracle:oinstall /u01
[root@node2 ~]# ll /u01/app/
total 24
drwxrwxr-x 3 oracle oinstall 4096 Dec 25 20:21 11.2.0
drwxr-xr-x 2 oracle oinstall 4096 Dec 25 20:21 grid
drwxrwxr-x 5 oracle oinstall 4096 Dec 22 10:17 oracle
[root@node2 ~]#
4 创建11gR2 oracle软件的home目录
Note:
这里设置ORACLE_HOME=/u01/app/oracle/product/11.2.0/db_1,ORACLE_BASE还保留之前的10g版本下的设置。
Node1:
node1-> mkdir -p /u01/app/oracle/product/11.2.0/db_1
node1-> ll /u01/app/oracle/product/
total 8
drwxrwxr-x 4 oracle oinstall 4096 Dec 21 23:23 10.2.0
drwxr-xr-x 3 oracle oinstall 4096 Dec 26 09:32 11.2.0
node1->
Node2:
node2-> pwd
/home/oracle
node2-> mkdir -p /u01/app/oracle/product/11.2.0/db_1
node2-> ll /u01/app/oracle/product/
total 16
drwxrwxr-x 4 oracle oinstall 4096 Dec 21 23:32 10.2.0
drwxr-xr-x 3 oracle oinstall 4096 Dec 26 09:34 11.2.0
node2->
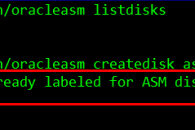
5 创建11gR2 grid Infrastructure的asm磁盘
节点1 上将之前配置的/dev/sdf1硬盘分区创建成第3块ASM磁盘,用作将来安装grid软件时来存放OCR和Voting Disk。
Node1:
[root@node1 ~]# /etc/init.d/oracleasm listdisks
ASMDISK1
ASMDISK2
[root@node1 ~]# /etc/init.d/oracleasm querydisk /dev/sd*
Device “/dev/sda” is not marked as an ASM disk
Device “/dev/sda1” is not marked as an ASM disk
Device “/dev/sda2” is not marked as an ASM disk
Device “/dev/sdb” is not marked as an ASM disk
Device “/dev/sdb1” is not marked as an ASM disk
Device “/dev/sdc” is not marked as an ASM disk
Device “/dev/sdc1” is not marked as an ASM disk
Device “/dev/sdd” is not marked as an ASM disk
Device “/dev/sdd1” is marked an ASM disk with the label “ASMDISK1”
Device “/dev/sde” is not marked as an ASM disk
Device “/dev/sde1” is marked an ASM disk with the label “ASMDISK2”
Device “/dev/sdf” is not marked as an ASM disk
Device “/dev/sdf1” is not marked as an ASM disk
[root@node1 ~]# /etc/init.d/oracleasm createdisk asmdisk3 /dev/sdf1
Marking disk “asmdisk3” as an ASM disk: [ OK ]
[root@node1 ~]# /etc/init.d/oracleasm listdisks
ASMDISK1
ASMDISK2
ASMDISK3
[root@node1 ~]#
Node2:
[root@node2 ~]# /etc/init.d/oracleasm listdisks
ASMDISK1
ASMDISK2
[root@node2 ~]# /etc/init.d/oracleasm scandisks
Scanning the system for Oracle ASMLib disks: [ OK ]
[root@node2 ~]# /etc/init.d/oracleasm listdisks
ASMDISK1
ASMDISK2
ASMDISK3
[root@node2 ~]#