11 升级10gR2 RAC数据库至11gR2 RAC数据库
升级前的准备工作:
A 确保原10g RAC数据库在双节点上都已经正常关闭,如果没关闭,请确保在所有节点上都关闭。
B Copy 10gR2 RAC下的初始化参数文件、口令文件、网络配置文件至11gR2 软件下对应的目录
节点1:
node1-> cp /u01/app/oracle/product/10.2.0/db_1/network/admin/tnsnames.ora /u01/app/oracle/product/11.2.0/db_1/network/admin/
node1-> cp /u01/app/oracle/product/10.2.0/db_1/dbs/initdevdb1.ora /u01/app/oracle/product/11.2.0/db_1/dbs/
node1-> cp /u01/app/oracle/product/10.2.0/db_1/dbs/orapwdevdb1 /u01/app/oracle/product/11.2.0/db_1/dbs/
节点2:
node2-> cp /u01/app/oracle/product/10.2.0/db_1/network/admin/tnsnames.ora /u01/app/oracle/product/11.2.0/db_1/network/admin/
node2-> cp /u01/app/oracle/product/10.2.0/db_1/dbs/initdevdb2.ora /u01/app/oracle/product/11.2.0/db_1/dbs/
node2-> cp /u01/app/oracle/product/10.2.0/db_1/dbs/orapwdevdb2 /u01/app/oracle/product/11.2.0/db_1/dbs/
node2->
Note 1:
请将cluster_database=false,如果不修改该参数的话,在下一步中,用11gR2版本的数据库软件来拉起10gRAC库的时候,您会遭遇下述错误:
即,在启动数据库的过程中,发现Hang:
检查alert日志:
node1-> tail -f /u01/app/oracle/diag/rdbms/devdb/devdb1/trace/alert_devdb1.log
minact-scn: Inst 1 is now the master inc#:2 mmon proc-id:24159 status:0x7
minact-scn status: grec-scn:0x0000.00000000 gmin-scn:0x0000.00000000 gcalc-scn:0x0000.00000000
Errors in file /u01/app/oracle/diag/rdbms/devdb/devdb1/trace/devdb1_ora_24227.trc:
ORA-39701: database must be mounted EXCLUSIVE for UPGRADE or DOWNGRADE
Errors in file /u01/app/oracle/diag/rdbms/devdb/devdb1/trace/devdb1_ora_24227.trc:
ORA-39701: database must be mounted EXCLUSIVE for UPGRADE or DOWNGRADE
Error 39701 happened during db open, shutting down database
USER (ospid: 24227): terminating the instance due to error 39701
Instance terminated by USER, pid = 24227
ORA-1092 signalled during: ALTER DATABASE OPEN MIGRATE…
node1-> oerr ora 39701
39701, 00000, “database must be mounted EXCLUSIVE for UPGRADE or DOWNGRADE”
// *Cause: The database was mounted for SHARED cluster access.
// *Action: Set the CLUSTER_DATABASE initialization parameter to FALSE and
// restart the server with the UPGRADE or DOWNGRADE option.
node1->
Note2:
如果不将原10g RAC下的/u01/app/oracle/product/10.2.0/db_1/network/admin/tnsnames.ora文件拷贝至11g RAC的下u01/app/oracle/product/11.2.0/db_1/network/admin/tnsnames.ora,在下一步中,您将遭遇下述错误:
node1-> sqlplus / as sysdba
SQL*Plus: Release 11.2.0.4.0 Production on Thu Dec 26 10:57:22 2013
Copyright (c) 1982, 2013, Oracle. All rights reserved.
Connected to an idle instance.
SQL> startup upgrade pfile=’/u01/app/oracle/product/11.2.0/db_1/dbs/initdevdb1.ora’;
ORA-32004: obsolete or deprecated parameter(s) specified for RDBMS instance
ORA-00119: invalid specification for system parameter REMOTE_LISTENER
ORA-00132: syntax error or unresolved network name ‘LISTENERS_DEVDB’
SQL>
C 尝试升级数据库
这里通过执行$ORACL_HOME/rdbms/admin/catupgrd.sql来尝试升级数据库。
其实,在这步骤里应该是过不去,因为源库需要执行升级前预检查的工作!
预检查脚本:
Note:
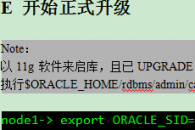
要用新装的11g 11204版本的数据库软件来拉10gRAC的库,注意环境变量的设置,且要以UPGRADE的方式来拉库
node1-> hostname
node1.oracleonlinux.cn
node1-> export ORACLE_SID=devdb1
node1-> export ORACLE_BASE=/u01/app/oracle
node1-> export ORACLE_HOME=/u01/app/oracle/product/11.2.0/db_1
node1-> export PATH=$ORACLE_HOME/bin:$PATH.
node1-> which sqlplus
/u01/app/oracle/product/11.2.0/db_1/bin/sqlplus
node1-> sqlplus / as sysdba
SQL*Plus: Release 11.2.0.4.0 Production on Fri Dec 27 10:27:20 2013
Copyright (c) 1982, 2013, Oracle. All rights reserved.
Connected to an idle instance.
SQL> startup upgrade
ORA-32004: obsolete or deprecated parameter(s) specified for RDBMS instance
ORACLE instance started.
Total System Global Area 1219260416 bytes
Fixed Size 2252744 bytes
Variable Size 385876024 bytes
Database Buffers 822083584 bytes
Redo Buffers 9048064 bytes
Database mounted.
Database opened.
SQL>
然后执行$ORACL_HOME/rdbms/admin/catupgrd.sql脚本来升级数据库:
SQL> spool /home/oracle/upgrade_info.log
SQL> @?/rdbms/admin/catupgrd
DOC>#######################################################################
DOC>#######################################################################
DOC>
DOC> The first time this script is run, there should be no error messages
DOC> generated; all normal upgrade error messages are suppressed.
DOC>
DOC> If this script is being re-run after correcting some problem, then
DOC> expect the following error which is not automatically suppressed:
DOC>
DOC> ORA-00001: unique constraint (<constraint_name>) violated
DOC> possibly in conjunction with
DOC> ORA-06512: at “<procedure/function name>”, line NN
DOC>
DOC> These errors will automatically be suppressed by the Database Upgrade
DOC> Assistant (DBUA) when it re-runs an upgrade.
DOC>
DOC>#######################################################################
DOC>#######################################################################
DOC>#
DOC>######################################################################
DOC>######################################################################
DOC> The following statement will cause an “ORA-01722: invalid number”
DOC> error if the user running this script is not SYS. Disconnect
DOC> and reconnect with AS SYSDBA.
DOC>######################################################################
DOC>######################################################################
DOC>#
no rows selected
DOC>######################################################################
DOC>######################################################################
DOC> The following statement will cause an “ORA-01722: invalid number”
DOC> error if the database server version is not correct for this script.
DOC> Perform “ALTER SYSTEM CHECKPOINT” prior to “SHUTDOWN ABORT”, and use
DOC> a different script or a different server.
DOC>######################################################################
DOC>######################################################################
DOC>#
no rows selected
DOC>#######################################################################
DOC>#######################################################################
DOC> The following statement will cause an “ORA-01722: invalid number”
DOC> error if the database has not been opened for UPGRADE.
DOC>
DOC> Perform “ALTER SYSTEM CHECKPOINT” prior to “SHUTDOWN ABORT”, and
DOC> restart using UPGRADE.
DOC>#######################################################################
DOC>#######################################################################
DOC>#
no rows selected
DOC>#######################################################################
DOC>#######################################################################
DOC> The following statement will cause an “ORA-01722: invalid number”
DOC> error if the Oracle Database Vault option is TRUE. Upgrades cannot
DOC> be run with the Oracle Database Vault option set to TRUE since
DOC> AS SYSDBA connections are restricted.
DOC>
DOC> Perform “ALTER SYSTEM CHECKPOINT” prior to “SHUTDOWN ABORT”, relink
DOC> the server without the Database Vault option, and restart the server
DOC> using UPGRADE mode.
DOC>
DOC>
DOC>#######################################################################
DOC>#######################################################################
DOC>#
no rows selected
DOC>#######################################################################
DOC>#######################################################################
DOC> The following statement will cause an “ORA-01722: invalid number”
DOC> error if Database Vault is installed in the database but the Oracle
DOC> Label Security option is FALSE. To successfully upgrade Oracle
DOC> Database Vault, the Oracle Label Security option must be TRUE.
DOC>
DOC> Perform “ALTER SYSTEM CHECKPOINT” prior to “SHUTDOWN ABORT”,
DOC> relink the server with the OLS option (but without the Oracle Database
DOC> Vault option) and restart the server using UPGRADE.
DOC>#######################################################################
DOC>#######################################################################
DOC>#
no rows selected
DOC>#######################################################################
DOC>#######################################################################
DOC> The following statement will cause an “ORA-01722: invalid number”
DOC> error if bootstrap migration is in progress and logminer clients
DOC> require utlmmig.sql to be run next to support this redo stream.
DOC>
DOC> Run utlmmig.sql
DOC> then (if needed)
DOC> restart the database using UPGRADE and
DOC> rerun the upgrade script.
DOC>#######################################################################
DOC>#######################################################################
DOC>#
no rows selected
DOC>#######################################################################
DOC>#######################################################################
DOC> The following error is generated if the pre-upgrade tool has not been
DOC> run in the old ORACLE_HOME home prior to upgrading a pre-11.2 database:
DOC>
DOC> SELECT TO_NUMBER(‘MUST_HAVE_RUN_PRE-UPGRADE_TOOL_FOR_TIMEZONE’)
DOC> *
DOC> ERROR at line 1:
DOC> ORA-01722: invalid number
DOC>
DOC> o Action:
DOC> Shutdown database (“alter system checkpoint” and then “shutdown abort”).
DOC> Revert to the original oracle home and start the database.
DOC> Run pre-upgrade tool against the database.
DOC> Review and take appropriate actions based on the pre-upgrade
DOC> output before opening the datatabase in the new software version.
DOC>
DOC>#######################################################################
DOC>#######################################################################
DOC>#
Session altered.
Table created.
Table altered.
SELECT TO_NUMBER(‘MUST_HAVE_RUN_PRE-UPGRADE_TOOL_FOR_TIMEZONE’)
*
ERROR at line 1:
ORA-01722: invalid number
Disconnected from Oracle Database 11g Enterprise Edition Release 11.2.0.4.0 – 64bit Production
With the Partitioning, Real Application Clusters, Automatic Storage Management, OLAP,
Data Mining and Real Application Testing options
node1->
果不其然,发现报错!!!
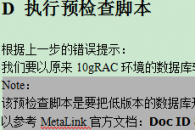
D 执行预检查脚本
根据上一步的错误提示:
我们要以原来10gRAC环境的数据库软件来启动数据库,去执行1个升级前的预检查脚本:
Note:
该预检查脚本是要把低版本的数据库升级到11204版本的数据库需要执行预检查的脚本,可以参考MetaLink官方文档:Doc ID 837570.1及Note 884522.1
这里将utlu112i_7.sql脚本下载至/home/oracle路径下。
这里要以原来10gRAC环境的数据库软件来启动数据库、并且以UPGRADE方式来启库、且需要注意环境变量需要设置成对应原10g RAC数据库软件的配置。
同样,记得需要修改10g参数文件里的cluster_database=false。
Note:
11gR2版本下,oracle会自动创建一个隐含参数”__oracle_base”,而在10g版本下不支持该参数。当然,如果不去掉该参数的话,那么您可能会遇到下述错误:
node1-> export ORACLE_SID=devdb1
node1-> export ORACLE_BASE=/u01/app/oracle
node1-> export ORACLE_HOME=/u01/app/oracle/product/10.2.0/db_1
node1-> export PATH=$ORACLE_HOME/bin:$PATH.
node1-> which sqlplus
/u01/app/oracle/product/10.2.0/db_1/bin/sqlplus
node1-> sqlplus / as sysdba
SQL*Plus: Release 10.2.0.5.0 – Production on Fri Dec 27 10:46:12 2013
Copyright (c) 1982, 2010, Oracle. All Rights Reserved.
Connected to an idle instance.
SQL> startup upgrade
ORA-01078: failure in processing system parameters
LRM-00101: unknown parameter name ‘__oracle_base’
SQL>
解决:
通过11g创建1个pfile,然后将pfile里的初始化参数去掉:
node1-> export ORACLE_SID=devdb1
node1-> export ORACLE_BASE=/u01/app/oracle
node1-> export ORACLE_HOME=/u01/app/oracle/product/11.2.0/db_1
node1-> export PATH=$ORACLE_HOME/bin:$PATH.
node1-> which sqlplus
/u01/app/oracle/product/11.2.0/db_1/bin/sqlplus
node1-> sqlplus / as sysdba
SQL*Plus: Release 11.2.0.4.0 Production on Fri Dec 27 10:47:09 2013
Copyright (c) 1982, 2013, Oracle. All rights reserved.
Connected to an idle instance.
SQL> startup nomount;
ORA-32004: obsolete or deprecated parameter(s) specified for RDBMS instance
ORACLE instance started.
Total System Global Area 1219260416 bytes
Fixed Size 2252744 bytes
Variable Size 385876024 bytes
Database Buffers 822083584 bytes
Redo Buffers 9048064 bytes
SQL> create pfile=’/home/oracle/pfile.txt’ from spfile;
修改注释掉/home/oracle/pfile.txt里的下述参数:
devdb1.__oracle_base=’/u01/app/oracle’#ORACLE_BASE set from environment
以及修改
*.cluster_database=false
再根据提示,重新执行,参数文件指向新生成的且已修改的/home/oracle/pfile.txt:
node1-> export ORACLE_SID=devdb1
node1-> export ORACLE_BASE=/u01/app/oracle
node1-> export ORACLE_HOME=/u01/app/oracle/product/10.2.0/db_1
node1-> export PATH=$ORACLE_HOME/bin:$PATH.
node1-> which sqlplus
/u01/app/oracle/product/10.2.0/db_1/bin/sqlplus
node1-> sqlplus / as sysdba
SQL*Plus: Release 10.2.0.5.0 – Production on Fri Dec 27 10:49:18 2013
Copyright (c) 1982, 2010, Oracle. All Rights Reserved.
Connected to an idle instance.
SQL> startup upgrade pfile=’/home/oracle/pfile.txt’;
ORACLE instance started.
Total System Global Area 1224736768 bytes
Fixed Size 2095896 bytes
Variable Size 318768360 bytes
Database Buffers 889192448 bytes
Redo Buffers 14680064 bytes
Database mounted.
Database opened.
SQL> spool /home/oracle/u2.log
SQL> @/home/oracle/utlu112i_7
Oracle Database 11.2 Pre-Upgrade Information Tool 12-27-2013 10:50:45
Script Version: 11.2.0.4.0 Build: 007
.
**********************************************************************
Database:
**********************************************************************
–> name: DEVDB
–> version: 10.2.0.5.0
–> compatible: 10.2.0.5.0
–> blocksize: 8192
–> platform: Linux x86 64-bit
–> timezone file: V4
.
**********************************************************************
Tablespaces: [make adjustments in the current environment]
**********************************************************************
–> SYSTEM tablespace is adequate for the upgrade.
…. minimum required size: 942 MB
–> UNDOTBS1 tablespace is adequate for the upgrade.
…. minimum required size: 400 MB
–> SYSAUX tablespace is adequate for the upgrade.
…. minimum required size: 731 MB
–> TEMP tablespace is adequate for the upgrade.
…. minimum required size: 60 MB
.
**********************************************************************
Flashback: OFF
**********************************************************************
**********************************************************************
Update Parameters: [Update Oracle Database 11.2 init.ora or spfile]
Note: Pre-upgrade tool was run on a lower version 64-bit database.
**********************************************************************
–> If Target Oracle is 32-Bit, refer here for Update Parameters:
— No update parameter changes are required.
.
–> If Target Oracle is 64-Bit, refer here for Update Parameters:
— No update parameter changes are required.
.
**********************************************************************
Renamed Parameters: [Update Oracle Database 11.2 init.ora or spfile]
**********************************************************************
— No renamed parameters found. No changes are required.
.
**********************************************************************
Obsolete/Deprecated Parameters: [Update Oracle Database 11.2 init.ora or spfile]
**********************************************************************
–> background_dump_dest 11.1 DEPRECATED replaced by “diagnostic_dest”
–> user_dump_dest 11.1 DEPRECATED replaced by “diagnostic_dest”
.
**********************************************************************
Components: [The following database components will be upgraded or installed]
**********************************************************************
–> Oracle Catalog Views [upgrade] VALID
–> Oracle Packages and Types [upgrade] VALID
–> JServer JAVA Virtual Machine [upgrade] VALID
–> Oracle XDK for Java [upgrade] VALID
–> Real Application Clusters [upgrade] VALID
–> Oracle Workspace Manager [upgrade] VALID
–> OLAP Analytic Workspace [upgrade] VALID
–> OLAP Catalog [upgrade] VALID
–> EM Repository [upgrade] VALID
–> Oracle Text [upgrade] VALID
–> Oracle XML Database [upgrade] VALID
–> Oracle Java Packages [upgrade] VALID
–> Oracle interMedia [upgrade] VALID
–> Spatial [upgrade] VALID
–> Data Mining [upgrade] VALID
–> Expression Filter [upgrade] VALID
–> Rule Manager [upgrade] VALID
–> Oracle OLAP API [upgrade] VALID
.
**********************************************************************
Miscellaneous Warnings
**********************************************************************
WARNING: –> Database is using a timezone file older than version 14.
…. After the release migration, it is recommended that DBMS_DST package
…. be used to upgrade the 10.2.0.5.0 database timezone version
…. to the latest version which comes with the new release.
WARNING: –> Database contains INVALID objects prior to upgrade.
…. The list of invalid SYS/SYSTEM objects was written to
…. registry$sys_inv_objs.
…. The list of non-SYS/SYSTEM objects was written to
…. registry$nonsys_inv_objs.
…. Use utluiobj.sql after the upgrade to identify any new invalid
…. objects due to the upgrade.
…. USER MDSYS has 18 INVALID objects.
…. USER DMSYS has 2 INVALID objects.
…. USER PUBLIC has 352 INVALID objects.
…. USER CTXSYS has 1 INVALID objects.
…. USER ORACLE_OCM has 2 INVALID objects.
…. USER EXFSYS has 8 INVALID objects.
…. USER DBSNMP has 4 INVALID objects.
…. USER SYSMAN has 3 INVALID objects.
…. USER XDB has 3 INVALID objects.
…. USER SYS has 429 INVALID objects.
…. USER WMSYS has 25 INVALID objects.
WARNING: –> EM Database Control Repository exists in the database.
…. Direct downgrade of EM Database Control is not supported. Refer to the
…. Upgrade Guide for instructions to save the EM data prior to upgrade.
WARNING: –> Your recycle bin is turned on and currently contains no objects.
…. Because it is REQUIRED that the recycle bin be empty prior to upgrading
…. and your recycle bin is turned on, you may need to execute the command:
PURGE DBA_RECYCLEBIN
…. prior to executing your upgrade to confirm the recycle bin is empty.
.
**********************************************************************
Recommendations
**********************************************************************
Oracle recommends gathering dictionary statistics prior to
upgrading the database.
To gather dictionary statistics execute the following command
while connected as SYSDBA:
EXECUTE dbms_stats.gather_dictionary_stats;
**********************************************************************
Oracle recommends removing all hidden parameters prior to upgrading.
To view existing hidden parameters execute the following command
while connected AS SYSDBA:
SELECT name,description from SYS.V$PARAMETER WHERE name
LIKE ‘\_%’ ESCAPE ‘\’
Changes will need to be made in the init.ora or spfile.
**********************************************************************
SQL>
看到有几个警告,分别是时区、用户的无效对象、以及回收站、数据字典的统计信息,我们可以忽略之!!!!
在这里我们把数据库正常关闭、准备正式升级数据库!!!