PostgreSQL编译安装uuid函数

1 现象

一台源码编译安装之后的PostgreSQL数据库,在创建使用uuid的时候,报错。

 
postgres=# \c
You are now connected to database "postgres" as user "postgres".
postgres=# CREATE OR REPLACE FUNCTION uuid_generate_v4()
postgres-#   RETURNS uuid AS
postgres-# '$libdir/uuid-ossp', 'uuid_generate_v4'
postgres-#   LANGUAGE c VOLATILE STRICT
postgres-#   COST 1;
ERROR:  could not access file "$libdir/uuid-ossp": No such file or directory
postgres=#

2 原因

源码编译安装的时候,没有选择编译uuid,需要重新编译

[postgres@localhost postgresql-9.6.4]$ pwd
/home/postgres/postgresql-9.6.4
[postgres@localhost postgresql-9.6.4]$ ./configure --prefix=/postgres/9.6.4/ --with-ossp-uuid 
..
.
..

这里有两点需要注意:

  • 需要使用之前解压出来的源码文件,如果之前解压的源码被删除,那么可以用与已经安装的数据库软件相同版本的压缩包重新解压;
  • --prefix选项要与之前安装时的相同目录;

在重新编译的过程中,如果遇到下述错误:

checking for uuid_export in -lossp-uuid... no
checking for uuid_export in -luuid... no
configure: error: library 'ossp-uuid' or 'uuid' is required for OSSP-UUID

则,解决:yum install uuid-devel -y

yum install uuid-devel -y

然后,重新继续编译,编译完成之后,再到源码的contrib路径下,执行 make和make install来安装uuid-ossp.

[postgres@localhost uuid-ossp]$ pwd
/home/postgres/postgresql-9.6.4/contrib/uuid-ossp
[postgres@localhost uuid-ossp]$ make 
make: 对“all”无需做任何事。
[postgres@localhost uuid-ossp]$ make install
/bin/mkdir -p '/postgres/9.6.4/lib'
/bin/mkdir -p '/postgres/9.6.4/share/extension'
/bin/install -c -m 755  uuid-ossp.so '/postgres/9.6.4/lib/uuid-ossp.so'
/bin/install -c -m 644 ./uuid-ossp.control '/postgres/9.6.4/share/extension/'
/bin/install -c -m 644 ./uuid-ossp--1.1.sql ./uuid-ossp--1.0--1.1.sql ./uuid-ossp--unpackaged--1.0.sql  '/postgres/9.6.4/share/extension/'
[postgres@localhost uuid-ossp]$ 

3 最后,重新启动数据库

后来经过测试,可以不需要重启数据库。

直接到对应的库里,创建该函数即可。

postgres=# \c zyd_test 
You are now connected to database "zyd_test" as user "postgres".
zyd_test=# CREATE OR REPLACE FUNCTION uuid_generate_v4()
  RETURNS uuid AS
'$libdir/uuid-ossp', 'uuid_generate_v4'
  LANGUAGE c VOLATILE STRICT
  COST 1;
CREATE FUNCTION
zyd_test=# alter function uuid_generate_v4() owner to zyd_test ;
ALTER FUNCTION
zyd_test=#

PostgreSQL数据库SQL性能优化案例二则

零 背景与说明

数据库的性能会影响整个业务系统的性能,而数据库的性能问题,90%以上的几率都是由性能低下的SQL导致的。

一个即将上线的新系统,开发同事发过来2个SQL优化的请求。

PostgreSQL数据库SQL性能优化案例二则

一 SQL一优化分析处理思路

1 格式化原始SQL:

SELECT COUNT(b.code) AS totalCount, b.status AS status	
FROM t_ai_prd_bill b 
WHERE b.status != '900' AND b.is_deleted = FALSE 
GROUP BY b.status

2  原始SQL执行计划

ai=> explain analyze SELECT COUNT(b.code) AS totalCount, b.status AS status 
ai-> FROM t_ai_prd_bill b 
ai-> WHERE b.status != '900' AND b.is_deleted = FALSE 
ai-> GROUP BY b.status;
                                                          QUERY PLAN                                                          
------------------------------------------------------------------------------------------------------------------------------
 HashAggregate  (cost=3870.50..3870.51 rows=1 width=17) (actual time=12.660..12.661 rows=5 loops=1)
   Group Key: status
   ->  Seq Scan on t_ai_prd_bill b  (cost=0.00..3839.75 rows=6150 width=17) (actual time=0.013..11.139 rows=6153 loops=1)
         Filter: ((NOT is_deleted) AND (status <> '900'::bpchar))
         Rows Removed by Filter: 32227
 Planning time: 0.165 ms
 Execution time: 12.719 ms
(7 rows)

ai=>

3 获取t_ai_prd_bill表结构,数据量和数据分布

 
ai=> \d t_ai_prd_bill                                      
                         Table "ai.t_ai_prd_bill"
       Column       |              Type              |      Modifiers      
--------------------+--------------------------------+---------------------
 id                 | character varying(32)          | not null
 code               | character varying(12)          | 
 packet_code        | character varying(10)          | 
 status             | character(3)                   | 
 is_deleted         | boolean                        | default false
 classify_type      | character varying(1)           | 
 last_oper_time     | timestamp(6) without time zone | 
 template_no        | character varying(32)          | 
 oss_key            | character varying(255)         | 
 receive_time       | timestamp(6) without time zone | 
 is_question        | boolean                        | default false
 ocr_type           | character(1)                   | 
 cust_id            | character varying(32)          | 
 exception_category | character(1)                   | default '0'::bpchar
 exception_detail   | character varying(400)         | 
 is_suspended       | boolean                        | 
 is_urgent          | boolean                        | 
 raw_deadline       | timestamp(6) without time zone | 
 priority           | smallint                       | 
 deadline           | timestamp(6) without time zone | 
 company_id         | character varying(32)          | 
 company_name       | character varying(255)         | 
 cust_category      | character varying(32)          | 
 source             | character varying(32)          | 
 mode_code          | character varying(32)          | 
 deadline_category  | character varying(3)           | 
 location_id        | character varying(32)          | 
 cust_name          | character varying(128)         | 
 template_category  | character varying(32)          | 
 platform_id        | character varying(32)          | 
 country_name       | character varying(64)          | 
 is_sended          | boolean                        | default false
Indexes:
    "t_ai_prd_bill_pkey" PRIMARY KEY, btree (id)
    "idx_bill_code" btree (code)
    "idx_bill_create_time_status_deleted" btree (receive_time, status, is_deleted)
    "idx_bill_cust_id" btree (cust_id)
    "idx_bill_packet_code" btree (packet_code)
    "idx_bill_status" btree (status)

ai=> select status,count(*) from t_ai_prd_bill group by status;
 status | count 
--------+-------
 400    |  2511
 401    |   183
 500    |  3174
 600    |     1
 701    |   284
 900    | 32227
(6 rows)

ai=>

4 改写等价SQL

结合上述的t_ai_prd_bill表结构、index信息、以及数据量来分析其执行计划。

t_ai_prd_bill表中的status字段,表示业务状态。status=900表示已完成业务操作的票据,status=901表示理票失败的票据,且随着业务正常流转,该表中status=900的记录会越来越多,占据数据量的绝大多数,同时status=901的记录应该非常少。也就是说,这条SQL原本是想查询在业务上除理票已完成的所有其它状态票据信息,即(status != 900)。

这样的话,如果从业务端着手,考虑将status=901表示理票失败的票据,如改为status=899表示理票失败。则,SQL可以等价改造为:

SELECT COUNT(b.code) AS totalCount, b.status AS status	
FROM t_ai_prd_bill b 
WHERE b.status < '900' AND b.is_deleted = FALSE 
GROUP BY b.status

5 新SQL执行计划

ai=> explain analyze SELECT COUNT(b.code) AS totalCount, b.status AS status 
ai-> FROM t_ai_prd_bill b 
ai-> WHERE b.status < '900' AND b.is_deleted = FALSE ai-> GROUP BY b.status;
                                                                QUERY PLAN                                                                
------------------------------------------------------------------------------------------------------------------------------------------
 HashAggregate  (cost=3782.19..3782.20 rows=1 width=17) (actual time=5.423..5.424 rows=5 loops=1)
   Group Key: status
   ->  Bitmap Heap Scan on t_ai_prd_bill b  (cost=247.95..3751.44 rows=6150 width=17) (actual time=0.996..3.811 rows=6153 loops=1)
         Recheck Cond: (status < '900'::bpchar) Filter: (NOT is_deleted) Heap Blocks: exact=1213 ->  Bitmap Index Scan on idx_bill_status  (cost=0.00..246.41 rows=6150 width=0) (actual time=0.825..0.825 rows=6153 loops=1)
               Index Cond: (status < '900'::bpchar) 
Planning time: 0.156 ms 
Execution time: 5.480 ms 
(10 rows) 
ai=>


6 小结

通过改写SQL前后的执行计划对比,执行时间从12ms降低到5ms。且,随着业务的推进,t_ai_prd_bill表中数据量越来越多,优化带来的效果也会越来越好。

这里,由于业务上将票据状态定义为’100,200,300,400,401,500,600,402,700,701,800,900,901’,每个代码表示每个不同的业务中间状态。该业务需求是想查询统计业务状态不成功的所有票据,程序员自然想到的是通过status !=’900’来过滤数据。却忽视了数据库index里,优化器对于不等于 !=的where条件,走不到index。


二 SQL二优化分析处理思路

1 原始SQL

select a.status, sum(case when b.status is null then 0 else 1 end),
        sum(case when b.cust_category = 'DZ001' then 1 else 0 end) as "zyd"
        , sum(case when b.cust_category = 'ZEJ001' then 1 else 0 end) as "zyj"
        , sum(case when b.cust_category = 'MY001' then 1 else 0 end) as "my"
        from (select regexp_split_to_table('100,200,300,400,401,500,600,402,700,701,800,901', ',') as status) a
        left join t_ai_prd_bill b on (b.status = a.status)
        WHERE b.is_deleted = FALSE
        group by a.status
        order by a.status;

2 原始SQL执行计划

ai=> explain analyze select a.status, sum(case when b.status is null then 0 else 1 end),
ai->         sum(case when b.cust_category = 'DZ001' then 1 else 0 end) as "zyd"
ai->         , sum(case when b.cust_category = 'ZEJ001' then 1 else 0 end) as "zyj"
ai->         , sum(case when b.cust_category = 'MY001' then 1 else 0 end) as "my"
ai->         from (select regexp_split_to_table('100,200,300,400,401,500,600,402,700,701,800,901', ',') as status) a
ai->         left join t_ai_prd_bill b on (b.status = a.status)
ai->         WHERE b.is_deleted = FALSE
ai->         group by a.status
ai->         order by a.status;
                                                                 QUERY PLAN                                                                 
--------------------------------------------------------------------------------------------------------------------------------------------
 GroupAggregate  (cost=6328.61..15390.61 rows=200 width=42) (actual time=70.104..75.647 rows=5 loops=1)
   Group Key: (regexp_split_to_table('100,200,300,400,401,500,600,402,700,701,800,901'::text, ','::text))
   ->  Merge Join  (cost=6328.61..10560.61 rows=241400 width=42) (actual time=43.422..57.495 rows=35869 loops=1)
         Merge Cond: ((regexp_split_to_table('100,200,300,400,401,500,600,402,700,701,800,901'::text, ','::text)) = ((b.status)::text))
         ->  Sort  (cost=64.84..67.34 rows=1000 width=32) (actual time=0.117..0.119 rows=12 loops=1)
               Sort Key: (regexp_split_to_table('100,200,300,400,401,500,600,402,700,701,800,901'::text, ','::text))
               Sort Method: quicksort  Memory: 25kB
               ->  Result  (cost=0.00..5.01 rows=1000 width=0) (actual time=0.094..0.102 rows=12 loops=1)
         ->  Sort  (cost=6263.78..6384.48 rows=48280 width=10) (actual time=43.293..46.852 rows=48280 loops=1)
               Sort Key: ((b.status)::text)
               Sort Method: quicksort  Memory: 3629kB
               ->  Seq Scan on t_ai_prd_bill b  (cost=0.00..2507.80 rows=48280 width=10) (actual time=0.012..30.322 rows=48280 loops=1)
                     Filter: (NOT is_deleted)
 Planning time: 0.367 ms
 Execution time: 75.737 ms
(15 rows)

ai=>

3 分析SQL及其执行计划

原始SQL是想查询统计t_ai_prd_bill表,按照status字段来分组排序。这里,绕了一个弯路,通过引入函数regexp_split_to_table来构造一个单列的虚拟表a,再使其与t_ai_prd_bill表做一次left join,没有必要。同时,从执行计划里看到有个较大的内存排序,Sort Method: quicksort Memory: 3629kB。

4 尝试改写等价SQL

select  b.status,sum(case when b.status is null then 0 else 1 end),
        sum(case when b.cust_category = 'DZ001' then 1 else 0 end) as "zyd"
        , sum(case when b.cust_category = 'ZEJ001' then 1 else 0 end) as "zyj"
        , sum(case when b.cust_category = 'MY001' then 1 else 0 end) as "my"
        from t_ai_prd_bill b 
        WHERE b.is_deleted = FALSE
        group by b.status
        order by b.status;

5 改写后的SQL执行计划

ai=> explain analyze select  b.status,sum(case when b.status is null then 0 else 1 end),
ai->         sum(case when b.cust_category = 'DZ001' then 1 else 0 end) as "zyd"
ai->         , sum(case when b.cust_category = 'ZEJ001' then 1 else 0 end) as "zyj"
ai->         , sum(case when b.cust_category = 'MY001' then 1 else 0 end) as "my"
ai->         from t_ai_prd_bill b 
ai->         WHERE b.is_deleted = FALSE
ai->         group by b.status
ai->         order by b.status;
                                                              QUERY PLAN                                                              
--------------------------------------------------------------------------------------------------------------------------------------
 Sort  (cost=3473.54..3473.55 rows=6 width=10) (actual time=49.986..49.987 rows=6 loops=1)
   Sort Key: status
   Sort Method: quicksort  Memory: 25kB
   ->  HashAggregate  (cost=3473.40..3473.46 rows=6 width=10) (actual time=49.932..49.934 rows=6 loops=1)
         Group Key: status
         ->  Seq Scan on t_ai_prd_bill b  (cost=0.00..2507.80 rows=48280 width=10) (actual time=0.008..11.934 rows=48280 loops=1)
               Filter: (NOT is_deleted)
 Planning time: 0.109 ms
 Execution time: 50.060 ms
(9 rows)

ai=>

6 小结

通过分析,改写SQL,前后对比执行计划,发现减少了不必要的内存排序操作,进而让数据库执行SQL响应更快,提升效率。


配置scp,ssh,rsync到另外一台主机无需密码的另外一种方式

配置scp,ssh,rsync到另外一台主机无需密码的另外一种方式

一 场景需求:

一台AIX主机,一台Linux主机。
需用从AIX主机上通过oracle用户SCP传输文件到Linux主机,且要求SCP传输文件的过程中,要脚本自动化处理,无需人工干预,即免去手动键入密码的环节。

可是AIX上没有ssh-copy-id的可用命令


# ssh-copy-id   
ksh: ssh-copy-id:  not found
# uname -M
IBM,8202-E4B
# uname -n
usp720
# uname -a
AIX usp720 1 6 00F67A854C00
# oslevel 
6.1.0.0
# 

二 解决方法:

1 AIX上,Oracle用户执行,ssh-keygen -t rsa:

ssh-keygen -t rsa
执行过程中,一路Enter回车即可。

2 AIX上,Oracle用户执行,cat ~/.ssh/id_rsa.pub文件内容:

3 Linux上,Oracle用户执行,把步骤2中的文件内容,写入~/.ssh/authorized_keys:

同时,修改~/.ssh/authorized_keys的文件权限为700。

 
chmod 700~/.ssh/authorized_keys

4 AIX上,执行:

 
bash-4.3$ hostname
usp720
bash-4.3$ ssh oracle@172.18.1.12
Last login: Wed Mar 14 16:41:42 2018 from 172.18.1.1
localhost-> hostname
localhost.localdomain
localhost-> 


三 小记:

早在2008年的时候,在学习Oracle 10gR2 RAC在CentOS 4.8上安装部署时,配置RAC双节点,Oracle用户的互信,就采用的这种方法。10年前学的知识点被唤醒了。

在CentOS7上配置etcd的高可用集群

上一篇文章,顺利完成了在CentOS7上安装部署kubernetes。接下来,考虑在CentOS7配置部署etcd的高可用集群。

etcd clustering的官方站点上,看到有3中方式来引导etcd cluster。这里分别以静态引导和public etcd discovery这两种方式给出配置过程。假定:

  • 你已经在CentOS7上安装好etcd,如果没有,可以参考在CentOS 7上安装部署kubernetes,或者利用yum单独安装etcd;
  • 要配置etcd cluster的3台机器分别为:172.16.11.30,172.16.11.71,172.16.11.78;
  • 及其在cluster中的命名依次为:infra0,infra1,infra2;

一 采用static方式开始执行配置:

1 第1台机器172.16.11.30上执行:

[root@localhost ~]# etcd --name infra0 --initial-advertise-peer-urls http://172.16.11.30:2380 --listen-peer-urls http://172.16.11.30:2380 --listen-client-urls http://172.16.11.30:2379,http://127.0.0.1:2379 --advertise-client-urls http://172.16.11.30:2379 --initial-cluster-token etcd-cluster-1 --initial-cluster infra0=http://172.16.11.30:2380,infra1=http://172.16.11.71:2380,infra2=http://172.16.11.78:2380 --initial-cluster-state new

2 第2台机器172.16.11.71上执行:

[root@test-zyd-jy-2 ~]# etcd --name infra1 --initial-advertise-peer-urls http://172.16.11.71:2380 --listen-peer-urls http://172.16.11.71:2380 --listen-client-urls http://172.16.11.71:2379,http://127.0.0.1:2379 --advertise-client-urls http://172.16.11.71:2379 --initial-cluster-token etcd-cluster-1 --initial-cluster infra0=http://172.16.11.30:2380,infra1=http://172.16.11.71:2380,infra2=http://172.16.11.78:2380 --initial-cluster-state new

3 第3台机器172.16.11.78上执行:

[root@localhost ~]# etcd --name infra2 --initial-advertise-peer-urls http://172.16.11.78:2380 --listen-peer-urls http://172.16.11.78:2380 --listen-client-urls http://172.16.11.78:2379,http://127.0.0.1:2379 --advertise-client-urls http://172.16.11.78:2379 --initial-cluster-token etcd-cluster-1 --initial-cluster infra0=http://172.16.11.30:2380,infra1=http://172.16.11.71:2380,infra2=http://172.16.11.78:2380 --initial-cluster-state new

4 任意机器上,验证cluster健康信息:

[root@localhost ~]# etcdctl cluster-health
member 2a21240027dcd247 is healthy: got healthy result from http://172.16.11.30:2379
member 784c02b20039dc5b is healthy: got healthy result from http://172.16.11.71:2379
member b1ca771041e5f776 is healthy: got healthy result from http://172.16.11.78:2379
cluster is healthy
[root@localhost ~]#

5 任意机器上,执行etcdctl set key value:

[root@localhost ~]# etcdctl set k1 100
100
[root@localhost ~]# etcdctl get k1
100
[root@localhost ~]#

6 其它机器上,执行etcdctl get key来验证:

[root@test-zyd-jy-2 ~]# etcdctl get k1
100
[root@test-zyd-jy-2 ~]# 

至此,通过静态方式,配置了一个3个节点的etcd cluster。关于上述命令中,几个参数的说明:

  • name:指位于同一个cluster中的每个etcd 节点的名字,必须唯一;
  • listen-client-urls:etcd接收客户端发起请求的监听地址;
  • advertise-client-urls:etcd cluster中的成员用于给其它成员或者客户端,发送广播的地址信息;该地址既不能配置为localhost的形式,也绝对不能留空;


二 采用discovery方式来配置etcd cluster

discovery方式配置etcd cluster又分为etcd discovery service和DNS discovery方式,这里采用etcd discovery service方式来配置etcd cluster。

1 创建public discovery的token

curl https://discovery.etcd.io/new?size=3

这里,只需在其中任意节点执行上述命令,并获取命令的结果。这个结果集用于整个etcd cluster的配置。

 [root@localhost ~]# curl https://discovery.etcd.io/new?size=3
https://discovery.etcd.io/920771e9b700844194c13ebeff79a543[root@localhost ~]# 

2 第1台机器172.16.11.30上执行:

[root@localhost ~]# etcd --name centos-master --initial-advertise-peer-urls http://172.16.11.30:2380 --listen-peer-urls http://172.16.11.30:2380  --listen-client-urls http://127.0.0.1:4001,http://172.16.11.30:4001 --advertise-client-urls http://172.16.11.30:4001  --discovery https://discovery.etcd.io/920771e9b700844194c13ebeff79a543
2018-01-16 09:40:51.420704 I | etcdmain: etcd Version: 3.2.9
2018-01-16 09:40:51.421594 I | etcdmain: Git SHA: f1d7dd8
2018-01-16 09:40:51.421624 I | etcdmain: Go Version: go1.8.3
2018-01-16 09:40:51.421644 I | etcdmain: Go OS/Arch: linux/amd64
2018-01-16 09:40:51.421673 I | etcdmain: setting maximum number of CPUs to 4, total number of available CPUs is 4
2018-01-16 09:40:51.422265 W | etcdmain: no data-dir provided, using default data-dir ./centos-master.etcd
2018-01-16 09:40:51.422854 I | embed: listening for peers on http://172.16.11.30:2380
2018-01-16 09:40:51.423539 I | embed: listening for client requests on 127.0.0.1:4001
2018-01-16 09:40:51.423694 I | embed: listening for client requests on 172.16.11.30:4001
2018-01-16 09:40:53.344420 N | discovery: found self 425cf1a6e9b4c574 in the cluster
2018-01-16 09:40:53.344515 N | discovery: found 1 peer(s), waiting for 2 more
...
...

3  第1台机器172.16.11.71上执行:

[root@test-zyd-jy-2 ~]# etcd --name centos-master71 --initial-advertise-peer-urls http://172.16.11.71:2380 --listen-peer-urls http://172.16.11.71:2380  --listen-client-urls http://127.0.0.1:4001,http://172.16.11.71:4001 --advertise-client-urls http://172.16.11.71:4001  --discovery https://discovery.etcd.io/920771e9b700844194c13ebeff79a543
2018-01-16 09:42:18.030679 I | etcdmain: etcd Version: 3.2.9
2018-01-16 09:42:18.030858 I | etcdmain: Git SHA: f1d7dd8
2018-01-16 09:42:18.030872 I | etcdmain: Go Version: go1.8.3
2018-01-16 09:42:18.030884 I | etcdmain: Go OS/Arch: linux/amd64
2018-01-16 09:42:18.030897 I | etcdmain: setting maximum number of CPUs to 4, total number of available CPUs is 4
2018-01-16 09:42:18.030920 W | etcdmain: no data-dir provided, using default data-dir ./centos-master71.etcd
2018-01-16 09:42:18.031763 N | etcdmain: the server is already initialized as member before, starting as etcd member...
2018-01-16 09:42:18.032013 I | embed: listening for peers on http://172.16.11.71:2380
2018-01-16 09:42:18.032364 I | embed: listening for client requests on 127.0.0.1:4001
2018-01-16 09:42:18.032463 I | embed: listening for client requests on 172.16.11.71:4001
2018-01-16 09:42:20.062578 N | discovery: found peer 425cf1a6e9b4c574 in the cluster
2018-01-16 09:42:20.062701 N | discovery: found self d91473943b320695 in the cluster
2018-01-16 09:42:20.062718 N | discovery: found 2 peer(s), waiting for 1 more

4  第1台机器172.16.11.78上执行:

[root@localhost ~]# etcd --name centos-master78 --initial-advertise-peer-urls http://172.16.11.78:2380 --listen-peer-urls http://172.16.11.78:2380  --listen-client-urls http://127.0.0.1:4001,http://172.16.11.78:4001 --advertise-client-urls http://172.16.11.78:4001  --discovery https://discovery.etcd.io/920771e9b700844194c13ebeff79a543
2018-01-16 09:43:08.553406 I | etcdmain: etcd Version: 3.2.9
2018-01-16 09:43:08.553770 I | etcdmain: Git SHA: f1d7dd8
2018-01-16 09:43:08.553785 I | etcdmain: Go Version: go1.8.3
2018-01-16 09:43:08.553799 I | etcdmain: Go OS/Arch: linux/amd64
2018-01-16 09:43:08.553812 I | etcdmain: setting maximum number of CPUs to 8, total number of available CPUs is 8
2018-01-16 09:43:08.553840 W | etcdmain: no data-dir provided, using default data-dir ./centos-master78.etcd
2018-01-16 09:43:08.554396 N | etcdmain: the server is already initialized as member before, starting as etcd member...
2018-01-16 09:43:08.554762 I | embed: listening for peers on http://172.16.11.78:2380
2018-01-16 09:43:08.554951 I | embed: listening for client requests on 127.0.0.1:4001
2018-01-16 09:43:08.555013 I | embed: listening for client requests on 172.16.11.78:4001
2018-01-16 09:43:10.345677 N | discovery: found peer 425cf1a6e9b4c574 in the cluster
2018-01-16 09:43:10.345813 N | discovery: found peer d91473943b320695 in the cluster
2018-01-16 09:43:10.345831 N | discovery: found self 98d67d53103d0e5e in the cluster
2018-01-16 09:43:10.345845 N | discovery: found 3 needed peer(s)
2018-01-16 09:43:10.346126 I | etcdserver: name = centos-master78
2018-01-16 09:43:10.346145 I | etcdserver: data dir = centos-master78.etcd
2018-01-16 09:43:10.346161 I | etcdserver: member dir = centos-master78.etcd/member
2018-01-16 09:43:10.346210 I | etcdserver: heartbeat = 100ms
2018-01-16 09:43:10.346226 I | etcdserver: election = 1000ms
2018-01-16 09:43:10.346240 I | etcdserver: snapshot count = 100000
2018-01-16 09:43:10.346286 I | etcdserver: discovery URL= https://discovery.etcd.io/920771e9b700844194c13ebeff79a543
2018-01-16 09:43:10.346322 I | etcdserver: advertise client URLs = http://172.16.11.78:4001
2018-01-16 09:43:10.346368 I | etcdserver: initial advertise peer URLs = http://172.16.11.78:2380
2018-01-16 09:43:10.346429 I | etcdserver: initial cluster = centos-master78=http://172.16.11.78:2380
2018-01-16 09:43:10.353143 I | etcdserver: starting member 98d67d53103d0e5e in cluster 57d019a9b13bd63a
2018-01-16 09:43:10.353268 I | raft: 98d67d53103d0e5e became follower at term 0

5  任意机器上,验证cluster健康信息:

[root@localhost ~]# etcdctl cluster-health
member 425cf1a6e9b4c574 is healthy: got healthy result from http://172.16.11.30:4001
member 98d67d53103d0e5e is healthy: got healthy result from http://172.16.11.78:4001
member d91473943b320695 is healthy: got healthy result from http://172.16.11.71:4001
cluster is healthy
[root@localhost ~]# 

至此,通过static和discovery service两种方式来配置了etcd cluster。


在CentOS 7上安装部署kubernetes

说明:

本文用于记录在CentOS 7.2上,安装配置kubernetes的过程和步骤。部署的2个机器:

IP OS level Kernel version usage
172.16.11.36  CentOS Linux release 7.2.1511 (Core)  3.10.0-327.el7.x86_64 x86_64  kubernetes master节点
 172.16.11.29  CentOS Linux release 7.2.1511 (Core)   3.10.0-327.el7.x86_64 x86_64  kubernetes node节点,或者叫worker节点

下文中,提到的master节点,指在172.16.11.36机器上操作,node节点,指在172.16.11.29机器,所有节点指这2台机器。

关于kubernetes的基础,简单说明:

master节点运行:kube-apiserver、kube-controller-manager、kube-scheduler

node节点运行:kube-proxy、kubelet


这些服务通过systemd来管理,其配置文件位于/etc/kubernets。

安装步骤:

1 所有节点:vi /etc/yum.repos.d/virt7-docker-common-release.repo

 
[root@localhost ~]# cat /etc/yum.repos.d/virt7-docker-common-release.repo
[virt7-docker-common-release]
name=virt7-docker-common-release
baseurl=http://cbs.centos.org/repos/virt7-docker-common-release/x86_64/os/
gpgcheck=0
[root@localhost ~]#

2 所有节点:Install Kubernetes, etcd and flannel on all hosts.This will also pull in docker and cadvisor.

yum -y install –enablerepo=virt7-docker-common-release kubernetes etcd flannel

该命令同样会在机器上安装docker[版本为1.12.6],如果机器上之前已经有安装其它版本docker的话,则可能会出现冲突,如下:

 
...
--> 处理 docker-ce-17.06.0.ce-1.el7.centos.x86_64 与 docker 的冲突
--> 正在使用新的信息重新解决依赖关系
--> 正在检查事务
---> 软件包 docker-ce.x86_64.0.17.06.0.ce-1.el7.centos 将被 升级
---> 软件包 docker-ce.x86_64.0.17.09.1.ce-1.el7.centos 将被 更新
--> 处理 docker-ce-17.09.1.ce-1.el7.centos.x86_64 与 docker-io 的冲突
--> 处理 docker-ce-17.09.1.ce-1.el7.centos.x86_64 与 docker 的冲突
--> 解决依赖关系完成
错误:docker-ce conflicts with 2:docker-1.12.6-68.gitec8512b.el7.centos.x86_64
 您可以尝试添加 --skip-broken 选项来解决该问题
** 发现 6 个已存在的 RPM 数据库问题, 'yum check' 输出如下:
cloog-ppl-0.15.7-1.2.el6.x86_64 有缺少的需求 libgmp.so.3()(64bit)
createrepo-0.9.9-26.el6.noarch 有缺少的需求 python(abi) = ('0', '2.6', None)
libgcj-4.4.7-17.el6.x86_64 有缺少的需求 libgmp.so.3()(64bit)
ppl-0.10.2-11.el6.x86_64 有缺少的需求 libgmp.so.3()(64bit)
1:redhat-upgrade-tool-0.7.22-3.el6.centos.noarch 有缺少的需求 preupgrade-assistant >= ('0', '1.0.2', '4')
1:redhat-upgrade-tool-0.7.22-3.el6.centos.noarch 有缺少的需求 python(abi) = ('0', '2.6', None)
[root@localhost ~]#

我这里的解决办法是,删除之前安装的CE版本的docker。

 
[root@localhost ~]# rpm -qa|grep docker
docker-ce-17.06.0.ce-1.el7.centos.x86_64
[root@localhost ~]# rpm -e docker-ce-17.06.0.ce-1.el7.centos.x86_64
[root@localhost ~]# docker -v
-bash: /usr/bin/docker: 没有那个文件或目录
[root@localhost ~]#

解决冲突之后,继续执行安装:

[root@localhost ~]# yum -y install --enablerepo=virt7-docker-common-release kubernetes etcd flannel
已加载插件:fastestmirror
Loading mirror speeds from cached hostfile
 * base: mirrors.aliyun.com
 * extras: mirrors.cn99.com
 * updates: mirrors.aliyun.com
正在解决依赖关系
--> 正在检查事务
---> 软件包 etcd.x86_64.0.3.2.9-3.el7 将被 安装
---> 软件包 flannel.x86_64.0.0.7.1-2.el7 将被 安装
---> 软件包 kubernetes.x86_64.0.1.5.2-0.7.git269f928.el7 将被 安装
--> 正在处理依赖关系 kubernetes-node = 1.5.2-0.7.git269f928.el7,它被软件包 kubernetes-1.5.2-0.7.git269f928.el7.x86_64 需要
--> 正在处理依赖关系 kubernetes-master = 1.5.2-0.7.git269f928.el7,它被软件包 kubernetes-1.5.2-0.7.git269f928.el7.x86_64 需要
--> 正在检查事务
---> 软件包 kubernetes-master.x86_64.0.1.5.2-0.7.git269f928.el7 将被 安装
--> 正在处理依赖关系 kubernetes-client = 1.5.2-0.7.git269f928.el7,它被软件包 kubernetes-master-1.5.2-0.7.git269f928.el7.x86_64 需要
---> 软件包 kubernetes-node.x86_64.0.1.5.2-0.7.git269f928.el7 将被 安装
--> 正在处理依赖关系 socat,它被软件包 kubernetes-node-1.5.2-0.7.git269f928.el7.x86_64 需要
--> 正在处理依赖关系 docker,它被软件包 kubernetes-node-1.5.2-0.7.git269f928.el7.x86_64 需要
--> 正在处理依赖关系 conntrack-tools,它被软件包 kubernetes-node-1.5.2-0.7.git269f928.el7.x86_64 需要
--> 正在检查事务
---> 软件包 conntrack-tools.x86_64.0.1.4.4-3.el7_3 将被 安装
--> 正在处理依赖关系 libnetfilter_conntrack >= 1.0.6,它被软件包 conntrack-tools-1.4.4-3.el7_3.x86_64 需要
--> 正在处理依赖关系 libnetfilter_cttimeout.so.1(LIBNETFILTER_CTTIMEOUT_1.1)(64bit),它被软件包 conntrack-tools-1.4.4-3.el7_3.x86_64 需要
--> 正在处理依赖关系 libnetfilter_cttimeout.so.1(LIBNETFILTER_CTTIMEOUT_1.0)(64bit),它被软件包 conntrack-tools-1.4.4-3.el7_3.x86_64 需要
--> 正在处理依赖关系 libnetfilter_cthelper.so.0(LIBNETFILTER_CTHELPER_1.0)(64bit),它被软件包 conntrack-tools-1.4.4-3.el7_3.x86_64 需要
--> 正在处理依赖关系 libnetfilter_queue.so.1()(64bit),它被软件包 conntrack-tools-1.4.4-3.el7_3.x86_64 需要
--> 正在处理依赖关系 libnetfilter_cttimeout.so.1()(64bit),它被软件包 conntrack-tools-1.4.4-3.el7_3.x86_64 需要
--> 正在处理依赖关系 libnetfilter_cthelper.so.0()(64bit),它被软件包 conntrack-tools-1.4.4-3.el7_3.x86_64 需要
---> 软件包 docker.x86_64.2.1.12.6-68.gitec8512b.el7.centos 将被 安装
--> 正在处理依赖关系 docker-common = 2:1.12.6-68.gitec8512b.el7.centos,它被软件包 2:docker-1.12.6-68.gitec8512b.el7.centos.x86_64 需要
--> 正在处理依赖关系 docker-client = 2:1.12.6-68.gitec8512b.el7.centos,它被软件包 2:docker-1.12.6-68.gitec8512b.el7.centos.x86_64 需要
---> 软件包 kubernetes-client.x86_64.0.1.5.2-0.7.git269f928.el7 将被 安装
---> 软件包 socat.x86_64.0.1.7.3.2-2.el7 将被 安装
--> 正在检查事务
---> 软件包 docker-client.x86_64.2.1.12.6-68.gitec8512b.el7.centos 将被 安装
---> 软件包 docker-common.x86_64.2.1.12.6-68.gitec8512b.el7.centos 将被 安装
--> 正在处理依赖关系 oci-umount >= 2:2.0.0-1,它被软件包 2:docker-common-1.12.6-68.gitec8512b.el7.centos.x86_64 需要
--> 正在处理依赖关系 container-storage-setup >= 0.7.0-1,它被软件包 2:docker-common-1.12.6-68.gitec8512b.el7.centos.x86_64 需要
--> 正在处理依赖关系 container-selinux >= 2:2.21-2,它被软件包 2:docker-common-1.12.6-68.gitec8512b.el7.centos.x86_64 需要
---> 软件包 libnetfilter_conntrack.x86_64.0.1.0.4-2.el7 将被 升级
---> 软件包 libnetfilter_conntrack.x86_64.0.1.0.6-1.el7_3 将被 更新
---> 软件包 libnetfilter_cthelper.x86_64.0.1.0.0-9.el7 将被 安装
---> 软件包 libnetfilter_cttimeout.x86_64.0.1.0.0-6.el7 将被 安装
---> 软件包 libnetfilter_queue.x86_64.0.1.0.2-2.el7_2 将被 安装
--> 正在检查事务
---> 软件包 container-selinux.noarch.2.2.19-2.1.el7 将被 升级
---> 软件包 container-selinux.noarch.2.2.33-1.git86f33cd.el7 将被 更新
---> 软件包 container-storage-setup.noarch.0.0.8.0-3.git1d27ecf.el7 将被 安装
--> 正在处理依赖关系 parted,它被软件包 container-storage-setup-0.8.0-3.git1d27ecf.el7.noarch 需要
---> 软件包 oci-umount.x86_64.2.2.3.0-1.git51e7c50.el7 将被 安装
--> 正在检查事务
---> 软件包 parted.x86_64.0.3.1-28.el7 将被 安装
--> 解决依赖关系完成

依赖关系解决

=================================================================================================================================
 Package                             架构               版本                                            源                  大小
=================================================================================================================================
正在安装:
 etcd                                x86_64             3.2.9-3.el7                                     extras             8.8 M
 flannel                             x86_64             0.7.1-2.el7                                     extras             6.6 M
 kubernetes                          x86_64             1.5.2-0.7.git269f928.el7                        extras              36 k
为依赖而安装:
 conntrack-tools                     x86_64             1.4.4-3.el7_3                                   base               186 k
 container-storage-setup             noarch             0.8.0-3.git1d27ecf.el7                          extras              33 k
 docker                              x86_64             2:1.12.6-68.gitec8512b.el7.centos               extras              15 M
 docker-client                       x86_64             2:1.12.6-68.gitec8512b.el7.centos               extras             3.4 M
 docker-common                       x86_64             2:1.12.6-68.gitec8512b.el7.centos               extras              82 k
 kubernetes-client                   x86_64             1.5.2-0.7.git269f928.el7                        extras              14 M
 kubernetes-master                   x86_64             1.5.2-0.7.git269f928.el7                        extras              25 M
 kubernetes-node                     x86_64             1.5.2-0.7.git269f928.el7                        extras              14 M
 libnetfilter_cthelper               x86_64             1.0.0-9.el7                                     base                18 k
 libnetfilter_cttimeout              x86_64             1.0.0-6.el7                                     base                18 k
 libnetfilter_queue                  x86_64             1.0.2-2.el7_2                                   base                23 k
 oci-umount                          x86_64             2:2.3.0-1.git51e7c50.el7                        extras              30 k
 parted                              x86_64             3.1-28.el7                                      base               607 k
 socat                               x86_64             1.7.3.2-2.el7                                   base               290 k
为依赖而更新:
 container-selinux                   noarch             2:2.33-1.git86f33cd.el7                         extras              31 k
 libnetfilter_conntrack              x86_64             1.0.6-1.el7_3                                   base                55 k

事务概要
=================================================================================================================================
安装  3 软件包 (+14 依赖软件包)
升级           (  2 依赖软件包)

总下载量:88 M
Downloading packages:
Not downloading deltainfo for extras, MD is 71 k and rpms are 31 k
No Presto metadata available for base
(1/19): container-selinux-2.33-1.git86f33cd.el7.noarch.rpm                                                |  31 kB  00:00:00     
(2/19): container-storage-setup-0.8.0-3.git1d27ecf.el7.noarch.rpm                                         |  33 kB  00:00:00     
(3/19): docker-common-1.12.6-68.gitec8512b.el7.centos.x86_64.rpm                                          |  82 kB  00:00:00     
(4/19): conntrack-tools-1.4.4-3.el7_3.x86_64.rpm                                                          | 186 kB  00:00:00     
(5/19): kubernetes-1.5.2-0.7.git269f928.el7.x86_64.rpm                                                    |  36 kB  00:00:00     
(6/19): docker-client-1.12.6-68.gitec8512b.el7.centos.x86_64.rpm                                          | 3.4 MB  00:00:01     
(7/19): docker-1.12.6-68.gitec8512b.el7.centos.x86_64.rpm                                                 |  15 MB  00:00:05     
(8/19): flannel-0.7.1-2.el7.x86_64.rpm                                                                    | 6.6 MB  00:00:05     
(9/19): libnetfilter_conntrack-1.0.6-1.el7_3.x86_64.rpm                                                   |  55 kB  00:00:00     
(10/19): libnetfilter_cthelper-1.0.0-9.el7.x86_64.rpm                                                     |  18 kB  00:00:00     
(11/19): libnetfilter_cttimeout-1.0.0-6.el7.x86_64.rpm                                                    |  18 kB  00:00:00     
(12/19): libnetfilter_queue-1.0.2-2.el7_2.x86_64.rpm                                                      |  23 kB  00:00:00     
(13/19): kubernetes-client-1.5.2-0.7.git269f928.el7.x86_64.rpm                                            |  14 MB  00:00:06     
(14/19): oci-umount-2.3.0-1.git51e7c50.el7.x86_64.rpm                                                     |  30 kB  00:00:00     
(15/19): parted-3.1-28.el7.x86_64.rpm                                                                     | 607 kB  00:00:00     
(16/19): socat-1.7.3.2-2.el7.x86_64.rpm                                                                   | 290 kB  00:00:01     
(17/19): kubernetes-node-1.5.2-0.7.git269f928.el7.x86_64.rpm                                              |  14 MB  00:00:04     
(18/19): etcd-3.2.9-3.el7.x86_64.rpm                                                                      | 8.8 MB  00:00:11     
(19/19): kubernetes-master-1.5.2-0.7.git269f928.el7.x86_64.rpm                                            |  25 MB  00:00:12     
---------------------------------------------------------------------------------------------------------------------------------
总计                                                                                             6.2 MB/s |  88 MB  00:00:14     
Running transaction check
Running transaction test
Transaction test succeeded
Running transaction
警告:RPM 数据库已被非 yum 程序修改。
** 发现 6 个已存在的 RPM 数据库问题, 'yum check' 输出如下:
cloog-ppl-0.15.7-1.2.el6.x86_64 有缺少的需求 libgmp.so.3()(64bit)
createrepo-0.9.9-26.el6.noarch 有缺少的需求 python(abi) = ('0', '2.6', None)
libgcj-4.4.7-17.el6.x86_64 有缺少的需求 libgmp.so.3()(64bit)
ppl-0.10.2-11.el6.x86_64 有缺少的需求 libgmp.so.3()(64bit)
1:redhat-upgrade-tool-0.7.22-3.el6.centos.noarch 有缺少的需求 preupgrade-assistant >= ('0', '1.0.2', '4')
1:redhat-upgrade-tool-0.7.22-3.el6.centos.noarch 有缺少的需求 python(abi) = ('0', '2.6', None)
  正在安装    : kubernetes-client-1.5.2-0.7.git269f928.el7.x86_64                                                           1/21 
  正在安装    : kubernetes-master-1.5.2-0.7.git269f928.el7.x86_64                                                           2/21 
  正在更新    : libnetfilter_conntrack-1.0.6-1.el7_3.x86_64                                                                 3/21 
  正在安装    : socat-1.7.3.2-2.el7.x86_64                                                                                  4/21 
  正在安装    : parted-3.1-28.el7.x86_64                                                                                    5/21 
  正在安装    : container-storage-setup-0.8.0-3.git1d27ecf.el7.noarch                                                       6/21 
  正在安装    : libnetfilter_cthelper-1.0.0-9.el7.x86_64                                                                    7/21 
  正在更新    : 2:container-selinux-2.33-1.git86f33cd.el7.noarch                                                            8/21 
  正在安装    : libnetfilter_queue-1.0.2-2.el7_2.x86_64                                                                     9/21 
  正在安装    : 2:oci-umount-2.3.0-1.git51e7c50.el7.x86_64                                                                 10/21 
  正在安装    : 2:docker-common-1.12.6-68.gitec8512b.el7.centos.x86_64                                                     11/21 
  正在安装    : 2:docker-client-1.12.6-68.gitec8512b.el7.centos.x86_64                                                     12/21 
  正在安装    : 2:docker-1.12.6-68.gitec8512b.el7.centos.x86_64                                                            13/21 
warning: /etc/docker/daemon.json created as /etc/docker/daemon.json.rpmnew
  正在安装    : libnetfilter_cttimeout-1.0.0-6.el7.x86_64                                                                  14/21 
  正在安装    : conntrack-tools-1.4.4-3.el7_3.x86_64                                                                       15/21 
  正在安装    : kubernetes-node-1.5.2-0.7.git269f928.el7.x86_64                                                            16/21 
  正在安装    : kubernetes-1.5.2-0.7.git269f928.el7.x86_64                                                                 17/21 
  正在安装    : etcd-3.2.9-3.el7.x86_64                                                                                    18/21 
  正在安装    : flannel-0.7.1-2.el7.x86_64                                                                                 19/21 
  清理        : 2:container-selinux-2.19-2.1.el7.noarch                                                                    20/21 
  清理        : libnetfilter_conntrack-1.0.4-2.el7.x86_64                                                                  21/21 
  验证中      : 2:docker-client-1.12.6-68.gitec8512b.el7.centos.x86_64                                                      1/21 
  验证中      : container-storage-setup-0.8.0-3.git1d27ecf.el7.noarch                                                       2/21 
  验证中      : libnetfilter_cttimeout-1.0.0-6.el7.x86_64                                                                   3/21 
  验证中      : 2:oci-umount-2.3.0-1.git51e7c50.el7.x86_64                                                                  4/21 
  验证中      : flannel-0.7.1-2.el7.x86_64                                                                                  5/21 
  验证中      : libnetfilter_queue-1.0.2-2.el7_2.x86_64                                                                     6/21 
  验证中      : 2:docker-common-1.12.6-68.gitec8512b.el7.centos.x86_64                                                      7/21 
  验证中      : kubernetes-node-1.5.2-0.7.git269f928.el7.x86_64                                                             8/21 
  验证中      : kubernetes-client-1.5.2-0.7.git269f928.el7.x86_64                                                           9/21 
  验证中      : 2:container-selinux-2.33-1.git86f33cd.el7.noarch                                                           10/21 
  验证中      : kubernetes-master-1.5.2-0.7.git269f928.el7.x86_64                                                          11/21 
  验证中      : etcd-3.2.9-3.el7.x86_64                                                                                    12/21 
  验证中      : libnetfilter_cthelper-1.0.0-9.el7.x86_64                                                                   13/21 
  验证中      : parted-3.1-28.el7.x86_64                                                                                   14/21 
  验证中      : conntrack-tools-1.4.4-3.el7_3.x86_64                                                                       15/21 
  验证中      : socat-1.7.3.2-2.el7.x86_64                                                                                 16/21 
  验证中      : libnetfilter_conntrack-1.0.6-1.el7_3.x86_64                                                                17/21 
  验证中      : 2:docker-1.12.6-68.gitec8512b.el7.centos.x86_64                                                            18/21 
  验证中      : kubernetes-1.5.2-0.7.git269f928.el7.x86_64                                                                 19/21 
  验证中      : 2:container-selinux-2.19-2.1.el7.noarch                                                                    20/21 
  验证中      : libnetfilter_conntrack-1.0.4-2.el7.x86_64                                                                  21/21 

已安装:
  etcd.x86_64 0:3.2.9-3.el7          flannel.x86_64 0:0.7.1-2.el7          kubernetes.x86_64 0:1.5.2-0.7.git269f928.el7         

作为依赖被安装:
  conntrack-tools.x86_64 0:1.4.4-3.el7_3                         container-storage-setup.noarch 0:0.8.0-3.git1d27ecf.el7        
  docker.x86_64 2:1.12.6-68.gitec8512b.el7.centos                docker-client.x86_64 2:1.12.6-68.gitec8512b.el7.centos         
  docker-common.x86_64 2:1.12.6-68.gitec8512b.el7.centos         kubernetes-client.x86_64 0:1.5.2-0.7.git269f928.el7            
  kubernetes-master.x86_64 0:1.5.2-0.7.git269f928.el7            kubernetes-node.x86_64 0:1.5.2-0.7.git269f928.el7              
  libnetfilter_cthelper.x86_64 0:1.0.0-9.el7                     libnetfilter_cttimeout.x86_64 0:1.0.0-6.el7                    
  libnetfilter_queue.x86_64 0:1.0.2-2.el7_2                      oci-umount.x86_64 2:2.3.0-1.git51e7c50.el7                     
  parted.x86_64 0:3.1-28.el7                                     socat.x86_64 0:1.7.3.2-2.el7                                   

作为依赖被升级:
  container-selinux.noarch 2:2.33-1.git86f33cd.el7                 libnetfilter_conntrack.x86_64 0:1.0.6-1.el7_3                

完毕!
[root@localhost ~]# 
[root@localhost ~]# docker -v
Docker version 1.12.6, build ec8512b/1.12.6
[root@localhost ~]#

3 配置所有节点的hosts文件,

[root@localhost ~]# cat /etc/hosts
127.0.0.1   localhost localhost.localdomain localhost4 localhost4.localdomain4
::1         localhost localhost.localdomain localhost6 localhost6.localdomain6
172.16.11.36 centos-master
172.16.11.29 centos-minion-1
[root@localhost ~]#

4  所有节点 Edit /etc/kubernetes/config which will be the same on all hosts to contain

[root@localhost ~]# vi /etc/kubernetes/config 
###
# kubernetes system config
#
# The following values are used to configure various aspects of all
# kubernetes services, including
#
#   kube-apiserver.service
#   kube-controller-manager.service
#   kube-scheduler.service
#   kubelet.service
#   kube-proxy.service
# logging to stderr means we get it in the systemd journal
KUBE_LOGTOSTDERR="--logtostderr=true"

# journal message level, 0 is debug
KUBE_LOG_LEVEL="--v=0"

# Should this cluster be allowed to run privileged docker containers
KUBE_ALLOW_PRIV="--allow-privileged=false"

# How the controller-manager, scheduler, and proxy find the apiserver
KUBE_MASTER="--master=http://centos-master:8080"

这里,其实,就是把该文件的最后一行从

KUBE_MASTER=”–master=http://127.0.0.1:8080″

改为:

KUBE_MASTER=”–master=http://centos-master:8080″ 。

5 关闭所有节点的SELinux和防火墙

 
setenforce 0
systemctl disable iptables-services firewalld
systemctl stop iptables-services firewalld

6 只修改master节点的 /etc/etcd/etcd.conf包含下列,其它不变:

 
# [member]
ETCD_NAME=default
ETCD_DATA_DIR="/var/lib/etcd/default.etcd"
ETCD_LISTEN_CLIENT_URLS="http://0.0.0.0:2379"

#[cluster]
ETCD_ADVERTISE_CLIENT_URLS="http://0.0.0.0:2379"

7 只修改master节点的/etc/kubernetes/apiserver包含下列,其它不变:


# The address on the local server to listen to.
KUBE_API_ADDRESS="--address=0.0.0.0"

# The port on the local server to listen on.
KUBE_API_PORT="--port=8080"

# Port kubelets listen on
KUBELET_PORT="--kubelet-port=10250"

# Comma separated list of nodes in the etcd cluster
KUBE_ETCD_SERVERS="--etcd-servers=http://centos-master:2379"

# Address range to use for services
KUBE_SERVICE_ADDRESSES="--service-cluster-ip-range=10.254.0.0/16"

# Add your own!
KUBE_API_ARGS=""

8 master节点上,启动ETCD服务

systemctl start etcd
etcdctl mkdir /kube-centos/network
etcdctl mk /kube-centos/network/config "{ \"Network\": \"172.30.0.0/16\", \"SubnetLen\": 24, \"Backend\": { \"Type\": \"vxlan\" } }"

9 master节点修改/etc/sysconfig/flanneld

 
[root@localhost ~]# cat /etc/sysconfig/flanneld
# Flanneld configuration options  

# etcd url location.  Point this to the server where etcd runs
FLANNEL_ETCD_ENDPOINTS="http://centos-master:2379"

# etcd config key.  This is the configuration key that flannel queries
# For address range assignment
FLANNEL_ETCD_PREFIX="/kube-centos/network"

# Any additional options that you want to pass
#FLANNEL_OPTIONS=""
 
[root@localhost ~]#

10 master节点启动服务

for SERVICES in etcd kube-apiserver kube-controller-manager kube-scheduler flanneld; do
    systemctl restart $SERVICES
    systemctl enable $SERVICES
    systemctl status $SERVICES
done

11 node节点修改/etc/kubernetes/kubelet

 
[root@dev-malay-29 ~]# cat /etc/kubernetes/kubelet 
###
# kubernetes kubelet (minion) config

# The address for the info server to serve on (set to 0.0.0.0 or "" for all interfaces)
KUBELET_ADDRESS="--address=0.0.0.0"

# The port for the info server to serve on
# KUBELET_PORT="--port=10250"

# You may leave this blank to use the actual hostname
KUBELET_HOSTNAME="--hostname-override=centos-minion-1"

# location of the api-server
KUBELET_API_SERVER="--api-servers=http://centos-master:8080"

# pod infrastructure container
KUBELET_POD_INFRA_CONTAINER="--pod-infra-container-image=registry.access.redhat.com/rhel7/pod-infrastructure:latest"

# Add your own!
KUBELET_ARGS=""
[root@dev-malay-29 ~]#

KUBELET_HOSTNAME=”–hostname-override=centos-minion-1″依实际情况调整。这里的值,是步骤3中指定的机器名,如果有多个node节点的话,则同样依照实际情况调整来配置。

12 node节点修改/etc/sysconfig/flanneld

 
[root@dev-malay-29 ~]# cat /etc/sysconfig/flanneld
# Flanneld configuration options  

# etcd url location.  Point this to the server where etcd runs
FLANNEL_ETCD_ENDPOINTS="http://centos-master:2379"

# etcd config key.  This is the configuration key that flannel queries
# For address range assignment
FLANNEL_ETCD_PREFIX="/kube-centos/network"

# Any additional options that you want to pass
#FLANNEL_OPTIONS=""
 
[root@dev-malay-29 ~]#

13 node节点启动服务

 for SERVICES in kube-proxy kubelet flanneld docker; do
    systemctl restart $SERVICES
    systemctl enable $SERVICES
    systemctl status $SERVICES
done

14 node节点配置kubectl

 
kubectl config set-cluster default-cluster --server=http://centos-master:8080
kubectl config set-context default-context --cluster=default-cluster --user=default-admin
kubectl config use-context default-context
...
[root@dev-malay-29 ~]# kubectl config set-cluster default-cluster --server=http://centos-master:8080
Cluster "default-cluster" set.
[root@dev-malay-29 ~]# kubectl config set-context default-context --cluster=default-cluster --user=default-admin
Context "default-context" set.
[root@dev-malay-29 ~]# kubectl config use-context default-context
Switched to context "default-context".
[root@dev-malay-29 ~]# 

15 验证

master、node都可以通过执行下述命令来验证:

kubectl get nodes

 
[root@localhost manifests]# kubectl get nodes
NAME              STATUS     AGE
centos-minion-1   NotReady   2s
[root@localhost manifests]# 

[root@dev-malay-29 ~]# kubectl get nodes
NAME              STATUS    AGE
centos-minion-1   Ready     12s
[root@dev-malay-29 ~]# 

16 参考引用

https://kubernetes.io/docs/getting-started-guides/centos/centos_manual_config/

至此,在Centos7上完成了部署一个master节点,一个node节点的kubernetes环境。

PostgreSQL删除表中的大量数据之后,统计信息不准的一则案例

一 问题现象

接开发同事反馈,某个日志表原来有100多万条记录,删除到只剩下200多条记录,在删除大量数据之后,执行查询,还是非常缓慢。

 postgres=# \c superp2b_test superp2b_test
You are now connected to database "superp2b_test" as user "superp2b_test".
superp2b_test=> select count(*) from t_sys_exception_log;
count
-------
267
(1 row)
 
Time: 101702.768 ms
superp2b_test=> create table t_sys_exception_log_bak as select * from t_sys_exception_log;
SELECT 267
Time: 160531.138 ms
superp2b_test=> select count(*) from t_sys_exception_log_bak ;
count
-------
267
(1 row)
 
Time: 87.180 ms
superp2b_test=>

通过执行CTAS复制该表为t_sys_exception_log_bak之后,查询该复制表却不慢。

二查看表结构和表及相关索引统计信息

superp2b_test=> \d t_sys_exception_log
              Table "public.t_sys_exception_log"
      Column      |              Type              | Modifiers
------------------+--------------------------------+-----------
 id               | character(32)                  | not null
 class_name       | character varying(512)         |
 create_time      | timestamp(6) without time zone |
 remark           | character varying(1024)        |
 type             | character varying(4)           |
 exception_type   | character varying(1024)        |
 exception_detail | text                           |
 method_name      | character varying(255)         |
 source           | character varying(1024)        |
 target           | character varying(1024)        |
 operator_id      | character(32)                  |
 operator_name    | character varying(255)         |
Indexes:
    "t_sys_exception_log_pkey" PRIMARY KEY, btree (id)
    "t_sys_exception_log_class_name_idx" btree (class_name)
    "t_sys_exception_log_create_time_idx" btree (create_time)
    "t_sys_exception_log_exception_type_idx" btree (exception_type)
    "t_sys_exception_log_method_name_idx" btree (method_name)
    "t_sys_exception_log_operator_id_idx" btree (operator_id)
    "t_sys_exception_log_operator_name_idx" btree (operator_name)
         
superp2b_test=> select relname,relpages,to_char(reltuples,'999999999') from pg_class where relname like 't_sys_exception_log%';
                relname                 | relpages |  to_char  
----------------------------------------+----------+------------
 t_sys_exception_log                    |   293660 |    1515498
 t_sys_exception_log_class_name_idx     |    14813 |    1515502
 t_sys_exception_log_pkey               |    20655 |    1515502
 t_sys_exception_log_create_time_idx    |     4162 |    1515502
 t_sys_exception_log_exception_type_idx |    12626 |    1515502
 t_sys_exception_log_method_name_idx    |     8555 |    1515502
 t_sys_exception_log_operator_id_idx    |     5302 |    1515502
 t_sys_exception_log_operator_name_idx  |     5267 |    1515502
 t_sys_exception_log_bak                |       38 |        267
(9 rows)
Time: 12.494 ms
superp2b_test=>

从上,看到,虽然表里当前只有267条记录,但是由于删除大量数据之后,数据库没有及时更新该表的统计信息,导致数据库依然认为该表有1515498条记录,占用了293660个磁盘页。

三 分析其执行计划

superp2b_test=> explain analyze select count(*) from t_sys_exception_log;
QUERY PLAN
-------------------------------------------------------------------------------------------------------------------------------------
Aggregate (cost=312603.72..312603.73 rows=1 width=0) (actual time=25771.014..25771.014 rows=1 loops=1)
-> Seq Scan on t_sys_exception_log (cost=0.00..308814.98 rows=1515498 width=0) (actual time=14.402..25770.915 rows=267 loops=1)
Total runtime: 25771.087 ms
(3 rows)
 
Time: 25779.274 ms
superp2b_test=>

的确,发现优化器对于该select count(*) from t_sys_exception_log语句,执行的全表扫描,且,优化器认为该表仍然有rows=1515498。实际上,该表只有267条记录。

四 收集统计信息

 superp2b_test=> analyze verbose t_sys_exception_log;
信息:  正在分析 "public.t_sys_exception_log"
信息:  "t_sys_exception_log": 已经扫描了293660页的30000, 包含28可用的记录和154878不能用的记录; 在示例中有28条记录,估算所有记录为1360704 .
ANALYZE
Time: 14294.586 ms
superp2b_test=> select relname,relpages,to_char(reltuples,'999999999') from pg_class where relname like 't_sys_exception_log%';
                relname                 | relpages |  to_char  
----------------------------------------+----------+------------
 t_sys_exception_log                    |   293660 |    1360704
 t_sys_exception_log_class_name_idx     |    14818 |    1360704
 t_sys_exception_log_pkey               |    20659 |    1360704
 t_sys_exception_log_create_time_idx    |     4163 |    1360704
 t_sys_exception_log_exception_type_idx |    12629 |    1360704
 t_sys_exception_log_method_name_idx    |     8559 |    1360704
 t_sys_exception_log_operator_id_idx    |     5304 |    1360704
 t_sys_exception_log_operator_name_idx  |     5268 |    1360704
 t_sys_exception_log_bak                |       38 |        267
(9 rows)
Time: 18.558 ms
superp2b_test=> explain analyze select count(*) from t_sys_exception_log;                                                     
                                                             QUERY PLAN                                                             
-------------------------------------------------------------------------------------------------------------------------------------
 Aggregate  (cost=310668.80..310668.81 rows=1 width=0) (actual time=24315.485..24315.485 rows=1 loops=1)
   ->  Seq Scan on t_sys_exception_log  (cost=0.00..307267.04 rows=1360704 width=0) (actual time=19.217..24315.358 rows=267 loops=1)
 Total runtime: 24315.574 ms
(3 rows)
Time: 24346.502 ms
superp2b_test=>

通过analyze来收集统计信息时,数据库扫描了该表所占有的磁盘页的293660页中的30000页。同时,数据库认为该表仍然有1360704条记录。此时,数据库收集的统计信息依然是不准确的,或者说是错误的。且,数据库还把这个错误的统计信息更新到字典表pg_statistic中。

接下来,再执行一次统计信息收集,并查看其select count(*) from t_sys_exception_log语句的执行计划:

superp2b_test=> analyze verbose t_sys_exception_log;                                                                          
信息:  正在分析 "public.t_sys_exception_log"
信息:  "t_sys_exception_log": 已经扫描了293660页的30000, 包含26可用的记录和105480不能用的记录; 在示例中有26条记录,估算所有记录为1221722 .
ANALYZE
Time: 15645.520 ms
superp2b_test=> select relname,relpages,to_char(reltuples,'999999999') from pg_class where relname like 't_sys_exception_log%';
                relname                 | relpages |  to_char  
----------------------------------------+----------+------------
 t_sys_exception_log                    |   293660 |    1221722
 t_sys_exception_log_class_name_idx     |    14818 |    1221722
 t_sys_exception_log_pkey               |    20659 |    1221722
 t_sys_exception_log_create_time_idx    |     4163 |    1221722
 t_sys_exception_log_exception_type_idx |    12629 |    1221722
 t_sys_exception_log_method_name_idx    |     8559 |    1221722
 t_sys_exception_log_operator_id_idx    |     5304 |    1221722
 t_sys_exception_log_operator_name_idx  |     5268 |    1221722
 t_sys_exception_log_bak                |       38 |        267
(9 rows)
Time: 11.437 ms
superp2b_test=> explain analyze select count(*) from t_sys_exception_log;
                                                             QUERY PLAN                                                            
------------------------------------------------------------------------------------------------------------------------------------
 Aggregate  (cost=308931.52..308931.53 rows=1 width=0) (actual time=21058.435..21058.435 rows=1 loops=1)
   ->  Seq Scan on t_sys_exception_log  (cost=0.00..305877.22 rows=1221722 width=0) (actual time=0.146..21058.327 rows=268 loops=1)
 Total runtime: 21058.525 ms
(3 rows)
Time: 21161.205 ms
superp2b_test=>

数据库依然认为,t_sys_exception_log占用293660个磁盘页,有1221722条记录。同时,这个统计信息也是错误的。

五 数据库自动收集统计信息

由于手头上有事儿,暂时停止了上述手工收集该表统计信息的工作。忙完其它事情之后,再回过头来继续的时候,发现了“惊喜”。

 superp2b_test=> explain analyze select count(*) from t_sys_exception_log;                                                      
                                                                                   QUERY PLAN                                                                                   
--------------------------------------------------------------------------------------------------------------------------------------------------------------------------------
 Aggregate  (cost=21547.18..21547.19 rows=1 width=0) (actual time=27.386..27.386 rows=1 loops=1)
   ->  Index Only Scan using t_sys_exception_log_create_time_idx on t_sys_exception_log  (cost=0.30..20562.24 rows=393976 width=0) (actual time=9.056..27.337 rows=268 loops=1)
         Heap Fetches: 23
 Total runtime: 27.450 ms
(4 rows)

Time: 127.384 ms
superp2b_test=> select relname,relpages,to_char(reltuples,'999999999') from pg_class where relname like 't_sys_exception_log%';
                relname                 | relpages |  to_char   
----------------------------------------+----------+------------
 t_sys_exception_log                    |   293660 |     393976
 t_sys_exception_log_class_name_idx     |    14818 |        268
 t_sys_exception_log_pkey               |    20659 |        268
 t_sys_exception_log_create_time_idx    |     4163 |        268
 t_sys_exception_log_exception_type_idx |    12629 |        268
 t_sys_exception_log_method_name_idx    |     8559 |        268
 t_sys_exception_log_operator_id_idx    |     5304 |        268
 t_sys_exception_log_operator_name_idx  |     5268 |        268
 t_sys_exception_log_bak                |       38 |        267
(9 rows)

Time: 18.922 ms
superp2b_test=> analyze verbose t_sys_exception_log;                                                                           
信息:  正在分析 "public.t_sys_exception_log"
信息:  "t_sys_exception_log": 已经扫描了293660页的30000, 包含32可用的记录和20不能用的记录; 在示例中有32条记录,估算所有记录为353760 .
ANALYZE
Time: 22083.290 ms
superp2b_test=> select relname,relpages,to_char(reltuples,'999999999') from pg_class where relname like 't_sys_exception_log%';
                relname                 | relpages |  to_char   
----------------------------------------+----------+------------
 t_sys_exception_log                    |   293660 |     353760
 t_sys_exception_log_class_name_idx     |    14818 |     353760
 t_sys_exception_log_pkey               |    20659 |     353760
 t_sys_exception_log_create_time_idx    |     4163 |     353760
 t_sys_exception_log_exception_type_idx |    12629 |     353760
 t_sys_exception_log_method_name_idx    |     8559 |     353760
 t_sys_exception_log_operator_id_idx    |     5304 |     353760
 t_sys_exception_log_operator_name_idx  |     5268 |     353760
 t_sys_exception_log_bak                |       38 |        267
(9 rows)

Time: 13.805 ms
superp2b_test=> explain analyze select count(*) from t_sys_exception_log;                                                      
                                                                                  QUERY PLAN                                                                                   
-------------------------------------------------------------------------------------------------------------------------------------------------------------------------------
 Aggregate  (cost=20885.77..20885.78 rows=1 width=0) (actual time=0.193..0.194 rows=1 loops=1)
   ->  Index Only Scan using t_sys_exception_log_create_time_idx on t_sys_exception_log  (cost=0.30..20001.37 rows=353760 width=0) (actual time=0.052..0.159 rows=268 loops=1)
         Heap Fetches: 23
 Total runtime: 0.230 ms
(4 rows)

Time: 1.753 ms
superp2b_test=> select relname,relpages,to_char(reltuples,'999999999') from pg_class where relname like 't_sys_exception_log%';
                relname                 | relpages |  to_char   
----------------------------------------+----------+------------
 t_sys_exception_log                    |   293660 |     353760
 t_sys_exception_log_class_name_idx     |    14818 |     353760
 t_sys_exception_log_pkey               |    20659 |     353760
 t_sys_exception_log_create_time_idx    |     4163 |     353760
 t_sys_exception_log_exception_type_idx |    12629 |     353760
 t_sys_exception_log_method_name_idx    |     8559 |     353760
 t_sys_exception_log_operator_id_idx    |     5304 |     353760
 t_sys_exception_log_operator_name_idx  |     5268 |     353760
 t_sys_exception_log_bak                |       38 |        267
(9 rows)

Time: 1.458 ms
superp2b_test=> vacuum(verbose,full,freeze,analyze) t_sys_exception_log;
信息:  正在清理 (vacuum)  "public.t_sys_exception_log"
信息:  "t_sys_exception_log": 在293660个页中找到0个可删除行版本,268不可删除的行版本.
DETAIL:  0 死行版本号仍不能移除.
CPU 3.04s/1.11u sec elapsed 29.73 sec.
信息:  正在分析 "public.t_sys_exception_log"
信息:  "t_sys_exception_log": 已经扫描了38页的38, 包含268可用的记录和0不能用的记录; 在示例中有268条记录,估算所有记录为268 .
VACUUM
Time: 32353.681 ms
superp2b_test=> select relname,relpages,to_char(reltuples,'999999999') from pg_class where relname like 't_sys_exception_log%';
                relname                 | relpages |  to_char   
----------------------------------------+----------+------------
 t_sys_exception_log                    |       38 |        268
 t_sys_exception_log_class_name_idx     |        5 |        268
 t_sys_exception_log_bak                |       38 |        267
 t_sys_exception_log_pkey               |        4 |        268
 t_sys_exception_log_create_time_idx    |        2 |        268
 t_sys_exception_log_exception_type_idx |        5 |        268
 t_sys_exception_log_method_name_idx    |        4 |        268
 t_sys_exception_log_operator_id_idx    |        4 |        268
 t_sys_exception_log_operator_name_idx  |        2 |        268
(9 rows)

Time: 6.762 ms
superp2b_test=> explain analyze select count(*) from t_sys_exception_log;
                                                       QUERY PLAN                                                       
------------------------------------------------------------------------------------------------------------------------
 Aggregate  (cost=41.35..41.36 rows=1 width=0) (actual time=0.103..0.103 rows=1 loops=1)
   ->  Seq Scan on t_sys_exception_log  (cost=0.00..40.68 rows=268 width=0) (actual time=0.005..0.074 rows=268 loops=1)
 Total runtime: 0.133 ms
(3 rows)

Time: 0.535 ms
superp2b_test=> select count(*) from t_sys_exception_log;                
 count 
-------
   268
(1 row)

Time: 1.007 ms
superp2b_test=>

说明:
1 第一次执行查看执行计划时,发现执行计划有所改变,变的“更快更好”了,从之前的全表扫描变为索引扫描,执行效率变好了。但是,这个离真实情况下的执行计划,应该还是有误差,因为表里才268条记录,此时不应该走index的;
2 接下来,查看统计信息,发现t_sys_exception_log表上的统计信息依然显示有393976条记录,而该表上的index却显示的有268条记录,与真实情况向吻合;
3 再手工收集一次统计信息看看,再次发生偏差,结果显示有353760条记录,连之前索引上的统计信息也从正确的268条记录,变为了353760条记录;
4 干脆执行vacuum(verbose,full,freeze,analyze) t_sys_exception_log来回收空间+更新统计信息。这里,不论是从vacuum的verbose信息来看,还是从pg_class里的信息查询来看,统计信息终于正确了;
5 最后,再次查看执行计划,发现回归正常了。统计一个只有268条记录的表数据量,其选择的全表扫描的执行计划,比较合理。且,该条语句本身,执行起来,也回归正常了,不再像前面那么慢,让人费解了。

六 小结与疑问

1 对于PostgreSQL数据库而言,如果有频繁的DML操作,或者批量DML操作的情形,要及时更新统计信息;
2 为什么手工执行analyze收集统计信息时,得到的统计信息结果,与实际情况偏差那么大?
3 多次执行analyze之后,依然得不到准确的统计信息?
4 间隔一段时间之后,发现统计信息比较接近真实情况(此时,猜测应该是数据库autovacuum自动更新了统计信息)?
5 如果是autovacuum更新统计信息之后,为什么优化器选择的执行计划不够好,只有268条记录的表执行count操作,还是选择index scan?
6 为什么,最后通过执行vacuum来回收空间+更新统计信息之后,统计信息保持正确且不再变动?

在CentOS 7上安装redis

1 下载:从Redis官方网站下载安装最新的稳定版安装包;

[root@localhost ~]# cat /etc/redhat-release 
CentOS Linux release 7.2.1511 (Core) 
[root@localhost ~]# uname -rm
3.10.0-327.el7.x86_64 x86_64
[root@localhost ~]# wget http://download.redis.io/releases/redis-4.0.2.tar.gz
--2017-11-22 14:32:03--  http://download.redis.io/releases/redis-4.0.2.tar.gz
正在解析主机 download.redis.io (download.redis.io)... 109.74.203.151
正在连接 download.redis.io (download.redis.io)|109.74.203.151|:80... 已连接。
已发出 HTTP 请求,正在等待回应... 200 OK
长度:1713990 (1.6M) [application/x-gzip]
正在保存至: “redis-4.0.2.tar.gz”

100%[===================================================================================================================================>] 1,713,990    890KB/s 用时 1.9s   

2017-11-22 14:32:09 (890 KB/s) - 已保存 “redis-4.0.2.tar.gz” [1713990/1713990])

[root@localhost ~]#

2 解压:解压安装包;

[root@localhost ~]# tar -zxvf redis-4.0.2.tar.gz 
...
...
redis-4.0.2/utils/releasetools/02_upload_tarball.sh
redis-4.0.2/utils/releasetools/03_test_release.sh
redis-4.0.2/utils/releasetools/04_release_hash.sh
redis-4.0.2/utils/releasetools/changelog.tcl
redis-4.0.2/utils/speed-regression.tcl
redis-4.0.2/utils/whatisdoing.sh
[root@localhost ~]#

3 编译:进入安装包,执行make;

 [root@localhost ~]# cd redis-4.0.2
[root@localhost redis-4.0.2]# pwd
/root/redis-4.0.2
[root@localhost redis-4.0.2]# ll
总用量 280
-rw-rw-r--  1 root root 131381 9月  21 22:12 00-RELEASENOTES
-rw-rw-r--  1 root root     53 9月  21 22:12 BUGS
-rw-rw-r--  1 root root   1815 9月  21 22:12 CONTRIBUTING
-rw-rw-r--  1 root root   1487 9月  21 22:12 COPYING
drwxrwxr-x  6 root root   4096 9月  21 22:12 deps
-rw-rw-r--  1 root root     11 9月  21 22:12 INSTALL
-rw-rw-r--  1 root root    151 9月  21 22:12 Makefile
-rw-rw-r--  1 root root   4223 9月  21 22:12 MANIFESTO
-rw-rw-r--  1 root root  20530 9月  21 22:12 README.md
-rw-rw-r--  1 root root  57764 9月  21 22:12 redis.conf
-rwxrwxr-x  1 root root    271 9月  21 22:12 runtest
-rwxrwxr-x  1 root root    280 9月  21 22:12 runtest-cluster
-rwxrwxr-x  1 root root    281 9月  21 22:12 runtest-sentinel
-rw-rw-r--  1 root root   7606 9月  21 22:12 sentinel.conf
drwxrwxr-x  3 root root   4096 9月  21 22:12 src
drwxrwxr-x 10 root root   4096 9月  21 22:12 tests
drwxrwxr-x  8 root root   4096 9月  21 22:12 utils
[root@localhost redis-4.0.2]# make 
cd src && make all
make[1]: 进入目录“/root/redis-4.0.2/src”
    CC Makefile.dep
make[1]: 离开目录“/root/redis-4.0.2/src”
make[1]: 进入目录“/root/redis-4.0.2/src”
...
...
    INSTALL redis-check-rdb
    INSTALL redis-check-aof

Hint: It's a good idea to run 'make test' ;)

make[1]: 离开目录“/root/redis-4.0.2/src”
[root@localhost redis-4.0.2]#

4 启动Redis;

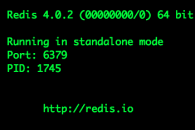
 [root@localhost redis-4.0.2]# /root/redis-4.0.2/src/redis-server 
1745:C 22 Nov 14:39:22.049 # oO0OoO0OoO0Oo Redis is starting oO0OoO0OoO0Oo
1745:C 22 Nov 14:39:22.049 # Redis version=4.0.2, bits=64, commit=00000000, modified=0, pid=1745, just started
1745:C 22 Nov 14:39:22.049 # Warning: no config file specified, using the default config. In order to specify a config file use /root/redis-4.0.2/src/redis-server /path/to/redis.conf
1745:M 22 Nov 14:39:22.051 * Increased maximum number of open files to 10032 (it was originally set to 1024).
                _._                                                  
           _.-``__ ''-._                                             
      _.-``    `.  `_.  ''-._           Redis 4.0.2 (00000000/0) 64 bit
  .-`` .-```.  ```\/    _.,_ ''-._                                   
 (    '      ,       .-`  | `,    )     Running in standalone mode
 |`-._`-...-` __...-.``-._|'` _.-'|     Port: 6379
 |    `-._   `._    /     _.-'    |     PID: 1745
  `-._    `-._  `-./  _.-'    _.-'                                   
 |`-._`-._    `-.__.-'    _.-'_.-'|                                  
 |    `-._`-._        _.-'_.-'    |           http://redis.io        
  `-._    `-._`-.__.-'_.-'    _.-'                                   
 |`-._`-._    `-.__.-'    _.-'_.-'|                                  
 |    `-._`-._        _.-'_.-'    |                                  
  `-._    `-._`-.__.-'_.-'    _.-'                                   
      `-._    `-.__.-'    _.-'                                       
          `-._        _.-'                                           
              `-.__.-'                                               

1745:M 22 Nov 14:39:22.052 # WARNING: The TCP backlog setting of 511 cannot be enforced because /proc/sys/net/core/somaxconn is set to the lower value of 128.
1745:M 22 Nov 14:39:22.052 # Server initialized
1745:M 22 Nov 14:39:22.052 # WARNING overcommit_memory is set to 0! Background save may fail under low memory condition. To fix this issue add 'vm.overcommit_memory = 1' to /etc/sysctl.conf and then reboot or run the command 'sysctl vm.overcommit_memory=1' for this to take effect.
1745:M 22 Nov 14:39:22.052 # WARNING you have Transparent Huge Pages (THP) support enabled in your kernel. This will create latency and memory usage issues with Redis. To fix this issue run the command 'echo never > /sys/kernel/mm/transparent_hugepage/enabled' as root, and add it to your /etc/rc.local in order to retain the setting after a reboot. Redis must be restarted after THP is disabled.
1745:M 22 Nov 14:39:22.052 * Ready to accept connections


至此,Redis已经安装完毕。

5 通过redis-cli,访问和使用Redis:

 [root@localhost ~]# /root/redis-4.0.2/src/redis-cli 
127.0.0.1:6379> info
# Server
redis_version:4.0.2
redis_git_sha1:00000000
redis_git_dirty:0
redis_build_id:1e096713e5234ce6
redis_mode:standalone
os:Linux 3.10.0-327.el7.x86_64 x86_64
...
....
127.0.0.1:6379> set a testredis
OK
127.0.0.1:6379> get a
"testredis"
127.0.0.1:6379>


接着看文档,继续动手实践。

Java学习笔记003:primitive type小结

十年以前,在大学校校园里,学习Java的时候,遇到讲基本数据类型的章节,因自己缺乏足够的耐心,进而觉得麻烦,啰嗦,而直接选择略过,自然自己所学的那一丁点儿关于Java的编程知识,随着考试的结束而结束了。

现如今,开始动手看《Thinking in Java》这本书时,同样会遇到讲解数据类型的章节,同样的知识点儿,同样的知识内容,遇到同样的读者,只不过这次有了不一样心态的读者。相较过去而言,即使我有了足够的耐心和不一样的心态,也没有能够一次性搞定这些数据类型。在反复翻看了这一章节的书本内容之后,加上从互联网上看到这篇关于讲解Java变量和数据类型文字,以及看到这个关于primitive type的小结图,瞬间觉得对基本数据类型了解和掌握的通透。

小结:

  1. 知识早晚是要学的,十年前欠下的债现在还,要还抓紧还,现在还也不晚,还干净,还彻底;
  2. 对于学习新知识要有足够足够的耐心,反复打磨,刻意练习;
  3. 同一个知识点,有时候需要从多个角度、维度去学习;
  4. 基本数据类型分为布尔类型、字符类型、数字类型。其中数字类型又分为整型数字和浮点数;


zookeeper启动之后又异常死掉的处理

通过in-place的方式把一台CentOS 6.5的Linux机器升级到Centos 7.2之后,发现该机器上之前运行的zookeeper启动异常,记录如下:

 
[root@zkserver1 bin]# sh zkServer.sh start
JMX enabled by default
Using config: /usr/local/zookeeper-3.4.5/bin/../conf/zoo.cfg
Starting zookeeper ... STARTED
[root@zkserver1 bin]# ps -ef|grep zook
root       891   843  0 14:10 pts/0    00:00:00 grep --color=auto zook
[root@zkserver1 bin]# cat zookeeper.out 
2017-06-22 14:10:04,154 [myid:] - INFO  [main:QuorumPeerConfig@101] - Reading configuration from: /usr/local/zookeeper-3.4.5/bin/../conf/zoo.cfg
2017-06-22 14:10:04,166 [myid:] - INFO  [main:DatadirCleanupManager@78] - autopurge.snapRetainCount set to 3
2017-06-22 14:10:04,167 [myid:] - INFO  [main:DatadirCleanupManager@79] - autopurge.purgeInterval set to 0
2017-06-22 14:10:04,168 [myid:] - INFO  [main:DatadirCleanupManager@101] - Purge task is not scheduled.
2017-06-22 14:10:04,168 [myid:] - WARN  [main:QuorumPeerMain@113] - Either no config or no quorum defined in config, running  in standalone mode
2017-06-22 14:10:04,190 [myid:] - INFO  [main:QuorumPeerConfig@101] - Reading configuration from: /usr/local/zookeeper-3.4.5/bin/../conf/zoo.cfg
2017-06-22 14:10:04,191 [myid:] - INFO  [main:ZooKeeperServerMain@95] - Starting server
2017-06-22 14:10:04,206 [myid:] - INFO  [main:Environment@100] - Server environment:zookeeper.version=3.4.5-1392090, built on 09/30/2012 17:52 GMT
2017-06-22 14:10:04,207 [myid:] - INFO  [main:Environment@100] - Server environment:host.name=zkserver1
2017-06-22 14:10:04,207 [myid:] - INFO  [main:Environment@100] - Server environment:java.version=1.7.0_21
2017-06-22 14:10:04,208 [myid:] - INFO  [main:Environment@100] - Server environment:java.vendor=Oracle Corporation
2017-06-22 14:10:04,209 [myid:] - INFO  [main:Environment@100] - Server environment:java.home=/usr/java/jdk1.7.0_21/jre
2017-06-22 14:10:04,209 [myid:] - INFO  [main:Environment@100] - Server environment:java.class.path=/usr/local/zookeeper-3.4.5/bin/../build/classes:/usr/local/zookeeper-3.4.5/bin/../build/lib/*.jar:/usr/local/zookeeper-3.4.5/bin/../lib/slf4j-log4j12-1.6.1.jar:/usr/local/zookeeper-3.4.5/bin/../lib/slf4j-api-1.6.1.jar:/usr/local/zookeeper-3.4.5/bin/../lib/netty-3.2.2.Final.jar:/usr/local/zookeeper-3.4.5/bin/../lib/log4j-1.2.15.jar:/usr/local/zookeeper-3.4.5/bin/../lib/jline-0.9.94.jar:/usr/local/zookeeper-3.4.5/bin/../zookeeper-3.4.5.jar:/usr/local/zookeeper-3.4.5/bin/../src/java/lib/*.jar:/usr/local/zookeeper-3.4.5/bin/../conf:
2017-06-22 14:10:04,210 [myid:] - INFO  [main:Environment@100] - Server environment:java.library.path=/usr/java/packages/lib/amd64:/usr/lib64:/lib64:/lib:/usr/lib
2017-06-22 14:10:04,211 [myid:] - INFO  [main:Environment@100] - Server environment:java.io.tmpdir=/tmp
2017-06-22 14:10:04,212 [myid:] - INFO  [main:Environment@100] - Server environment:java.compiler=
2017-06-22 14:10:04,212 [myid:] - INFO  [main:Environment@100] - Server environment:os.name=Linux
2017-06-22 14:10:04,213 [myid:] - INFO  [main:Environment@100] - Server environment:os.arch=amd64
2017-06-22 14:10:04,214 [myid:] - INFO  [main:Environment@100] - Server environment:os.version=3.10.0-327.el7.x86_64
2017-06-22 14:10:04,215 [myid:] - INFO  [main:Environment@100] - Server environment:user.name=root
2017-06-22 14:10:04,215 [myid:] - INFO  [main:Environment@100] - Server environment:user.home=/root
2017-06-22 14:10:04,216 [myid:] - INFO  [main:Environment@100] - Server environment:user.dir=/usr/local/zookeeper-3.4.5/bin
2017-06-22 14:10:04,227 [myid:] - INFO  [main:ZooKeeperServer@726] - tickTime set to 2000
2017-06-22 14:10:04,228 [myid:] - INFO  [main:ZooKeeperServer@735] - minSessionTimeout set to -1
2017-06-22 14:10:04,229 [myid:] - INFO  [main:ZooKeeperServer@744] - maxSessionTimeout set to -1
2017-06-22 14:10:04,274 [myid:] - INFO  [main:NIOServerCnxnFactory@94] - binding to port 0.0.0.0/0.0.0.0:2181
2017-06-22 14:10:04,343 [myid:] - ERROR [main:FileTxnSnapLog@210] - Parent /dubbo/com.onlyou.es.bck.service.IUserStoreService/consumers missing for /dubbo/com.onlyou.es.bck.service.IUserStoreService/consumers/consumer%3A%2F%2F172.16.11.73%2Fcom.onlyou.es.bck.service.IUserStoreService%3Fapplication%3Des-client-web%26category%3Dconsumers%26check%3Dfalse%26default.check%3Dfalse%26default.reference.filter%3DdubboConsumerFilter%26default.retries%3D0%26default.timeout%3D1000000%26dubbo%3D2.5.3%26interface%3Dcom.onlyou.es.bck.service.IUserStoreService%26methods%3DgetUserStoreByCorpIdAndStoreId%2CdeleteStoreUserById%2ClistStoreCode%2CgetUserStoreByUserId%2CsearchStoreIdsByUserId%2CsearchUserStaffList%2CsaveStoreUser%2CgetUserStoreByCorpId%2CsearchStoreInfosByUserId%26pid%3D488%26revision%3Ddev-SNAPSHOT%26side%3Dconsumer%26timestamp%3D1496999541671
2017-06-22 14:10:04,345 [myid:] - ERROR [main:ZooKeeperServerMain@63] - Unexpected exception, exiting abnormally
java.io.IOException: Failed to process transaction type: 1 error: KeeperErrorCode = NoNode for /dubbo/com.onlyou.es.bck.service.IUserStoreService/consumers
        at org.apache.zookeeper.server.persistence.FileTxnSnapLog.restore(FileTxnSnapLog.java:153)
        at org.apache.zookeeper.server.ZKDatabase.loadDataBase(ZKDatabase.java:223)
        at org.apache.zookeeper.server.ZooKeeperServer.loadData(ZooKeeperServer.java:250)
        at org.apache.zookeeper.server.ZooKeeperServer.startdata(ZooKeeperServer.java:377)
        at org.apache.zookeeper.server.NIOServerCnxnFactory.startup(NIOServerCnxnFactory.java:122)
        at org.apache.zookeeper.server.ZooKeeperServerMain.runFromConfig(ZooKeeperServerMain.java:112)
        at org.apache.zookeeper.server.ZooKeeperServerMain.initializeAndRun(ZooKeeperServerMain.java:86)
        at org.apache.zookeeper.server.ZooKeeperServerMain.main(ZooKeeperServerMain.java:52)
        at org.apache.zookeeper.server.quorum.QuorumPeerMain.initializeAndRun(QuorumPeerMain.java:116)
        at org.apache.zookeeper.server.quorum.QuorumPeerMain.main(QuorumPeerMain.java:78)
Caused by: org.apache.zookeeper.KeeperException$NoNodeException: KeeperErrorCode = NoNode for /dubbo/com.onlyou.es.bck.service.IUserStoreService/consumers
        at org.apache.zookeeper.server.persistence.FileTxnSnapLog.processTransaction(FileTxnSnapLog.java:211)
        at org.apache.zookeeper.server.persistence.FileTxnSnapLog.restore(FileTxnSnapLog.java:151)
        ... 9 more
[root@zkserver1 bin]#

原因:可能是服务器升级的过程中,导致zookeeper的数据文件被”破坏”了,导致重启zookeeper时异常。

解决:删除zookeeper的数据文件/tmp/zookeeper,然后重启zookeeper。

一则PostgreSQL数据库的性能问题定位处理

一、先看一台运行PostgreSQL数据库服务器的top和iostat相关信息图:

top:
[root@db2 ~ 11:14:42]$ top

top - 11:16:10 up 2 days, 13:01,  5 users,  load average: 51.62, 41.75, 29.06
Tasks: 948 total,   5 running, 943 sleeping,   0 stopped,   0 zombie
Cpu(s):  9.0%us, 59.2%sy,  0.0%ni, 14.1%id, 17.2%wa,  0.0%hi,  0.5%si,  0.0%st
Mem:  16284812k total, 16159260k used,   125552k free,     5700k buffers
Swap:  8191992k total,   107980k used,  8084012k free,  8010540k cached

  PID USER      PR  NI  VIRT  RES  SHR S %CPU %MEM    TIME+  COMMAND                                                
31450 postgres  20   0 4534m 2.3g 2.2g D 46.6 15.0   7:02.50 postgres                                                
30166 postgres  20   0 4528m 2.3g 2.2g D 46.0 14.9   4:05.40 postgres                                                
30185 postgres  20   0 4494m 2.2g 2.1g D 43.5 14.1   4:05.08 postgres                                                
31453 postgres  20   0 4529m 1.9g 1.8g D 42.9 12.3   3:39.13 postgres                                                
30232 postgres  20   0 4526m 2.3g 2.1g D 40.4 14.6   6:07.51 postgres                                                
 2811 postgres  20   0 4521m 874m 742m D 39.8  5.5   1:36.34 postgres                                                
31457 postgres  20   0 4534m 1.8g 1.7g R 39.5 11.6   3:55.23 postgres                                                
30956 postgres  20   0 4521m 1.7g 1.5g D 38.8 10.8   2:14.67 postgres                                                
 2714 postgres  20   0 4519m 1.4g 1.3g D 37.9  9.1   1:19.96 postgres                                                
30182 postgres  20   0 4525m 1.9g 1.8g D 37.9 12.5   3:40.31 postgres                                                
31444 postgres  20   0 4525m 2.2g 2.0g D 37.6 13.9   3:29.11 postgres                                                
31654 postgres  20   0 4526m 2.4g 2.2g D 36.7 15.3   5:04.19 postgres                                                
 2717 postgres  20   0 4519m 847m 718m D 36.1  5.3   1:37.20 postgres                                                
  753 postgres  20   0 4533m 3.7g 3.6g D 35.4 23.9  27:52.65 postgres                                                
31451 postgres  20   0 4433m 1.8g 1.7g D 35.4 11.5   2:36.85 postgres                                                
30701 postgres  20   0 4520m 1.7g 1.6g D 35.1 11.1   2:09.85 postgres                                                
31448 postgres  20   0 4435m 2.2g 2.1g D 33.3 13.9   4:16.70 postgres                                                
29192 postgres  20   0 4526m 2.3g 2.1g D 32.6 14.6   4:19.91 postgres                                                
30693 postgres  20   0 4525m 1.9g 1.8g D 32.0 12.4   2:29.72 postgres                                                
 3448 postgres  20   0 4451m 383m 305m D 31.4  2.4   0:49.98 postgres                                                
 3568 postgres  20   0 4388m 131m 113m D 29.5  0.8   0:10.03 postgres                                                
 3435 postgres  20   0 4376m 364m 355m D 29.2  2.3   0:12.23 postgres                                                
[root@db2 ~ 11:16:22]$ 
iostat:
 
[root@db2 ~ 11:16:25]$ iostat 1 10 /dev/emcpowerf 
Linux 2.6.32-279.el6.x86_64 (db2) 	2016年06月02日 	_x86_64_	(24 CPU)

avg-cpu:  %user   %nice %system %iowait  %steal   %idle
           4.51    0.00    0.84    2.04    0.00   92.61

Device:            tps   Blk_read/s   Blk_wrtn/s   Blk_read   Blk_wrtn
emcpowerf       210.87     10256.34     11724.86 2257542690 2580782824

avg-cpu:  %user   %nice %system %iowait  %steal   %idle
          10.07    0.00   80.00    7.12    0.00    2.82

Device:            tps   Blk_read/s   Blk_wrtn/s   Blk_read   Blk_wrtn
emcpowerf     34443.00   3095056.00   1747336.00    3095056    1747336

avg-cpu:  %user   %nice %system %iowait  %steal   %idle
           8.38    0.00   90.25    1.25    0.00    0.13

Device:            tps   Blk_read/s   Blk_wrtn/s   Blk_read   Blk_wrtn
emcpowerf        83.79      7430.09     14483.79      89384     174240

avg-cpu:  %user   %nice %system %iowait  %steal   %idle
          18.00    0.00   70.16   10.69    0.00    1.14

Device:            tps   Blk_read/s   Blk_wrtn/s   Blk_read   Blk_wrtn
emcpowerf      2887.25    323498.04     71545.10     329968      72976

avg-cpu:  %user   %nice %system %iowait  %steal   %idle
           9.76    0.00   86.36    3.17    0.00    0.71

Device:            tps   Blk_read/s   Blk_wrtn/s   Blk_read   Blk_wrtn
emcpowerf      1996.00    222072.00     34056.00     222072      34056

avg-cpu:  %user   %nice %system %iowait  %steal   %idle
           7.75    0.00   89.37    2.50    0.00    0.38

Device:            tps   Blk_read/s   Blk_wrtn/s   Blk_read   Blk_wrtn
emcpowerf      2344.00    229568.00    149152.00     229568     149152

avg-cpu:  %user   %nice %system %iowait  %steal   %idle
           9.68    0.00   82.81    5.88    0.00    1.63

Device:            tps   Blk_read/s   Blk_wrtn/s   Blk_read   Blk_wrtn
emcpowerf      2585.00    242224.00    154320.00     242224     154320

avg-cpu:  %user   %nice %system %iowait  %steal   %idle
          14.57    0.00   24.36   34.20    0.00   26.87

Device:            tps   Blk_read/s   Blk_wrtn/s   Blk_read   Blk_wrtn
emcpowerf      2692.08    283271.29    137940.59     286104     139320

avg-cpu:  %user   %nice %system %iowait  %steal   %idle
          11.80    0.00   85.10    2.02    0.00    1.07

Device:            tps   Blk_read/s   Blk_wrtn/s   Blk_read   Blk_wrtn
emcpowerf      3367.33    268491.09    124879.21     271176     126128

avg-cpu:  %user   %nice %system %iowait  %steal   %idle
           9.77    0.00   85.36    4.32    0.00    0.54

Device:            tps   Blk_read/s   Blk_wrtn/s   Blk_read   Blk_wrtn
emcpowerf      2792.00    274976.00    143192.00     274976     143192

[root@db2 ~ 11:23:07]$
以及,文件系统结构图:
[root@db2 ~ 11:03:54]$ df -Th
Filesystem    Type    Size  Used Avail Use% Mounted on
/dev/sda1     ext4     58G   14G   42G  25% /
tmpfs        tmpfs    7.8G     0  7.8G   0% /dev/shm
/dev/sda3     ext4    210G   54G  146G  27% /data/log
/dev/emcpowerd1
              ext4     99G   58G   37G  62% /data/pgsql/backup
/dev/emcpowerc1
              ext4     99G   89G  5.5G  95% /data/pgsql/data_old
/dev/emcpowerf
              ext4    197G  146G   42G  78% /data/pgsql/data
/dev/emcpowerg
              ext4    493G   66G  403G  14% /data/pgsql/backup/archive
[root@db2 ~ 11:04:14]$

二 结论:数据库服务器已经出现性能瓶颈,具体问题出在系统IO上。通常情况是,应用系统的SQL写的不够好,或者是糟糕的SQL执行计划导致消耗过高的IO资源。

三 分析思路

1 从top上,看到系统负载已经比较高:load average: 51.62, 41.75, 29.06
2 CPU负载上看,Cpu(s):  9.0%us, 59.2%sy,  0.0%ni, 14.1%id, 17.2%wa,  0.0%hi,  0.5%si,  0.0%st 。

其中, 9.0%us用于user space process处理较为正常。但是在系统负载较高的情况下,且有59.2%sy的CPU资源用于system kernel running。The amount of time spent in the kernel should be as low as possible.This number can peak much higher, especially when there is a lot of I/O happening.这里,意味着CPU消耗在用于系统调度上的时间偏高了,尤其是当系统出现大量IO操作时,该值可能非常高。这里的59%略高,系统有IO等待操作。

另,14.1%id, 系统CPU闲置时间比较低,通常情况下我们希望它不要太低,太低了说明CPU太忙,太高也不好,太高了意味着CPU一直处于空闲状态。17.2%wa,CPU用于等待IO操作完成的时间占比。这里,CPU在等待IO完成。

3 进程状态列,有大量的进程处于D状态。进程状态通常有:

R:TASK_RUNNING,可执行状态。处于此状态的进程正在CPU上运行;同一时间,少量进程处于该状态;

S:TASK_INTERRUPTIBLE,可中断睡眠状态。处于该状态的进程因为正在等待某些事件发生(如等待socket连接,等待信号量),而事件还未发生,所以被挂起;同一时间,大量进程处于该状态

D:TASK_UNINTERRUPTIBLE,不可中断睡眠状态。该状态的进程同样处于休眠状态,但是该进程不能被其它事件或信号所打断。常见于,在进程对硬件设备进行操作时(如进程调用read系统来对某个设备文件进行读操作,read系统需要调用到最终执行对应设备的驱动代码,并且与对应设备进行交互时),可能需要使用TASK_UNINTERRUPTIBLE状态来保护进程,以避免进程在与设备进行交互的过程中被打断,最终造成设备陷入不可控的状态。

结合本例,可以看到有大量进程处于D状态,即不可中断的睡眠状态。说明有大量的数据库进程在与操作系统的IO系统进行交互,且这些进程不能被中断。说白了,就是进程在进行的IO操作迟迟未完成,且该进程不能被打断。就是系统出现了大量的IO等待。

4 从iostat上,也可以看到用于存放数据库的设备上IO操作频繁,该设备的IO请求很高。

这是去年今日(2016年6月2日)处理的一则PostgreSQL数据库性能问题定位的case,不是特意要放在今天(2017年6月2日)来说。而是,近期在看几篇Linux文档,加上之前翻看《PostgreSQL 9 Administration Cookbook》这本书,P249里面提到:

Not enough CPU power or disk I/O capacity for the current load

These are usually caused by suboptimal query plans, but sometimes you just have not a powerful enough computer.

Here, top is your friend for quick checks, and from the command line, run the following:

user@host:~$ top

First, watch the CPU idle reading in the top. If this is in low single-digits for most of the time, you probably have problems with CPU power.

If you have a high load average with still lots of CPU idle left, you are probably out of disk bandwidth. In this case, you should also have lots of postgres processes in status D.


索性,做一个整理总结,便于理清自己处理性能问题时,能有一个个清晰的思路和线索。

四 参考:

1 Understanding Linux CPU stats
2  top进程状态详解R,S,D